Selenium Tutorial

Selenium Tool Suit Versions of Selenium Selenium Testing Difference Between Selenium and QTP Advantage and Disadvantage of Selenium

Selenium IDE Topics

Selenium-IDE Introduction Installation /download  Selenium–IDE (Firefox) Installation /download Selenium–IDE (Google Chrome) Characteristics of Selenium-IDE First test case of Selenium-IDE Login test for Selenium-IDE Selenium-IDE commands Selenium-IDE locators Id locator Name Locator  X Path Locator CSS Selector Locator Locating by ID Locating by Class Locating by Attribute Locating by ID/Class & Attribute Locating by Sub-string Locating by inner text Link Text Locator Advantage and Disadvantage of Selenium-IDE

Selenium WebDriver Topics

WebDriver introduction Characteristics of WebDriver Difference Between Selenium RC and WebDriver Installation steps of WebDriver WebDriver Class Diagram/ Architecture WebDriver control commands Browser control Navigation control Web element control Operational control Data capture control Verification control WebDriver working with chrome browser WebDriver working with Firefox browser WebDriver working with internet explorer browser WebDriver working with Microsoft Edge browser WebDriver locator Id Locator Name Locator Class name Locator Xpath Locator XPath axes Link text Locator Partial link text Locator Tag name Locator Css Selector Tag and Id Tag and Class Tag and Attribute Tag, class, and Attribute Sub string matches WebDriver wait statements Drop down handling Mouse and keyboard controls Drag and drop Event Handling Window Handling: New tab/new window Alert pop up Handling Checkbox Handling Radio button Handling Selenium Assertion

Xpath locator in Selenium IDE

X PATH LOCATOR:

Xpath is used to identify the element using any attribute or visible test.

Syntax for X PATH:-

//html tag [@attribute=’value’]

e.g. - //div [@class=’label’]

                   OR

//html tag [text () =’Visible Text’]

e.g.-//div [text () =’Tasks’]

For example, we are locating Gmail‘s email textbox with the help of x path.

  • Open the Firefox browser.
  • Click on the Selenium icon, and it will open the Selenium IDE interface.
  • Click on the star recording button and enter the base URL is:

https://accounts.google.com/signin/v2/identifier?continue=https%3A%2F%2Fmail.google.com%2Fmail%2F&service=mail&sacu=1&rip=1&flowName=GlifWebSignIn&flowEntry=ServiceLogin

Start Recording
  • click on the command text box and write the first command as:-

Command: open

Target: https://accounts.google.com/signin/v2/identifier?continue=https%3A%2F%2Fmail.google.com%2Fmail%2F&service=mail&sacu=1&rip=1&flowName=GlifWebSignIn&flowEntry=ServiceLogin

click on the command text box
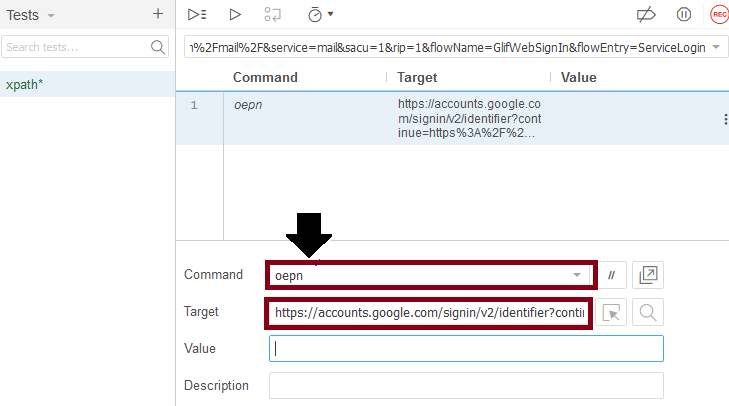
  • This command loads the Gmail page on the Firefox browser. 
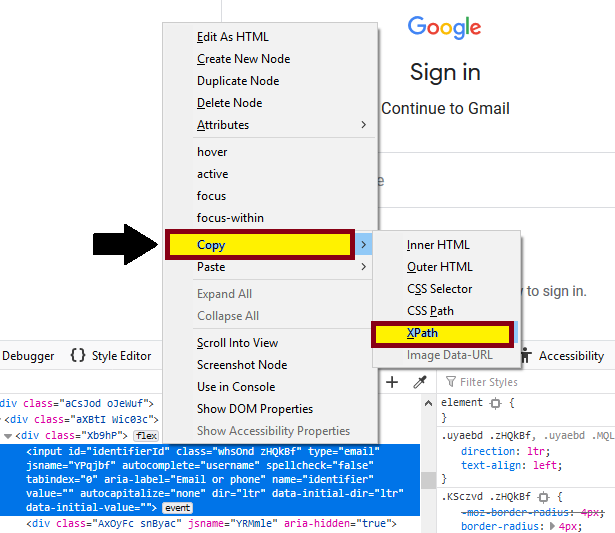
  • Then go to the email text box and right-click over it to inspect the email text box.
  • And do right click on the elements HTML code and then select the Copy XPath option.
click on the elements HTML code and then select the Copy XPath option
  • After that, right-click on insert new command.
right-click on insert new command
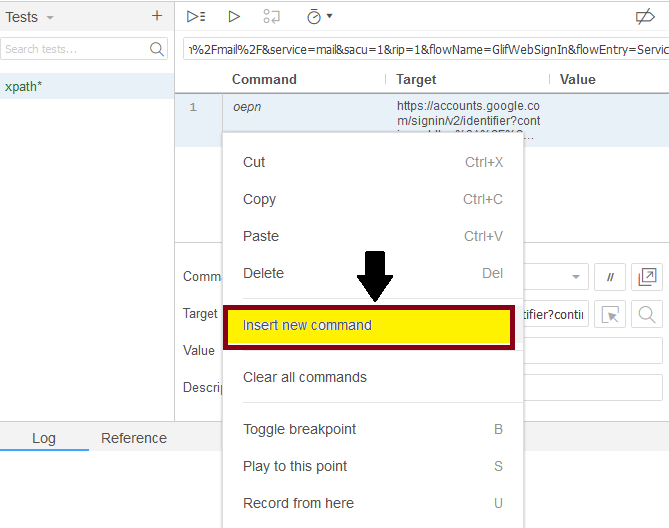
  • Write next command  and paste the copy x path  in target field:

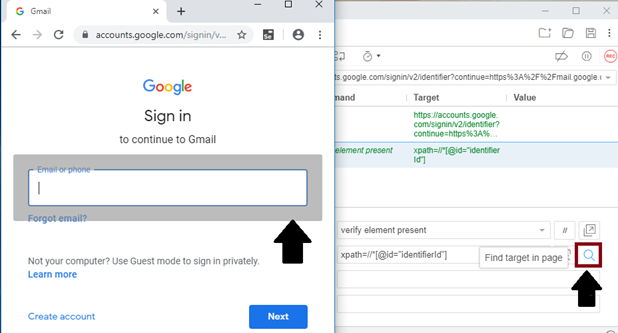
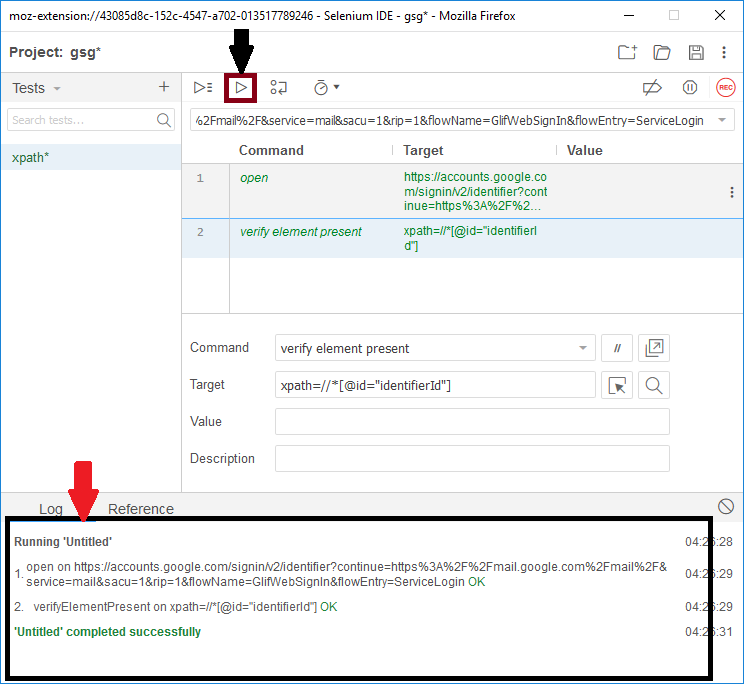
Command: verify element present

Target: xpath=//*[@id="identifierId"]

Write next command  and paste the copy x path  in target field
  • Click on the Stop recording button present at the top corner of the menu bar.
  • And click on the Run Current Test button.
  • It will execute all the inserted commands on the browser.
  • The Log pane is displaying the overall summary of the executed test scripts.
Click on the Stop recording button present at the top corner
  • After that, click on the Find button to verify that the link is highlighted in the browser or not.
  • And you can see the highlighted link in the Brower as well.
click on the Find button to verify that the link is highlighted in the browser