AutoFill in Excel
AutoFill in Excel
Excel is known for its credibility to operate repeated and similar tasks automatically. For this purpose, it facilitates an inbuilt feature known as Autofill that recognizes the series of numbers or characters based on some patterns and automatically fill the cell with data.
Autofill function works when we type few data based on some pattern or universal data and drag down the cursor (a solid cross representation) and the data series gets automatically filled in Excel sheet. This feature allows you to create the Excel spreadsheet quickly and efficiently. Thus, provides a relief by speeding up your work.
In this tutorial we will learn the various different ways to automate the auto fill function:
- Basic Auto Fill Method
- AutoFill for End to End data
- Autofill with two or more starting values
- Autofill Function for Dates & Time
- Fill Specific Cells
- AutoFill Using VBA
Basic AutoFill Method
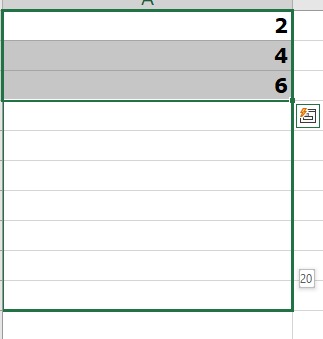
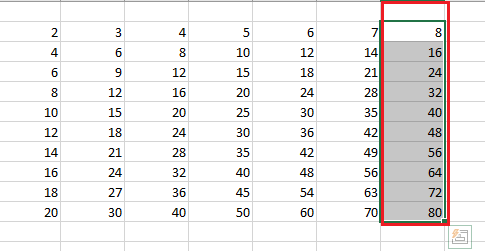
- The first step is to type few entries in your excel data and select those cells.
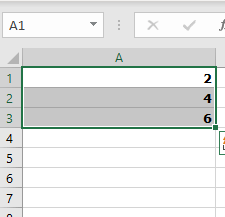
- At the bottom right corner of the selected cell you will notice a mini-toolbar (a square shaped blue colored downward pointing arrow) as Excel automatically adds an AutoFill button to the currently selected cell.
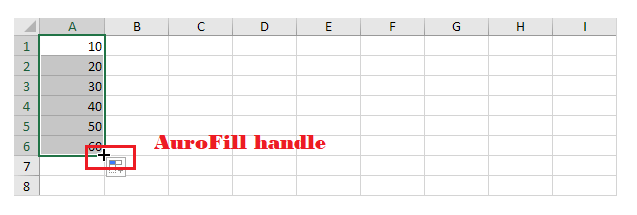
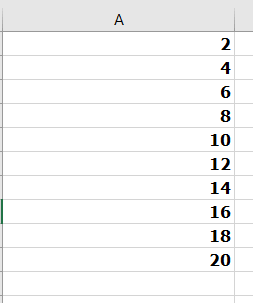
- Drag the AutoFill handle downwards across the blank cells in the same row or column wherein your data is filled across the data series.
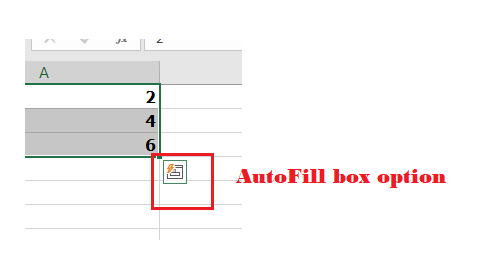
- You will notice that excel has systematically filed the selected cells after recognizing the gap of 2 in between the numbers.
- Similarly, you can try it function with characters. In the below image, we have used the abbreviation of months names as Jan, Feb, Mar, etc,.
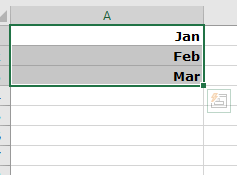
- Select the first three cells and drag the autofill handle down. All the further months names will be filled automatically.
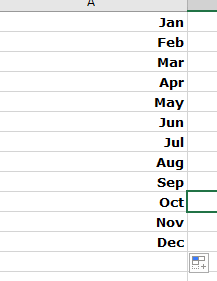
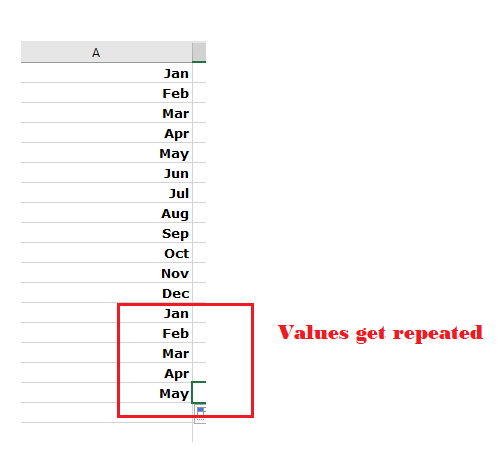
- In this case if you select more than 12 cells, the month values will be repeated after the 12th cell. The universal things which are pre-defined and can not be extended further repeats their value, unlike week names, months, etc,.
- While selecting, at the end of the bottom right corner of the selected cells, you will notice an AutoFill option box. Double on the box.
AutoFill for End to End data
One of the reasons that excel is widely used in corporate sectors is its efficiency in dealing with massive data. The basic AutoFill method is easy enough to automate your data by simply dragging your mouse. But it only seems easy when you are dealing with 100 or 200 rows or columns. Imagine in big corporates wherein you manage bulk of data stored across 10,000 to 20,000 rows and columns in the spreadsheet. Dragging the mouse cursor up to that extend would be cumbersome, time-taking and wasting your manual efforts.
To prevent the above challenges Excel has offered another trick to make the cursor dragging more efficient. Let’s see the steps to execute this method:
- In this method, instead of dragging the mouse cursor down column, press the shift key on the keyboard. Suddenly you will notice that now when you address your cursor to bottom right corner of the cell, instead of a plus icon, it’s an icon with two horizontal, parallel lines.
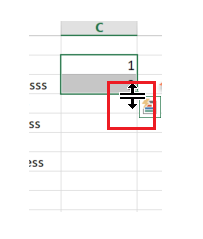
- Double click on the parallel lines icon and Excel will automate the workflow by filling all the column wherein the adjacent column has some data.
This method saves your countless efforts and hours wasted trying to drag the cursor across thousands of rows.
AutoFill Using VBA
Sub AutoFill_Method()
 Dim FstCol As String
 Dim FstRow As String
 Dim LstRow As String
 FstCol = InputBox("Please enter the column letter.")
 FstRow = InputBox("Please enter the row number.")
 LstRow = Range(FstCol & "65536").End(xlUp).Row
 For i = FstRow To LstRow
   If Range(FstCol & i).Value = "" Then
     Range(FstCol & (i - 1)).Copy Range(FstCol & i)
   End If
 Next i
 End Sub