How to lock cells in Excel?
How to lock cells in Excel?
The locked cells feature used to protect and secure your Excel sheet or workbook from the unauthorized access. If the cells are locked, it can’t be deleted, reformatted, and the data in that cell can’t be edited further. This feature makes sure that it doesn't unintentionally change the cells that are not supposed to be replaced. Though by default, in excel, all the locked cells but still they can be selected, reformed, and edited and but the user can easily change that in the protection options.
Locking All the cells
In Excel, all the cells are locked by default. But this locking will not effect until and unless the user protects the worksheet. The steps for locking and protecting the sheet are as follows:
- Select all cells or press the shortcut key CTRL+A.
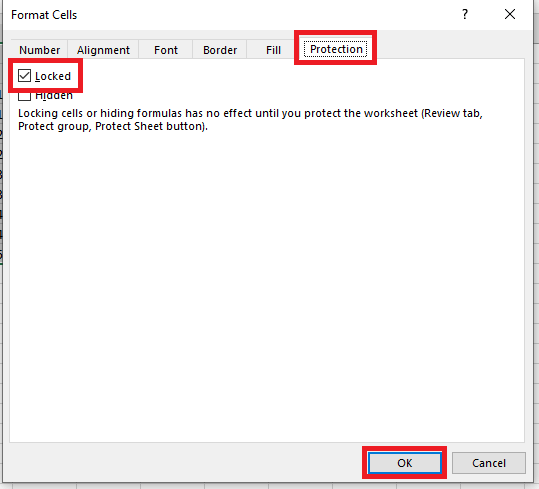
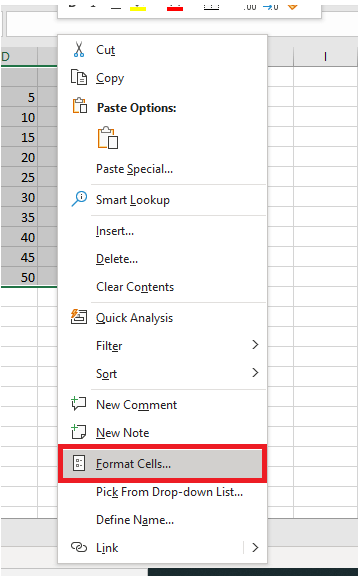
- Point the cursor over the selected portion and right click on the mouse. A dialog box will appear. Select the Format Cells option, or you can directly press the shortcut key CTRL + 1.

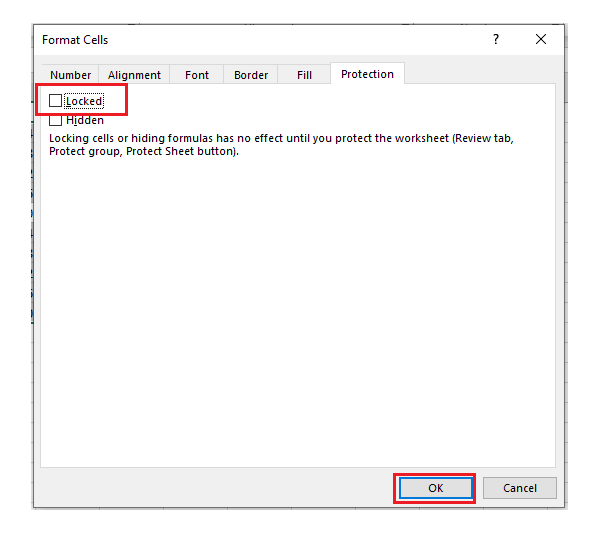
- Select the Protection Column tab from the Format Cells dialog box and tick the locked checkbox option (although it’s been already selected by default). Click on the OK option.
Protect the Sheet
- To protect the worksheet, right-click on the sheet tab (present at the bottom of the sheet).

- Click on the protect sheet option.

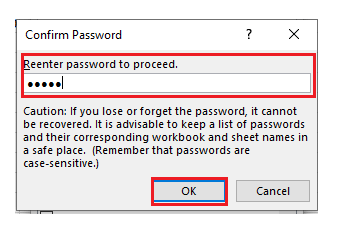
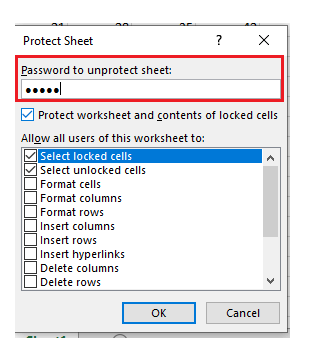
- The Protect Sheet dialog box pops up. In the first place, enter your password. And then, choose the actions you want the user to perform in your Excel worksheet. If you don’t tick any action, by default, the user can only read the Excel file. Click on the OK option.

- Excel will again ask you to reconfirm your password. Again, type your password and click on OK.
- The excel worksheet is protected, and all the cells are now locked. The user can only read the file, and if the user tries to write or edit the data, a prompt will pop up defying the accessibility.

UnProtect the Sheet
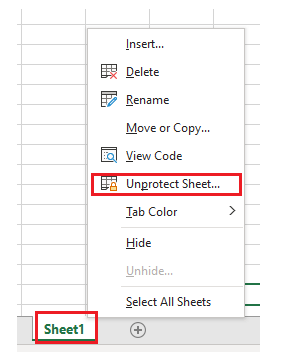
- All cells are locked and can’t be edited further. To unlock the Excel worksheet, right-click on the sheet tab and select the Unprotect Sheet option. Now you are open to read, write or edit the Excel sheet.
To lock some specific cells
There arise some situations where the user needs to protect and safeguard some specific cells. By default, all the cells are locked in Excel. So, firstly we need to unlock all the locked cells. Let’s see the steps to lock and protect specific cells:
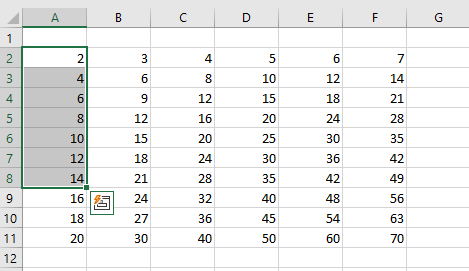
- Select the specific cells that you want to lock. For instance, we have chosen only the cells ranging from cell A2 to cell A8.
- Point the cursor over the selected portion and right click on the mouse. A dialog box will appear and then click on the Format Cells option, or you can directly press the shortcut key CTRL + 1.
- Select the Protection Column tab from the Format Cells dialog box and untick the locked checkbox. Click on OK.

- Now choose the cells to lock. Here we have chosen cell A2 to cell A8.
- Right-click and select the format cells option. Under the protection tab, tick the locked cell’s checkbox. Click on ok.

- Again, locking the cells is not sufficient and will not effect until and unless the Excel sheet is protected.
Protect the Sheet
- To protect the worksheet, right-click on the sheet tab (present at the bottom of the sheet).

- Click on the protect sheet option.

- The Protect Sheet dialog box pops up. In the first place, enter your password. And then, allocate the actions you want the user to perform in your Excel worksheet. If you don’t tick any action, by default, the user can only read the Excel file. Click on the OK option.

- Excel will again ask you to reconfirm your password. Again, type the password and click on OK.

- All the cells ranging from A2 to A8 are now locked. The user can only read the file, and if the user tries to write or edit the data, a prompt will pop up defying the accessibility. To edit the specific cells, you to unprotect the sheet.

Lock Formula Cells
Excel deals with numbers and formulas the most. In Excel business sheets, the calculation and analysis are done by using a range of formulas cells that are dependent on each other. The sheet is exchanged throughout and changing any formula cell mistakenly can turn over the shape and meaning of the sheet. Thus, resulting in data manipulation and false analysis. To avoid the unintentional changing of the cells one needs to lock all cells that contain formulas.
The steps for locking the formula cells are as follow:
- Select all cells or press the shortcut key CTRL+A.
- Point the cursor over the selected portion and right click on the mouse. A dialog box will appear and then click on the Format Cells option, or you can even press the shortcut key CTRL + 1.

- Now, select the Protection Column tab from the Format Cells dialog box and uncheck the locked cells checkbox. Click on OK.
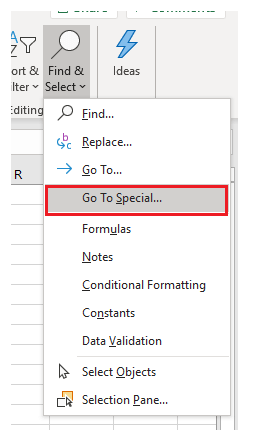
- From the Excel home Ribbon tab, select the find & select option.

- From the dialog box, select the Go to Special option.
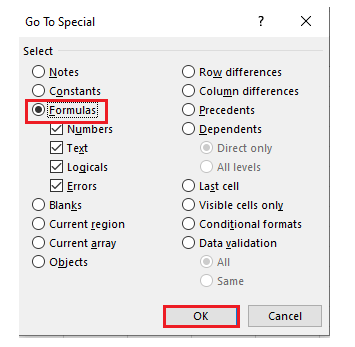
- From the Go To Special dialog box click on formula radio box and click on OK.
- Again, right-click and select the format cells option. Under the protection tab, tick the locked cell’s checkbox. Click on ok.

- Again, locking the cells will not effect until and unless the Excel sheet is protected.
Protect the Sheet
- To protect the worksheet right-click on the sheet tab.

- Click on the protect sheet option.

- The Protect Sheet dialog box pops up. In the first place, enter your password. And then, choose the authority of the actions you want the user to perform in your Excel worksheet. If you don’t tick any action, by default, the user can only read the Excel file. Click on the OK option.
- Excel will again ask you to reconfirm your password. Again, type the password and click on OK.

All the formula cells are now locked. The user can only read the file, and if the user tries to write or edit the data, a prompt will pop up defying the accessibility. To edit the formula cells, you need to unprotect the sheet.