Excel Themes
Microsoft Excel contains various features to enhance the appearance of the worksheet like text color, font size and general outlook of the objects. The users are provided with multiple theme options, they can choose their desired option where the document looks more attractive and efficient.
Themes help to appear the look of the workbook in a professional way rather than without the need of a designer. It comprises of three major components such as Colors, Fonts and Effects. Individual theme consists of 12 colors, two fonts like Heading and Body based on the effects for shapes and Smart Art. In this tutorial let’s have a look about how to use multiple themes present in the worksheet.
Key Factors in Themes
The three important key factors present in themes are as follows,
- Theme colors- Multiple colors present in Excel helps to format the text and objects present in the worksheet.
- Theme fonts- The various font options help to modify the heading and body of the content
- Theme Effects- Theme effect helps to format the shapes and objects present in worksheet.
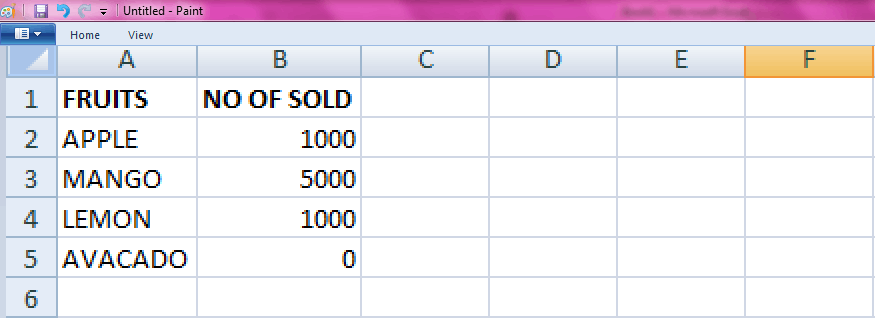
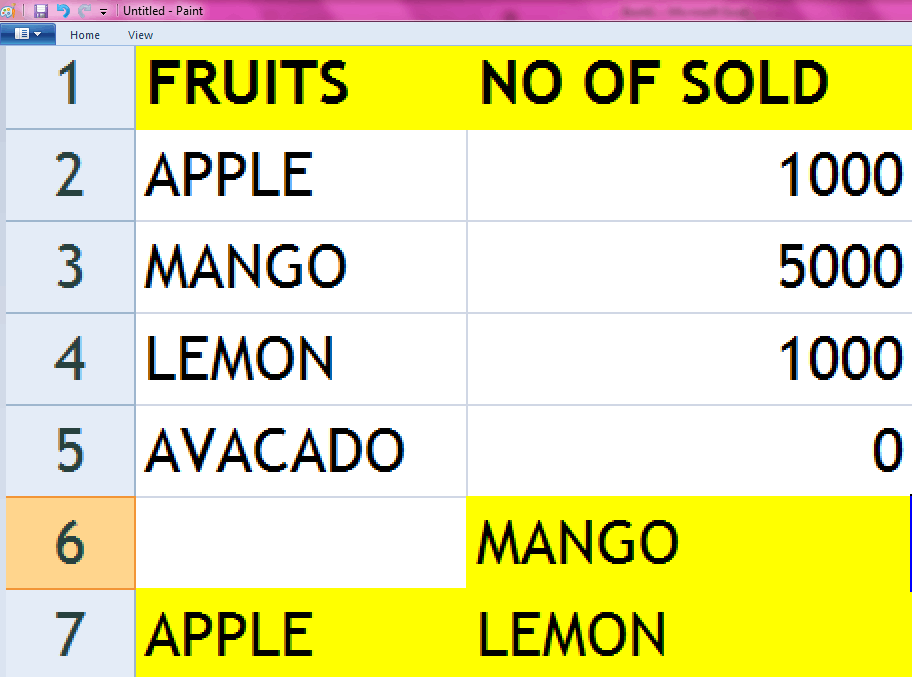
Create the data in the spreadsheet
First the user needs to create the data in the spreadsheet.
To apply the perspective theme for the above data, choose the Page Layout option from the theme group. Multiple theme options will appear, and the user is allowed to see the preview of each option in the spreadsheet.

Under Theme option multiple options are present.
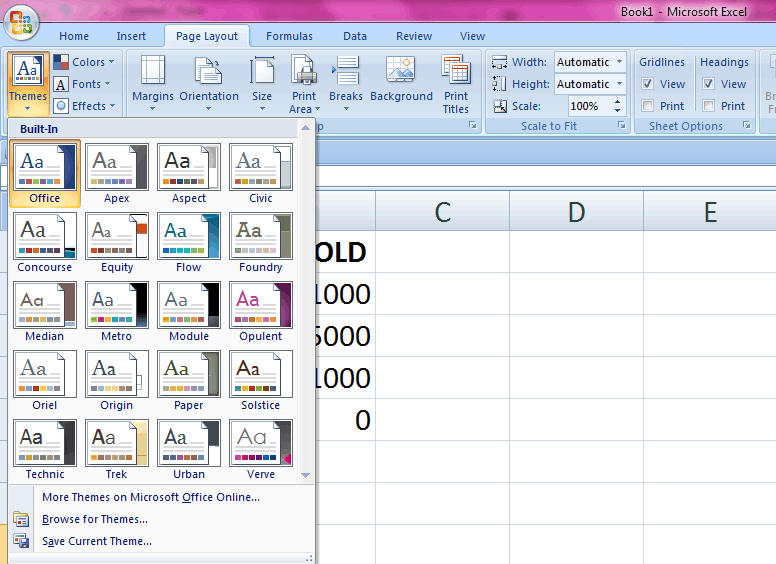
For example, if Apex theme is selected, the data will look like as shown in the below images.
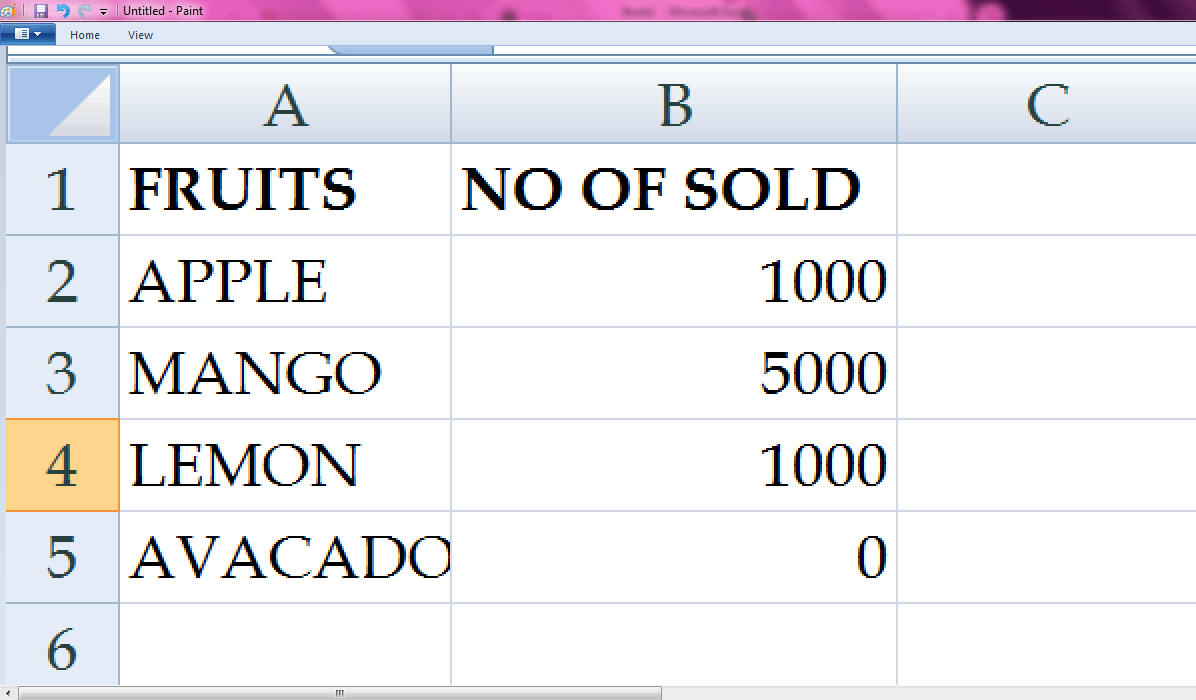
The variation in text is shown in the above image. Similarly the remaining theme contains its unique features to change the look of the worksheet. Apart from that one can highlight the data by applying colors by choosing Font>Home button.
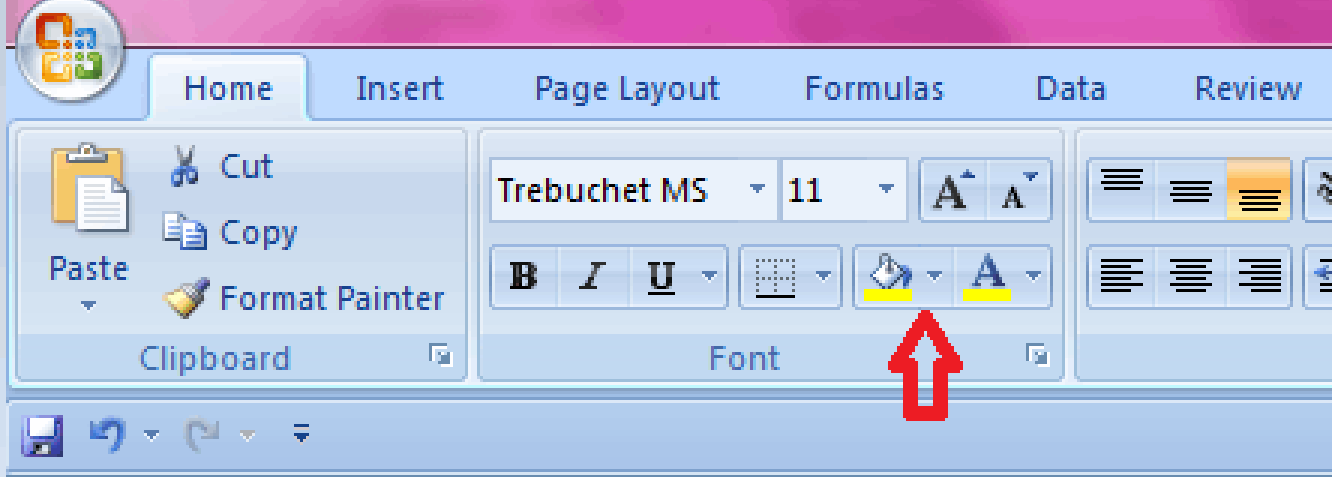
By applying the desired color to the specific text, it helps to highlight the text.
If a user selects a particular theme, it changes the overall appearance of the spreadsheet. It won’t allow you to set different themes for different spreadsheets within a workbook and changing one theme to another theme changes the entire look of the spreadsheet.
How to create a Customized Theme color, font and Effects?
To create a customized theme, following steps are followed.
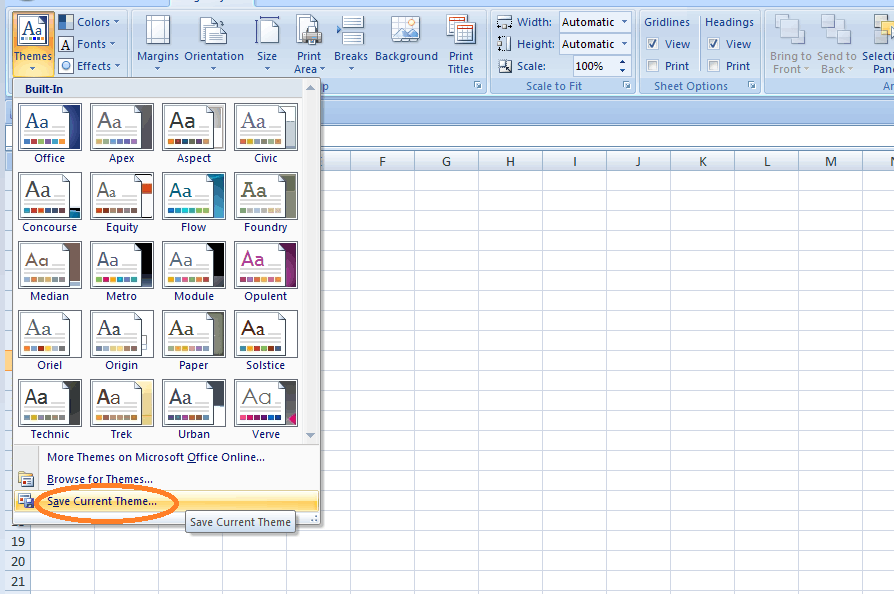
STEP 1: Select Theme option from Page Layout tab, click “Save Current Theme”
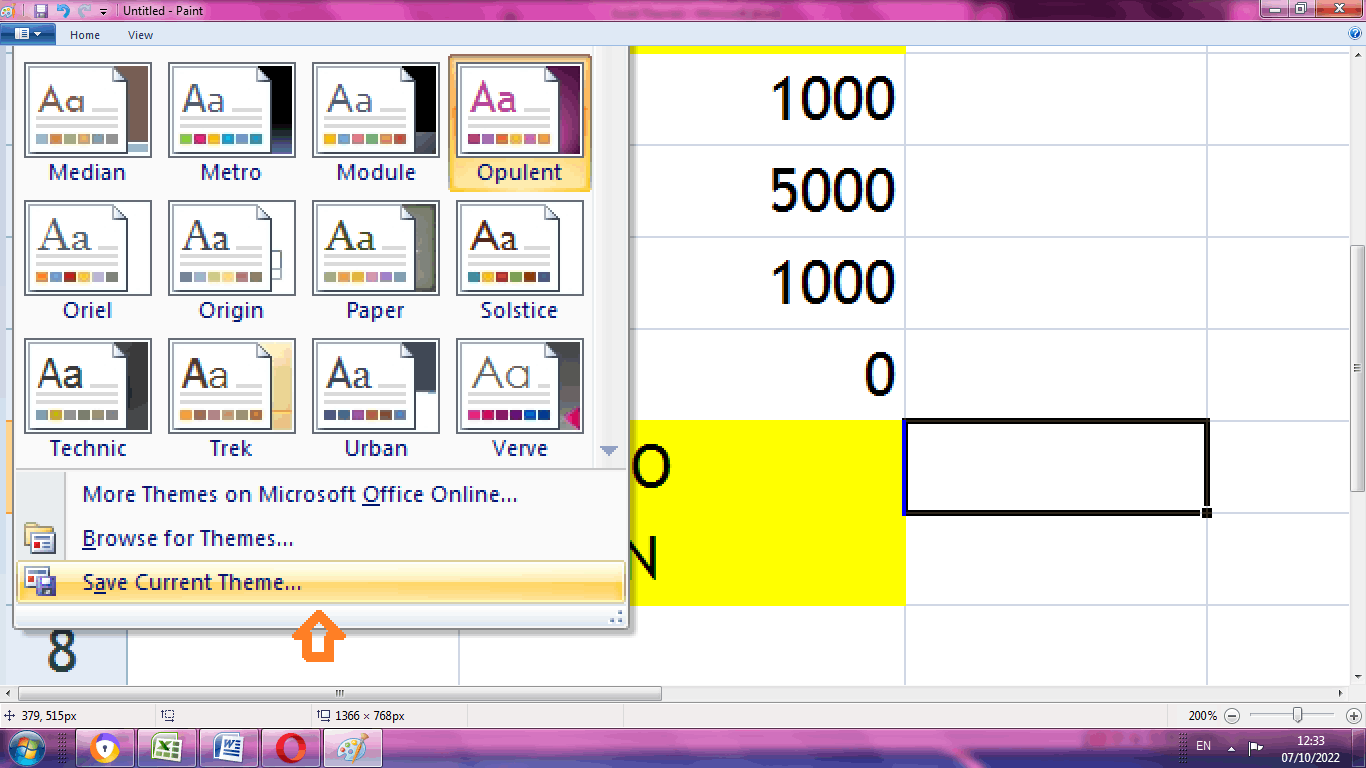
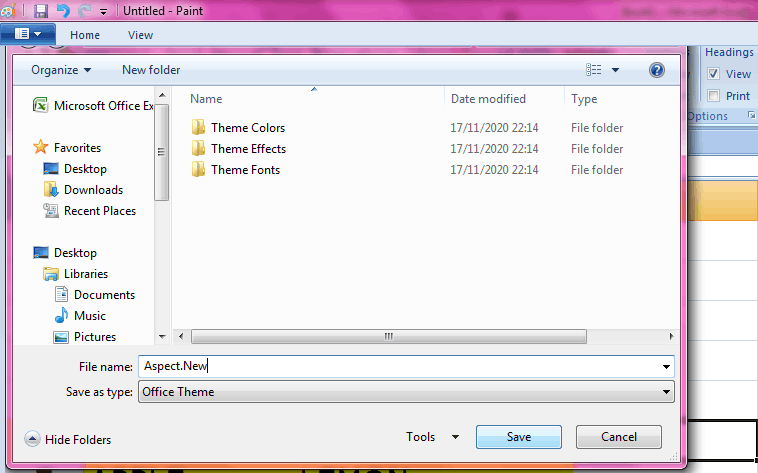
A dialog box appears, in the File Name, type the new name for the custom theme and click save button.
A custom theme is created.
How to delete Custom Theme?
If the user doesn’t want the customized theme, the user is allowed to delete the theme
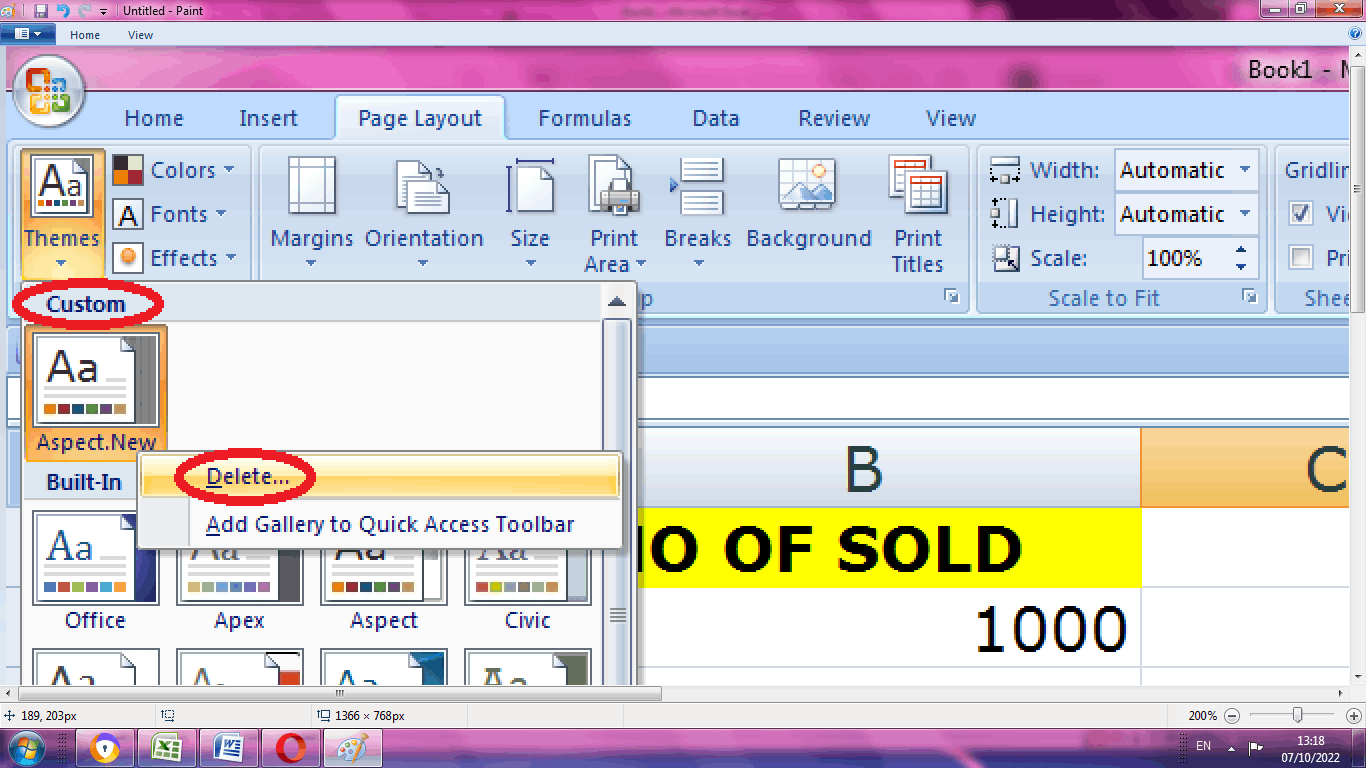
STEP 1: Click Themes from Page Layout. In the dialog box, there exist an option called “Custom Theme” is present.
STEP 2: Right click on the Custom Theme. A delete option will appear .Click on the option, where the custom theme is deleted from the worksheet.
If the user again opens the theme group from Page Layout, the customized theme won’t appear.
Creating a Customized Color Theme
To create a customized color theme, click color >Theme from Page Layout tab.
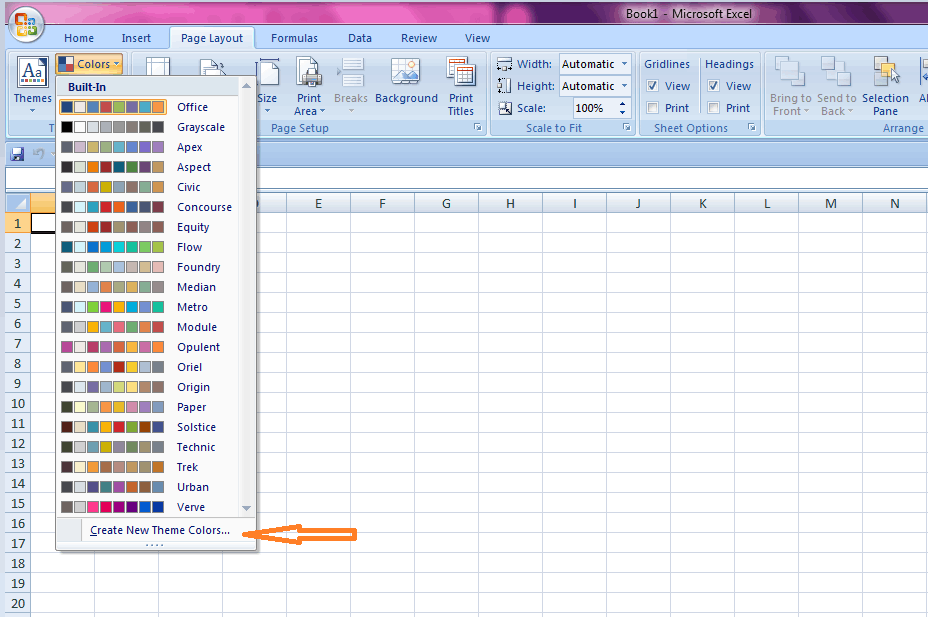
A set of colors will display, in that choose the option “Create New Theme Colors”. A dialog box appears,
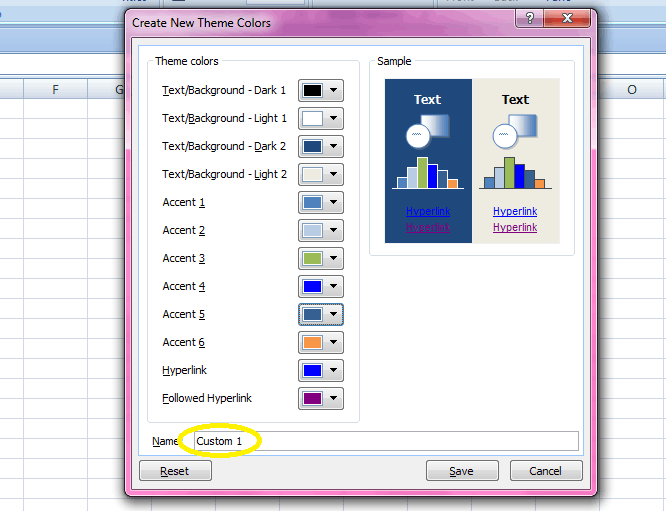
.In that choose the desired colour and clicks save. A customized color theme is saved.
To save ,color theme with present theme click Page Layout>Themes>Save Current theme.
Creating Customized Font Theme
To create customized font theme, click Page Layouts> Themes>Fonts.
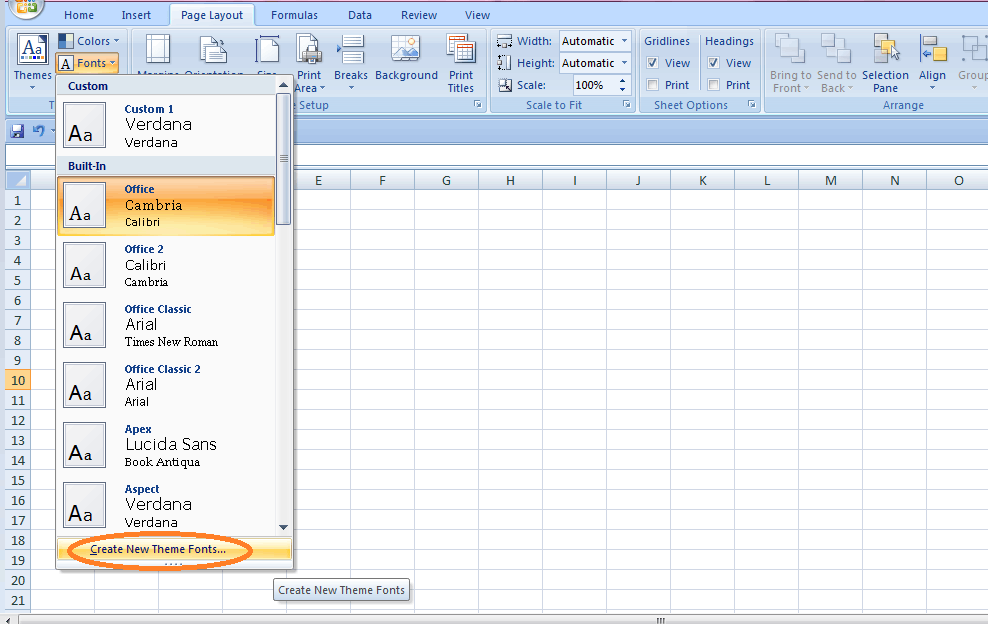
From the option listed, click Create New Theme Fonts.
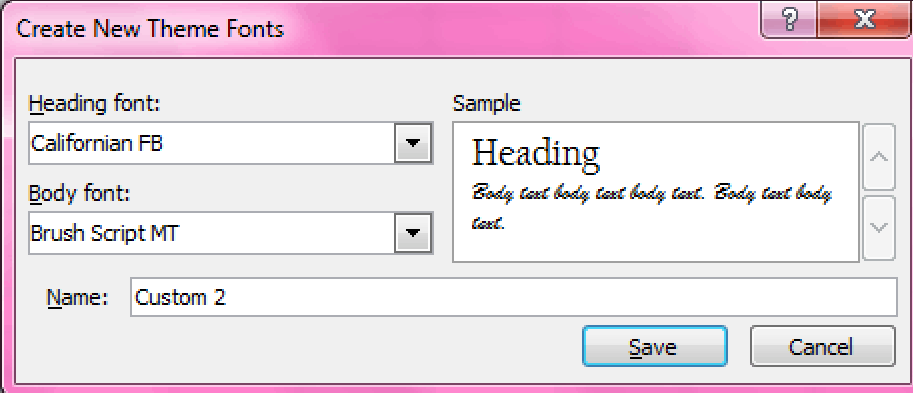
Select the desired heading font and body font. Click Save. A customized font theme is created.