Excel File using Password
How to Protect an Excel File using Password?
Nowadays Microsoft Excel is widely used by large organizations to small organizations for their personal and professional usage. They share files to various peoples and organizations for office and personal purposes. During such transactions, the confidentiality and security should be maintained. To ensure confidentiality the file should encrypt with a password. The sender sends the file with an encrypted password and only the concerned receiver decrypts the file. This password encryption method prevents the unauthorized user accessing the file. In business aspects, the company’s system are accessed by all employees, hence to protect the sensitive and confidential data some files aren’t authorized to open by everyone.
Let’s have a look how to protect the file using password in Excel.
Steps to protect Excel File using Password
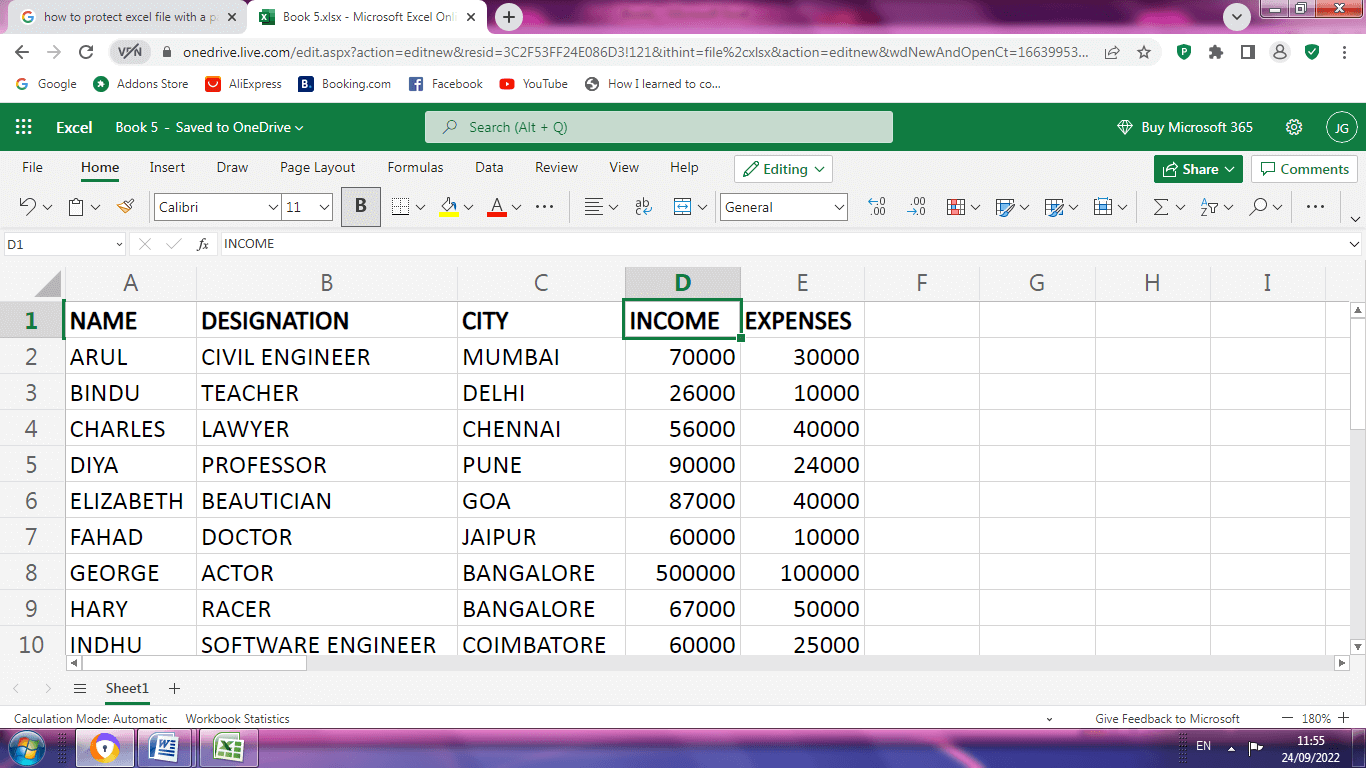
STEP 1: Create a data in a spreadsheet.
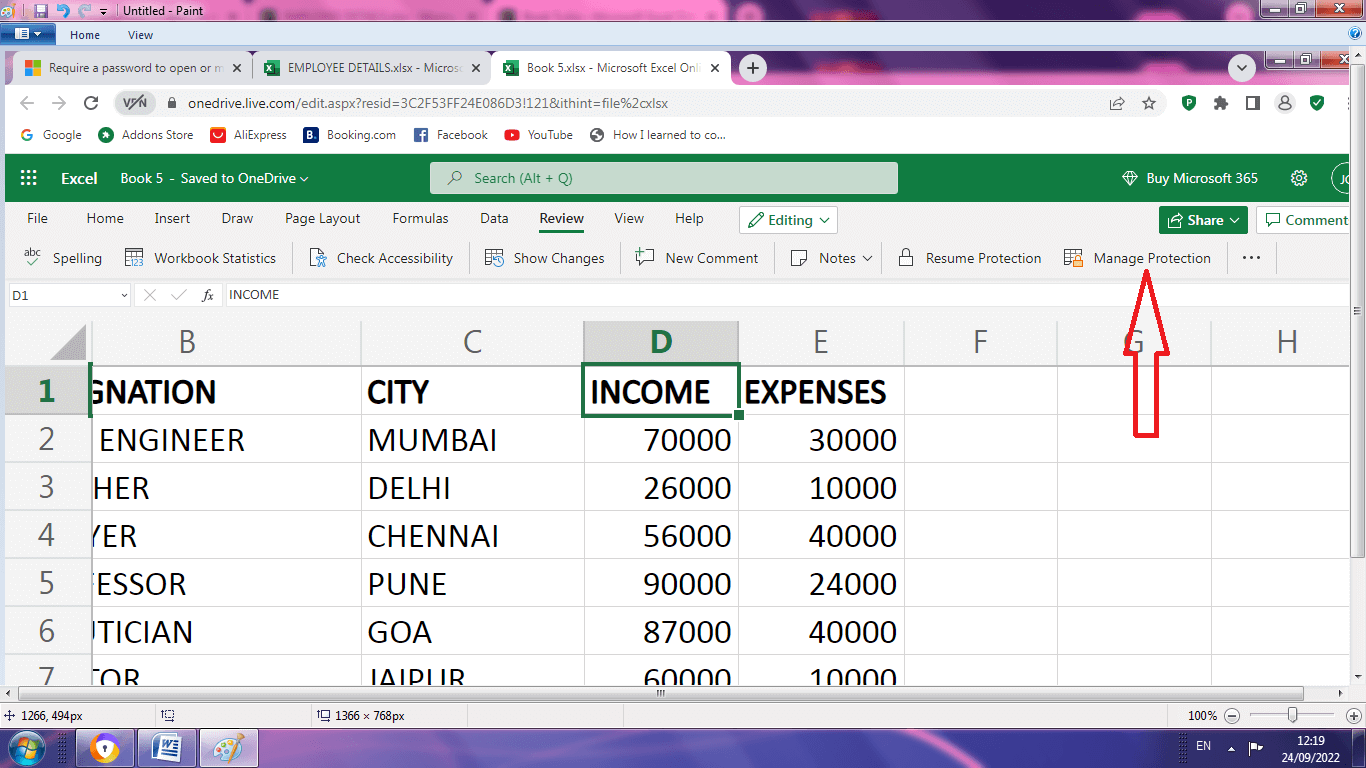
STEP 2: Select and Open the file which requires password. In the Review tab choose Manage Protection option.
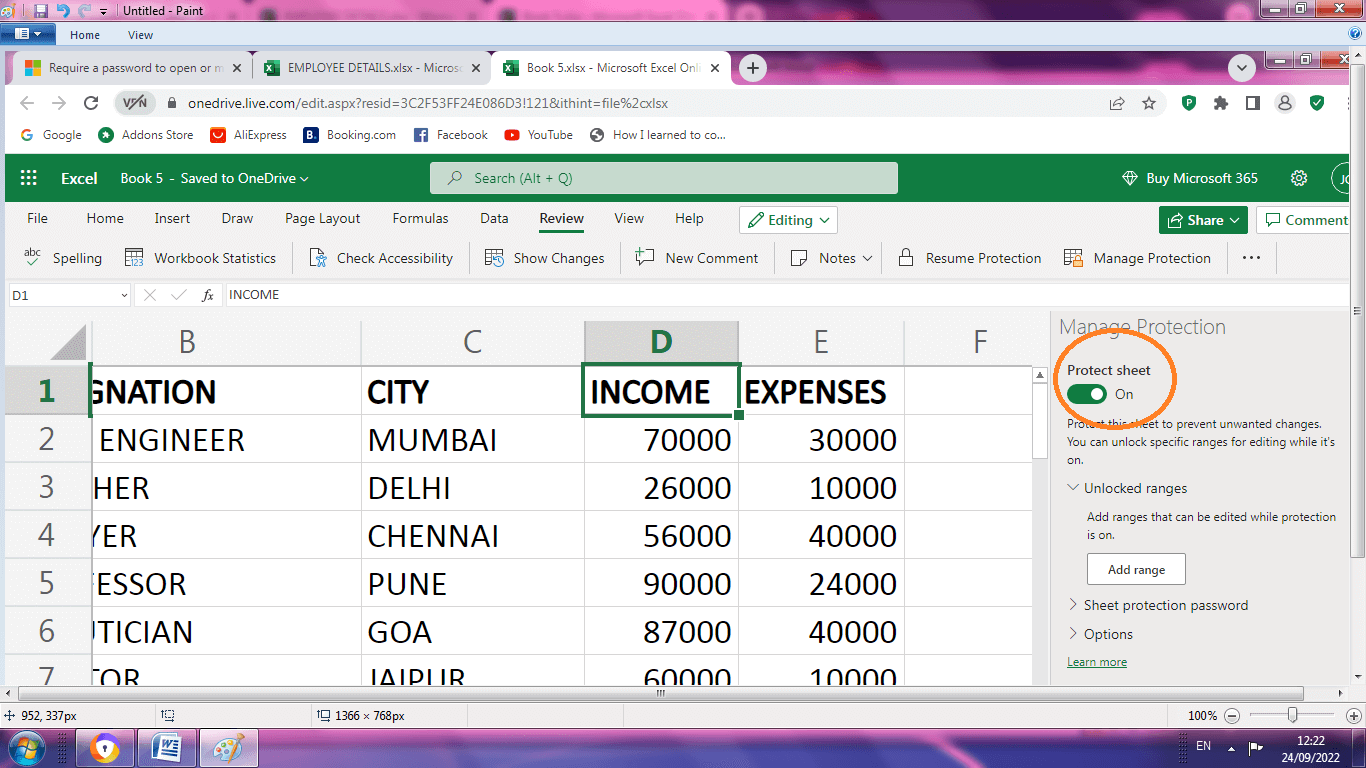
STEP 3: A dialog box appears in that, turn on the Protect sheet.
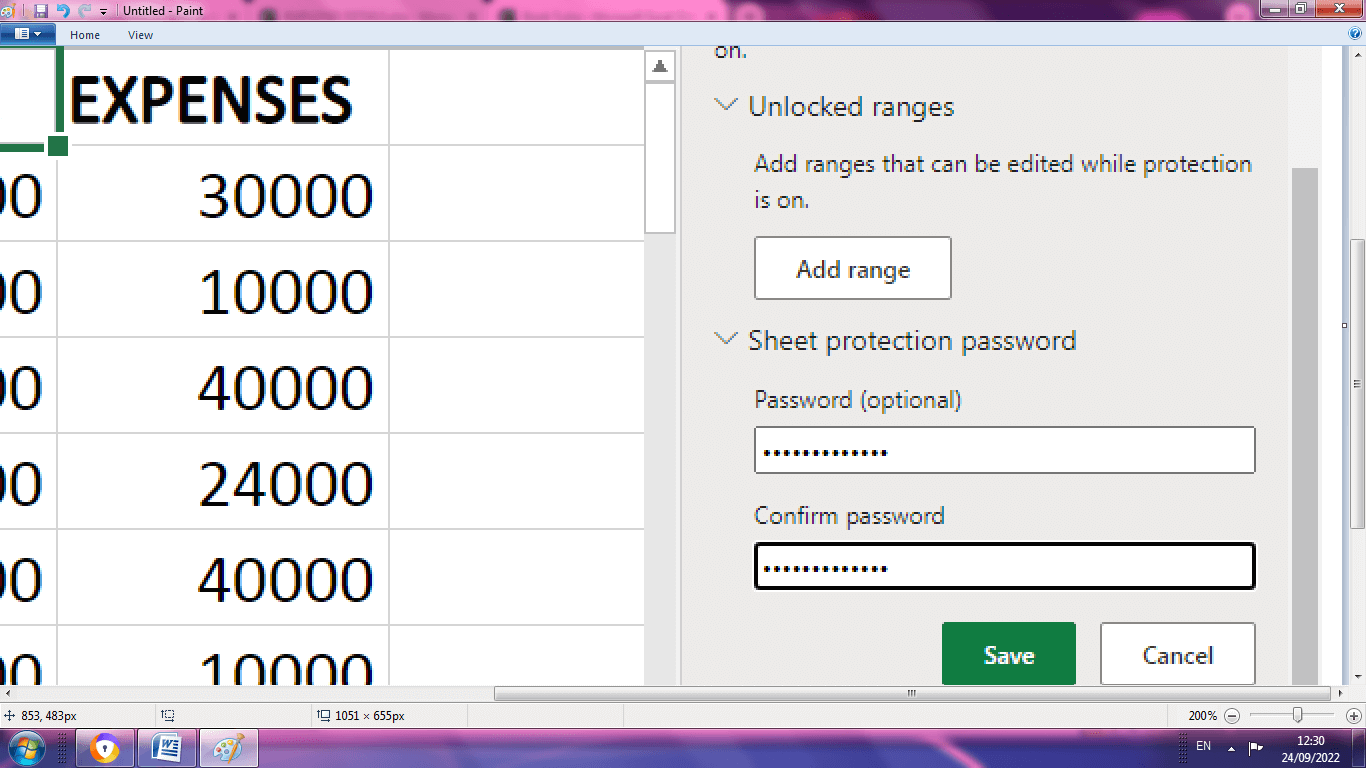
STEP 4: Choose Sheet Protection Password. Create a new password and Confirm Password. Click Save. A new password is created for the concerned file.
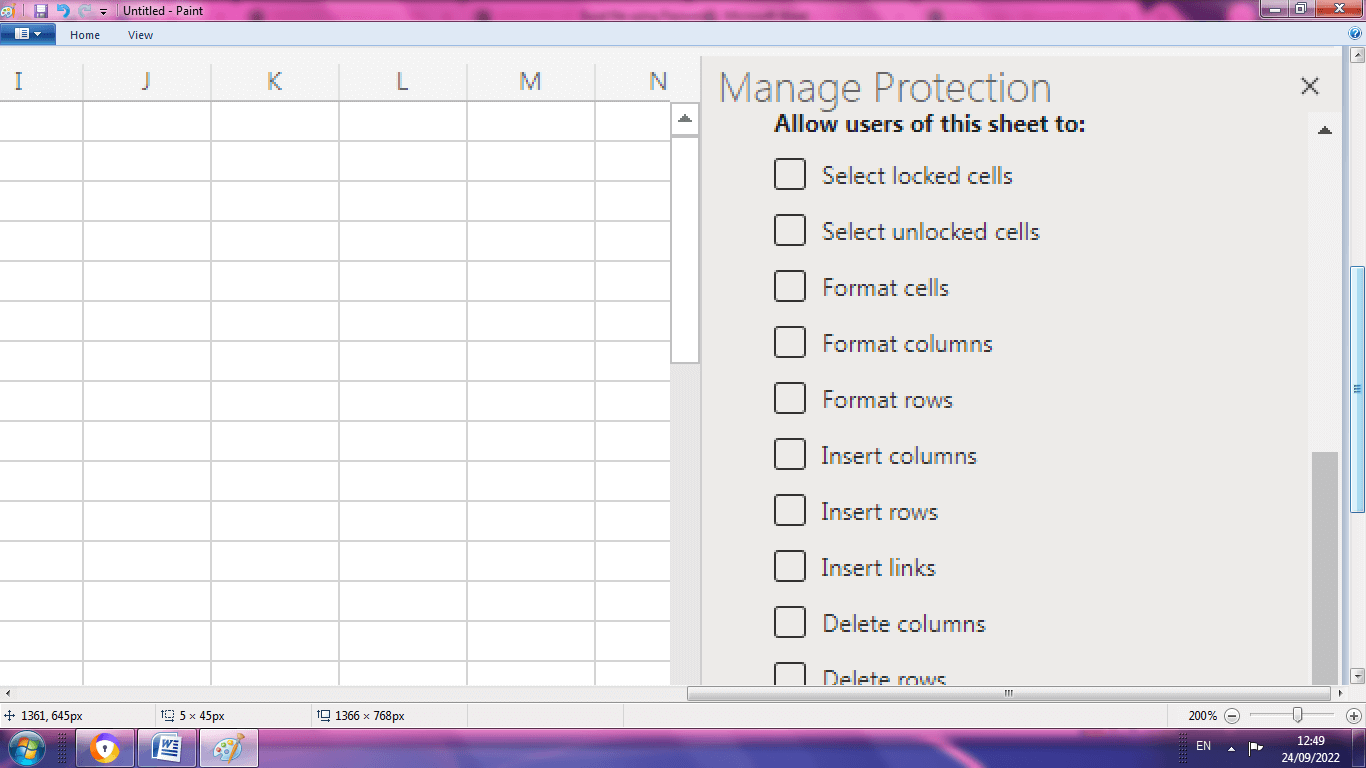
STEP 5: Choose Options> Manage Protection dialog box. A list of options will appear. In that choose the necessary options, where the third party user is allowed to perform the actions. If none of the options is selected the third party user can’t able to perform any changes in the document.
How to check whether the sheet is protected or Not?
After creating the password for the file, let’s have a look whether the file is protected or not.
STEP 1: Open the file which you have created the password.
STEP 2: Select a cell and try to modify the data.
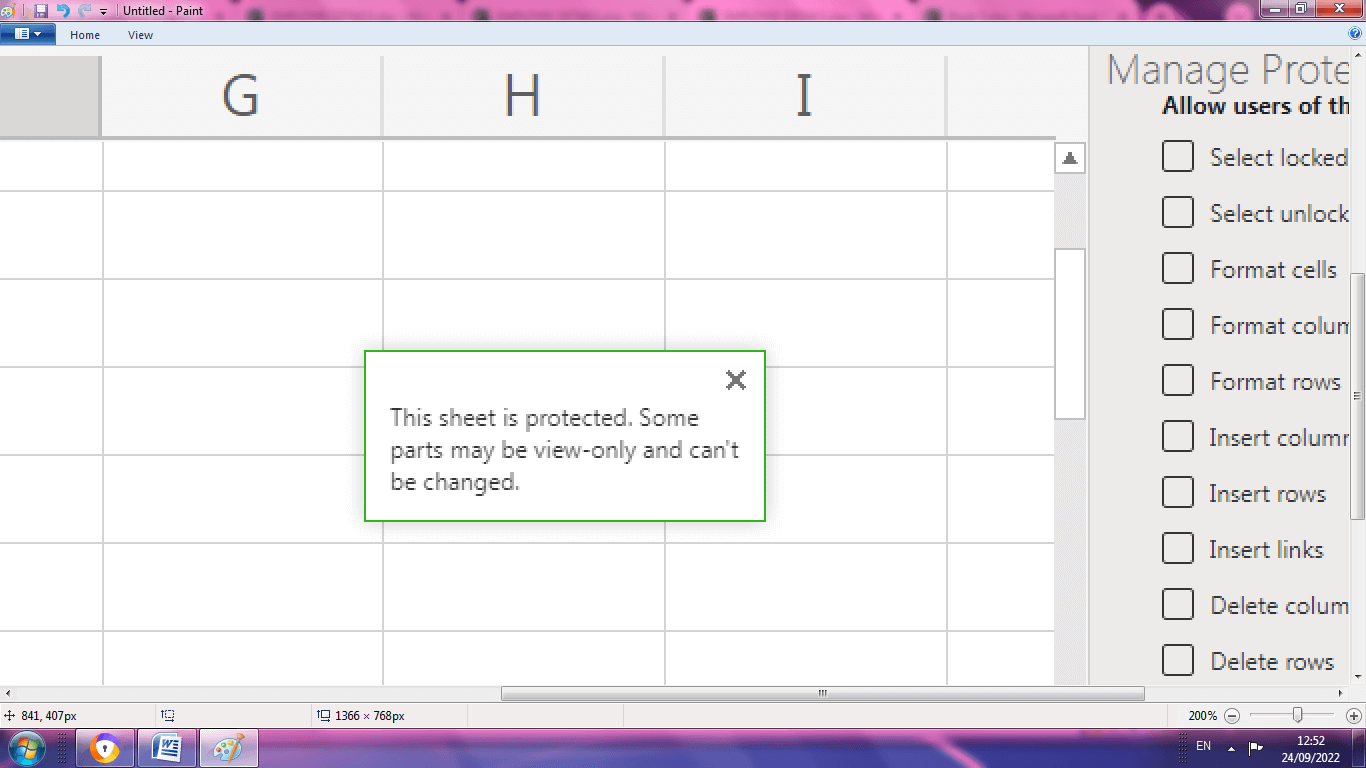
STEP 3: If the owner of the file protects the file no option selected then the third-party user can’t able to select the cell. If the cell is not selected, then the data can’t be modified. Hence the data present in the sheet remains original.
How to remove the password for a File?
Removing the password for an Excel file is similar to the process of creating password to the file.
STEP 1: Open the file in which to remove to the password.
STEP 2: Choose Review>Manage Protection. A dialog box appears which asks to enter the existing password.
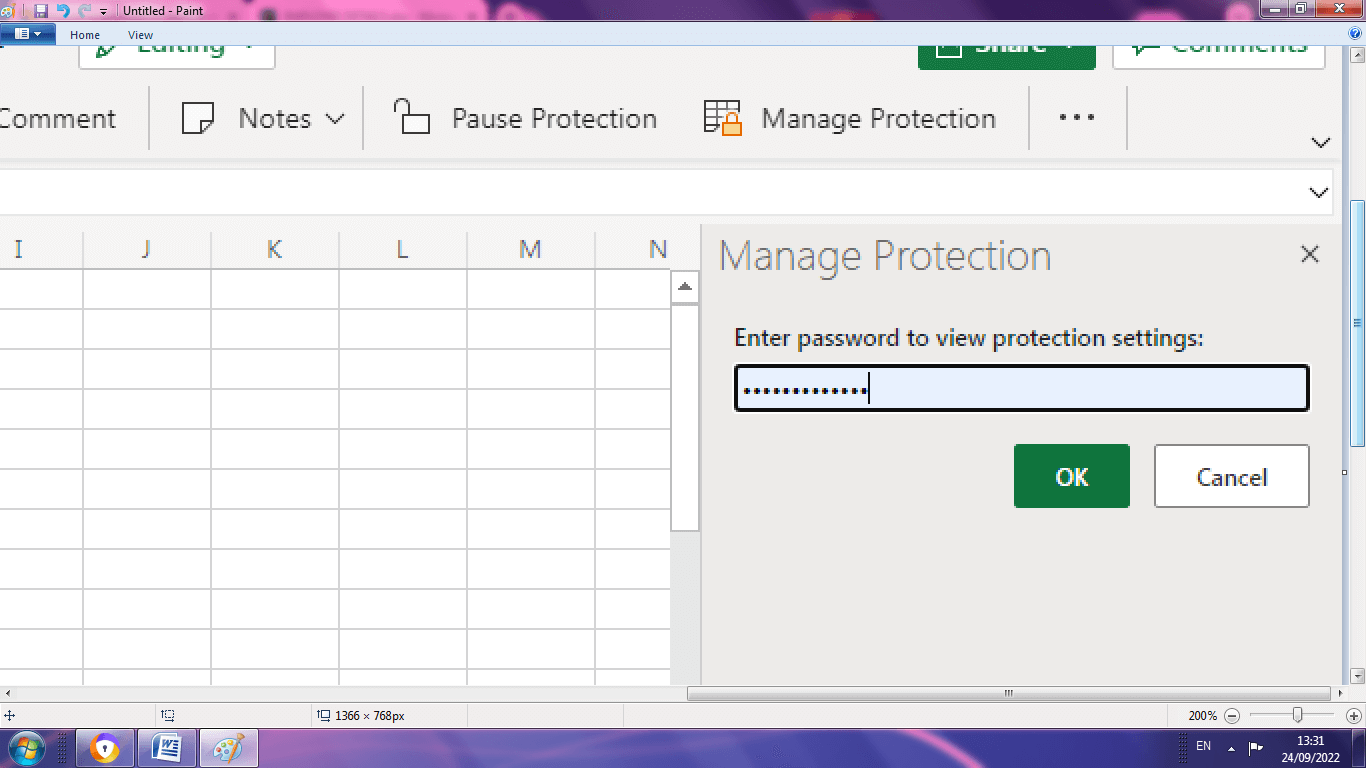
STEP 3: Enter the existing password. Click OK. A dialog box appears in that turn off the protect sheet.
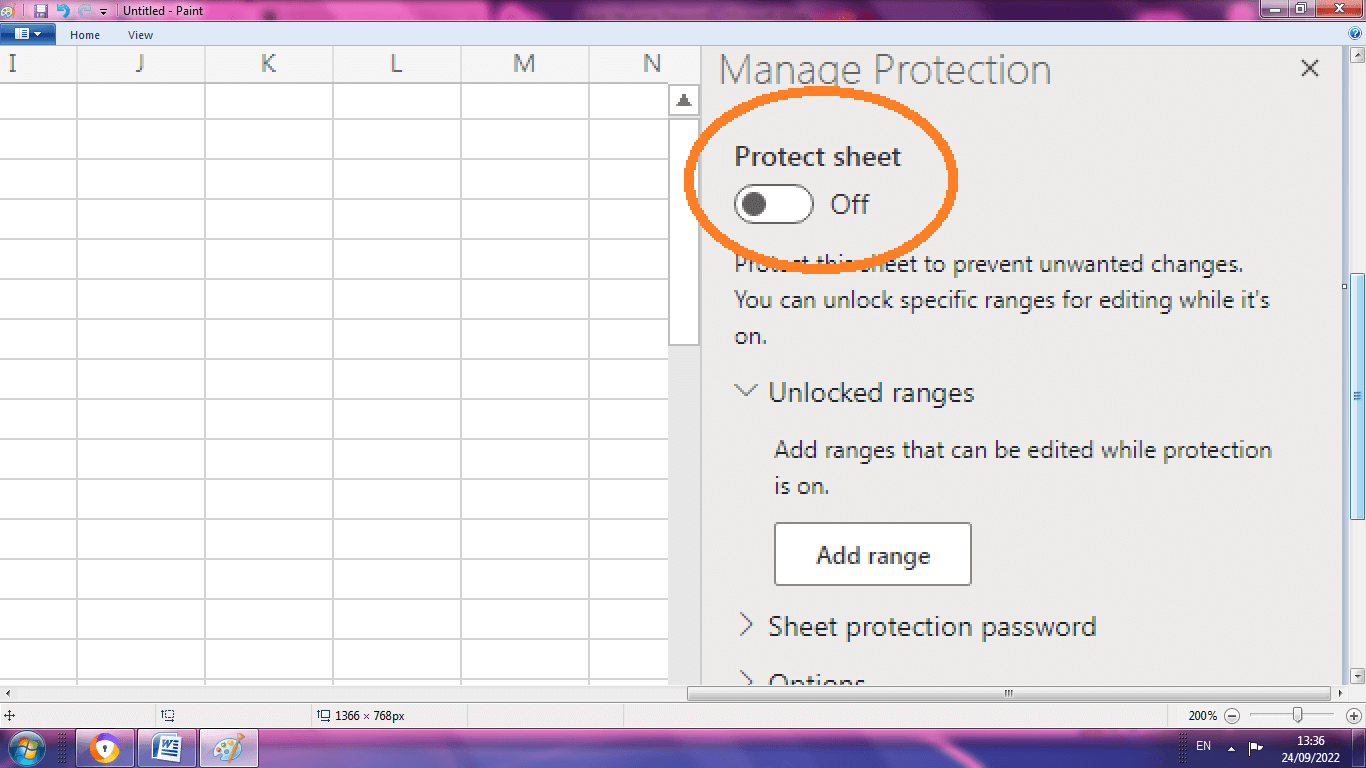
STEP 4: The password for the particular file is removed. The user can change the data whenever they needed.
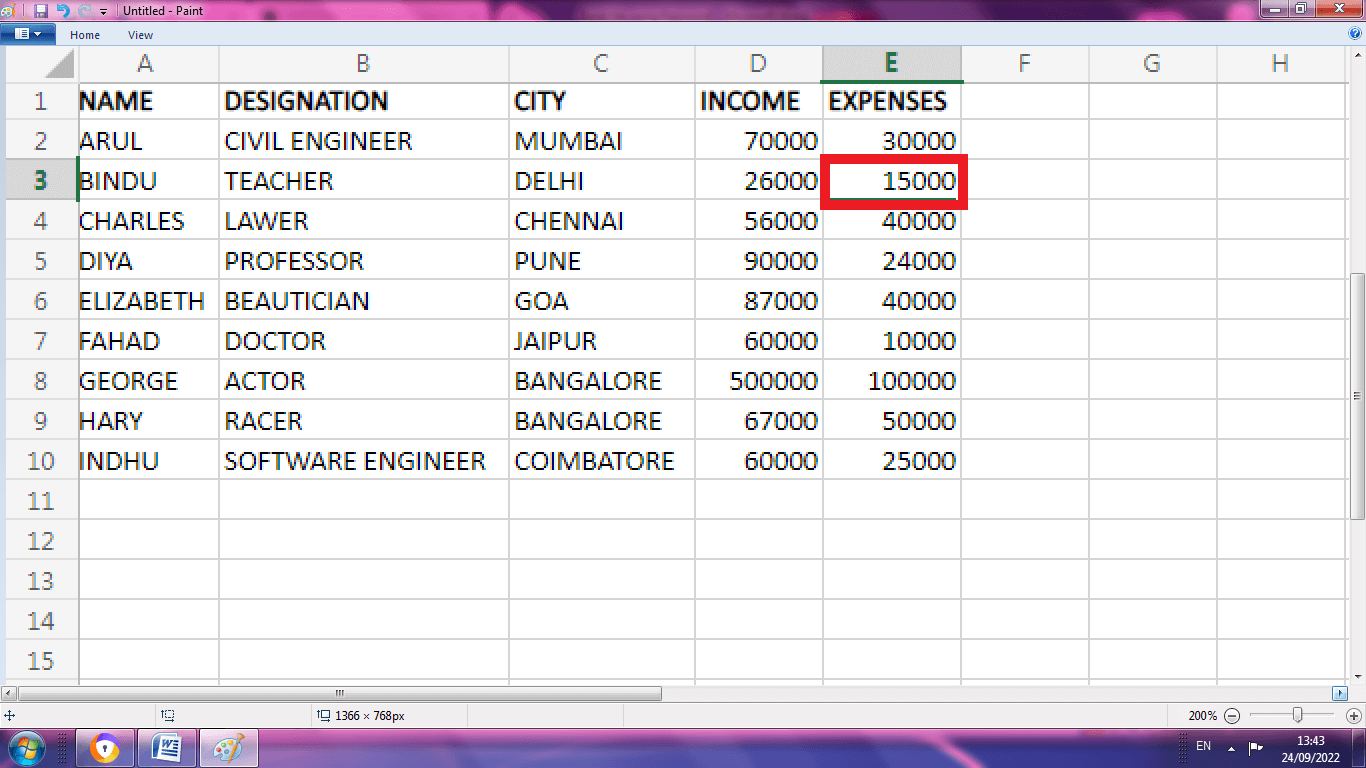
STEP5: The expense of the BINDU is changed from 10000 to 15000. As the password is removed, it allows the user to change the data.
Summary
From the tutorial the step by step process of creating and removing the password for an Excel file is discussed. Encryption is one of the best option to ensure the safety and security of the confidential file from unauthorized access.