Insert Row in Excel
It was known that we have various multiple ways that are extremely helpful in inserting a particular row in the Microsoft Excel. And we have lots of shortcut options available in the Microsoft Excel that can be used to perform this task very efficiently.
To insert a specific row in Microsoft Excel, first, we will select the row above which we want to see the most newly inserted row either with the help of the mouse cursor or by the help of pressing Shift+ Space Bar both together. Once the respective row gets selected, we can make use of the Ctrl+ Shift + Plus ("+") all together to insert the new row just above the previously selected row in Microsoft Excel respectively.
Moreover, we can effectively insert the row with the help of pressing the shortcut key Ctrl +Num Plus keys, in which we can find out the Num Plus key only on the Desktop keyboard or the Keyboard with the numerical keys, which are located on the right side.
Besides, all these in this article, we will effectively see all three options, which are listed as follows:
- With the help of the Shortcut keys, insert the new row.
- With the help of using the Insert Cell menu for the purpose of inserting a new row or column effectively.
- With the help of the Right Click key, insert the new cue and the row.
How to make Insertion of the Rows in the Microsoft Excel?
Here we will discuss the various essential methods to make insertion of particular rows in Microsoft Excel respectively,
- With the help of the Right-Click on the Menu without the shortcut:
- First, we will select the respective rows, then choose above or below where we want to precisely make the insertion of the new one and then efficiently right-clicking on the row cell.
- We will get encountered with the specific type of the dialogue box in which we will get the option that is the “insert options”.
- Next click on the insert options so that the respective selected new row will be get chosen, as depicted in the screenshot below.
- Insertion of the Column with the help of the right-click Menu without the shortcut:
- We will select the respective column where we want to insert the separate new column.
- And soon after that, we will move on Right-clicking to the respective column cell as well.
- After performing the above step, we will effectively get the dialogue box as depicted in the screenshot below.
- After that, we will click on the option that is the “insert options” in order to get the new column to be inserted effectively.
- Insertion of the Row with the help of the Ribbon Menu: It was assumed that in Microsoft Excel, we could effectively find the insert cell options on the home menu depicted in the below-attached screenshot.
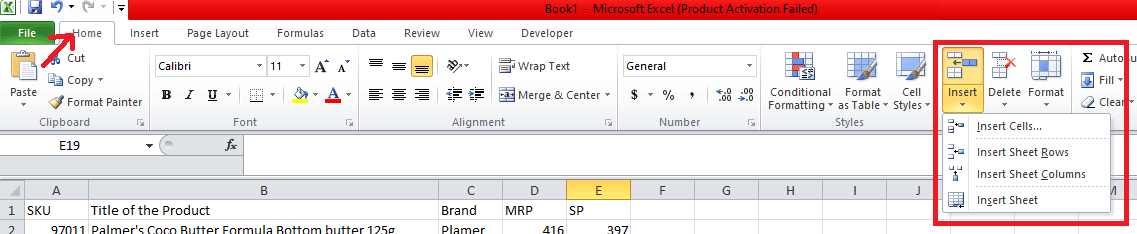
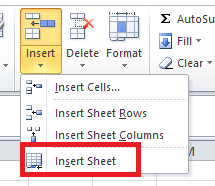
Once we click on the insert cells, then we will get the various following options that are as follows:
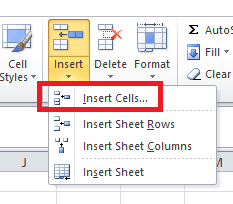
- Insert cell: Basically, the Insert cell is purposely used to insert the particular selected cells. As seen in the below-attached screenshot.
- Insert Sheet Rows: Insert sheet rows are used to insert the particular selected rows. As clearly seen in the below-attached screenshot.

- Insert Sheet Column: This is purposely used to insert the selected column in the respective Microsoft Excel, which can be seen from the attached-screenshot
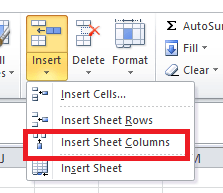
- below. Sheet: This can be used to insert the whole sheet caught in the screenshot below.
Examples of inserting the shortcut Row in the Microsoft Excel
Below there are the various examples that can be used to insert the shortcut rows in Microsoft Excel, and we will be discussing those in detail:
# Example: 1 Insert Cells
Let us consider the example below, which basically consists of the sales data. Sometimes it is required to add additional rows and columns to add the extra information to the respective data. So, in this case, we can insert the new cells or the row in the particular worksheet, which can be seen in the below steps as follows:
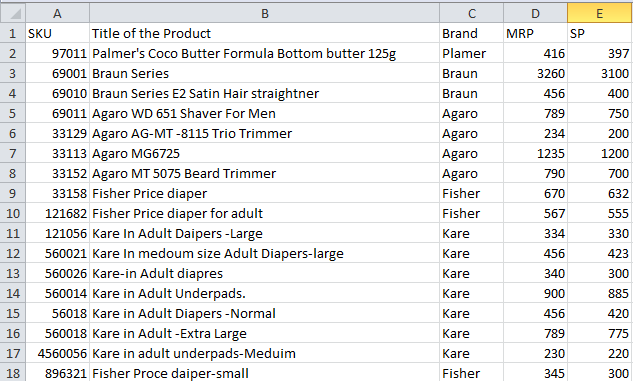
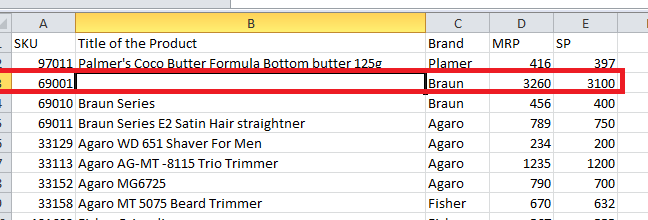
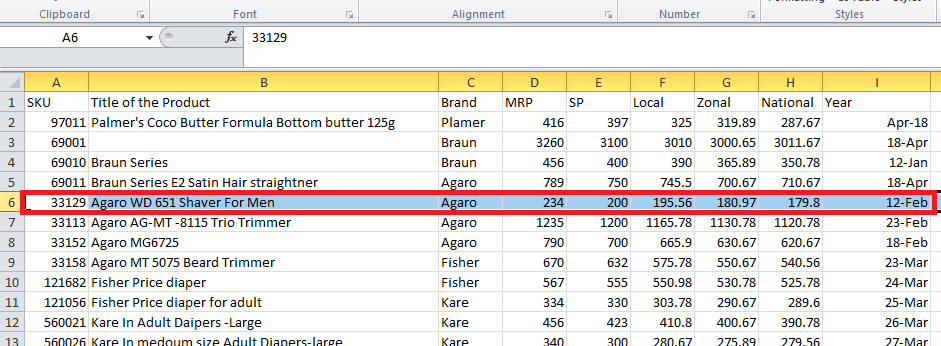
Step 1: Firstly, we will select the row where we need to have a new row and here in these respective examples, we have already made a selection of the row which is the third row where we need to exactly insert the new row as depicted in the below attached-screenshot.
It means that Microsoft Excel will efficiently insert the new row just after the immediate second row.
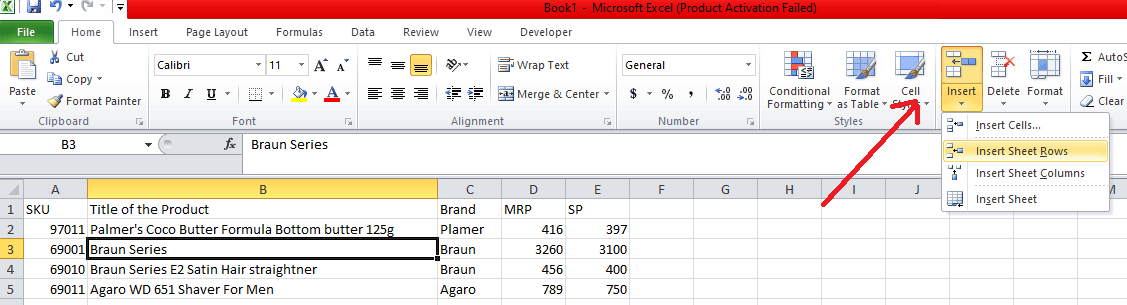
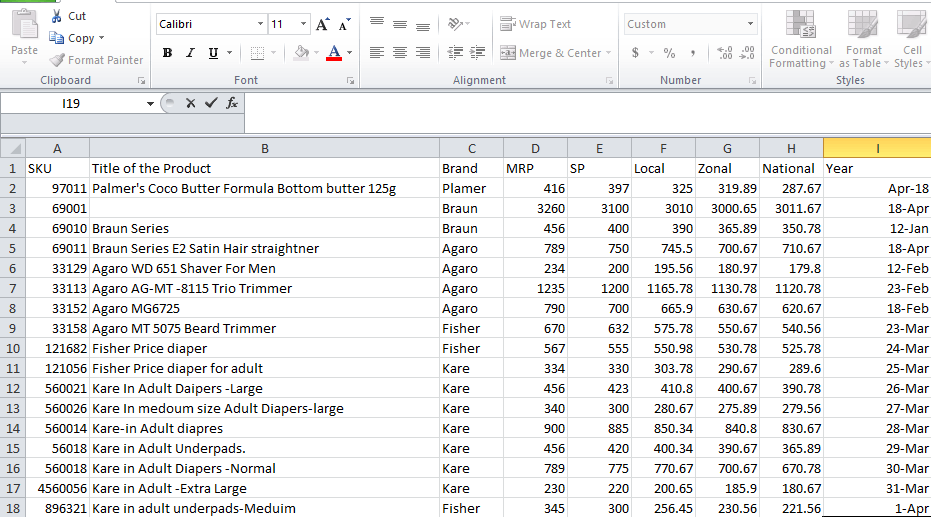
Step 2: Now, after that, we will be moving to the Menu that is the "HOME" menu, and then after that, we will select insert options and efficiently click on the "Insert Sheet Rows Options" as clearly depicted in the below-attached screenshot.
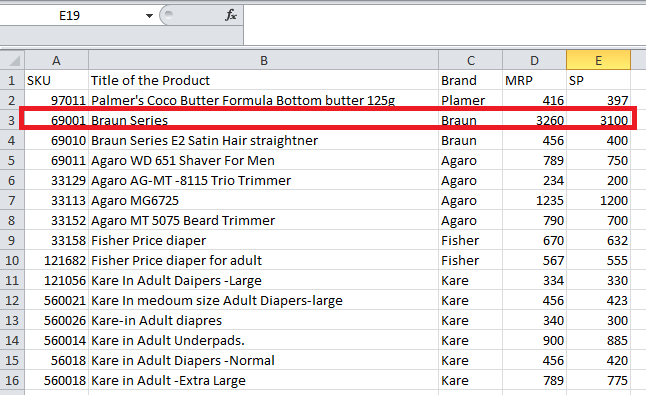
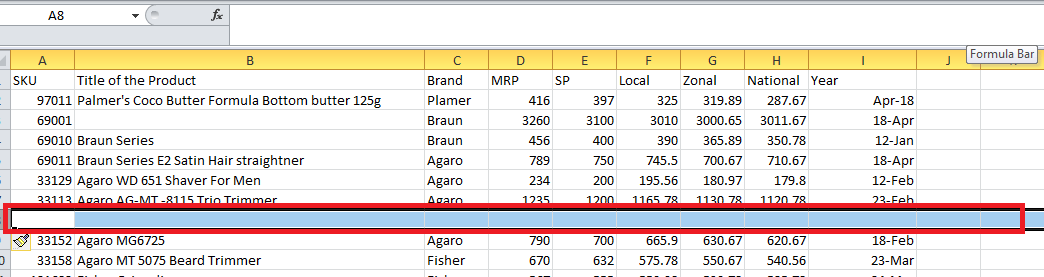
Step 3: After performing the above step, clicking on the insert option, a new row will get inserted just above the fourth row shown in the screenshot below.
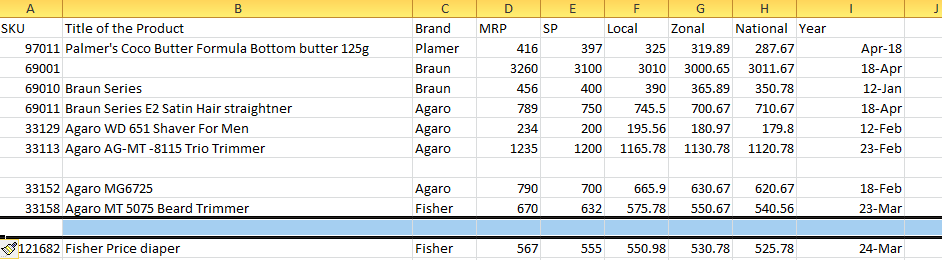
Now we can visualize the difference that the new white row has been inserted just after the SKU Row "97011", and now if an individual or we need to add any missing sales data, then, in that case, we easily enter the data to it efficiently.
# Example: 2 for inserting the multiple rows in the Microsoft excel sheet.
In this respective example, we are moving on to discussing how to insert the multiple rows in the Microsoft excel sheet with the help of the various steps discussed in detail below.
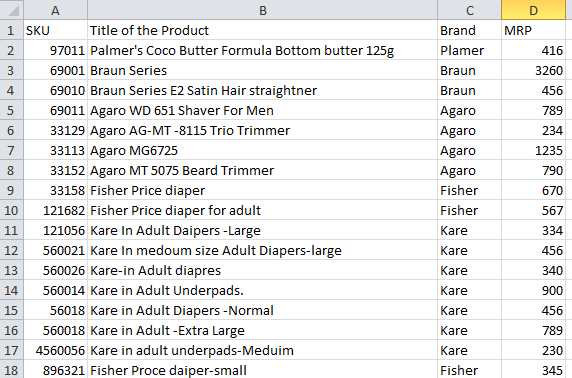
Let us assume the data related to the sales consist of the following things as follows:
- Title of the product.
- Brand.
- And MRP.
It was assumed that we had missed some of the data from these excel sheets and that we needed to include the rows at some selected ones.
As seen in the below-attached screenshot.
Moreover, in this respective example, we are now moving on to inserting the multiple rows by the below-mentioned steps.
Step 1: First, we need to select the highlighted area where we will insert the new one, as depicted in the attached screenshot below.
Step 2: Now, we will click on the "Insert", and then we will click on the second option, "Insert Sheet Row." As clearly seen in the below-attached screenshot,

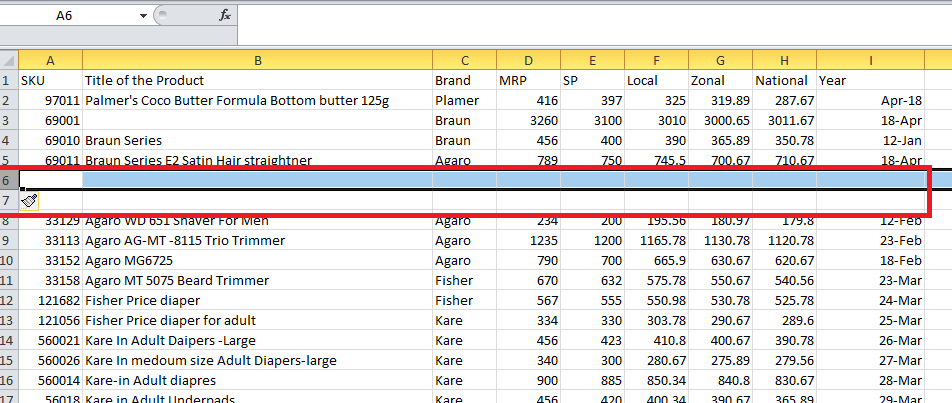
Step 3: After performing the above steps, a new row will be inserted, as seen in the below-attaches figure.
Step 4: We will do the same to the other row to get the multiple rows, as seen in the screenshot below.
We have several shortcut keys for all the practical functions in the respective Microsoft Excel. We have various shortcut keys for performing the deletion of the row and the column.
And the shortcut key for inserting the particular row in the Microsoft Excel sheet is none other than the CTRL+SHIFT+"+" (plus sign). And the duplicate shortcut keys can also be applied for inserting the column in Microsoft Excel.
Besides all these, an individual will be using the number pad to insert the numbers, and we can also make use of the available number pad shortcut keys to insert the row. The shortcut key for this is SHIFT+CTRL+"+" (plus sign).
# Example: 3 Shortcut keys to insert a row or the column with the help of the Keyboard
The shortcut key available on the Keyboard to insert a new row is none other than the SHIFT+CTRL++ "-" i.e., Plus sign we need to use.

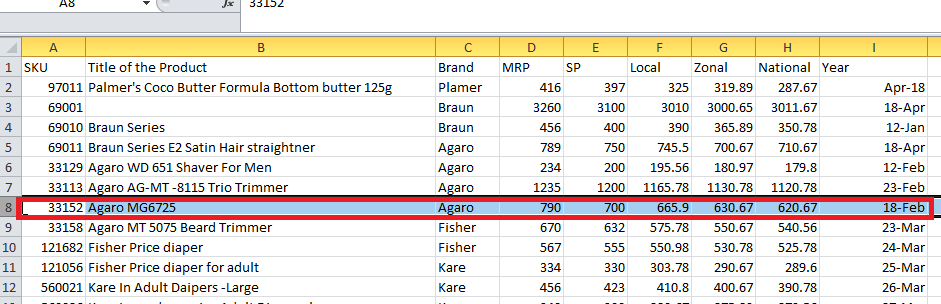
Step 1: First of all, we will select the respective cell where we need to insert the new row exactly, as clearly depicted in the screenshot below.
Step 2: With the help of the keyboard shortcut key, we will hold the SHIFT+CTRL keys and then press the "++" plus sign on the Keyboard so that the new row will be inserted, as seen in the below –attached screenshot.
# Example: 4 Keyboard Shortcut Key
Let us consider the below-mentioned steps in which we will also insert the new column.

And to make insertion of the new column with the help of the keyboard shortcut, we will follow the below-mentioned steps.
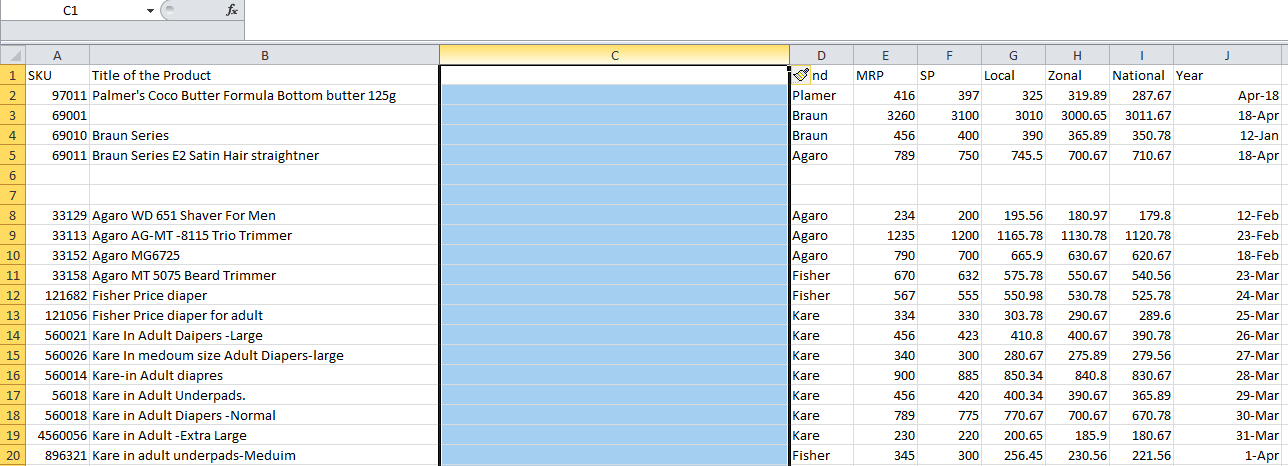
Step 1: First, we will select the column where we need to insert it exactly, as seen in the screenshot below.

Step 2: Now, we will apply the shortcut key SHIFT + CTRL + +. And after that when we click on the available shortcut key, then soon after that a new column will be get inserted, as clearly mentioned in the figure attached below.
Things that need to Remember
Various essential things need to remember by an individual while making insertion of particular rows in Microsoft Excel effectively; that specific points are as follows:
- In the respective Microsoft Excel, inserting the new row by any individual in the separate workbook (Excel sheet) helps an individual to add various additional data, and whenever they are required can be easily get inserted as well as get edited effectively by any individual.
- And the other most crucial point that needs to be remembered by an individual is that while inserting the particular row, it is the individual's responsibility to ensure that they have selected the duplicate rows and the column.