How to Set up a Wireless Router
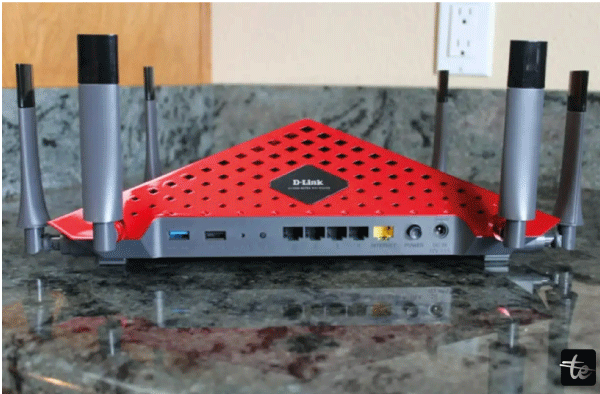
Throughout time, wireless router setup and configuration have gotten considerably simpler. However, the advice I provide here will make things much more manageable. Not only will you have peace of mind knowing that your home network is as safe as possible, but you'll also learn some networking specifics that user guides sometimes omit.
Nowadays, it's pretty probable that your router has a companion app that allows you to install and adjust it on your tablet or smartphone. Some businesses have given up on using browser-based user interfaces entirely. Since my PC's display is more extensive and more accessible to see, I think it's ideal to have both options available so you can make a decision.
Step 1: Place your Wireless Router
The optimal place for your wireless router is in the middle of your house, as any router manufacturer will tell you. The most significant event coverage will result from doing that. Most individuals cannot accomplish it because you need to connect your router to your internet service provider's broadband gateway. Regardless of the type of equipment cable, DSL, or fibre gateway, if you're fortunate, it is permanently mounted at a perimeter wall.
Ideally, your router should be placed in the middle of your house. By coincidence, my house has a wet bar in the middle.
Avoid installing your wireless router in a closet that will restrict its range if you cannot locate it in the middle of your house. Although moving the gateway is not necessary, you can place it outside by connecting the router to its ethernet port using a longer, relatively affordable CAT5e or CAT6 cable. If you're adventurous, you could run two ethernet cables one to link the router to your gateway and the other to an ethernet switch perhaps in the closet where the gateway is located through your walls to that perfect central spot.
However, a router in the mesh design is also a more straightforward solution. Locate the first node in this system wherever your gateway is, then install the remaining nodes in various parts of your house. You'll have robust WiFi coverage almost everywhere in your home since your data will effortlessly jump from one node to the next. Mesh systems don't have to be costly; at only $150, TP-Link's Deco M5 three-pack is our top budget option.
But be careful: A wireless node won't be able to connect to your network more effectively than any client device if placed in a WiFi dead zone. Instead, position the node so its wireless signal may reach the quiet region.
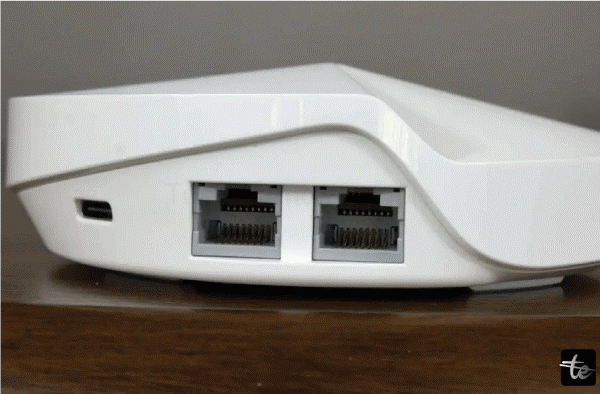
While some routers include auto-sensing ports that automatically configure themselves as WAN or LAN (Local Area Network, i.e., your home network), others have dedicated WAN (Wide Area Network) ports for connecting to the gateway. Don't unplug or turn anything off just yet; there are a few things you need to do first.
Numerous contemporary routers, like the TP-Link Deco M5, are equipped with auto-sensing Ethernet ports, which adjust their configuration for either LAN or WAN usage according to the signal strength received from the cable.
Step 2: Configure your Wireless Router Gateway
Most ISPs provide their consumers with modems, also known as gateways, with integrated routers. Sadly, the quality of these combined modem/routers is often much worse than that of standalone routers, and you won't be able to create mesh networks—networks with several wireless access points, or APs that would allow you to cover your whole house with WiFi.
If your gateway includes an integrated router, you must set it up to turn off the router and forward all network traffic, including the WAN IP address (the distinct IP address assigned to your account by the ISP), to your new router. This is required, among other reasons, to prevent double-NAT situations. (This explains double NAT and why you should avoid it.) The IP address the gateway is utilizing must be known to you; it is usually listed on a sticker on the gateway itself. The gateway setup screen may be accessed by entering the IP address into a web browser.
Switch the built-in router on your broadband gateway, such as this Motorola NVG510, to "bridge" or "passthrough" mode to utilize your router.
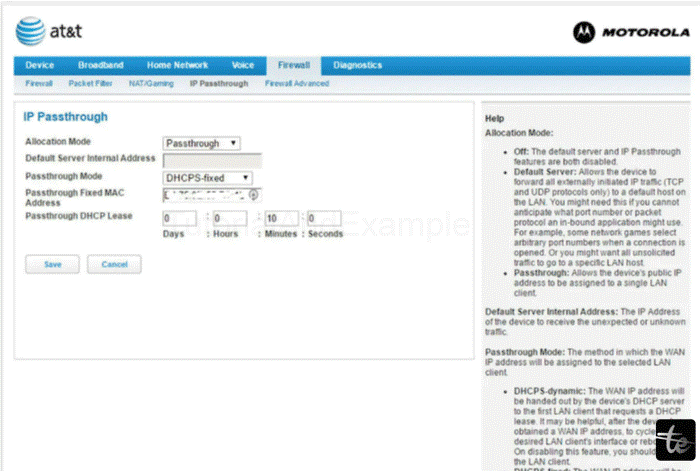
While some gateways manage things differently, others provide what is referred to as a "bridge mode" for interacting with a secondary router. You may need to contact your ISP for assistance with this stage since some may not let you set up the gateway yourself.
My ISP, AT&T U-Verse, gave me a Motorola NVG510 DSL gateway/router combination. Logging into the gateway, going to the Firewall menu, and selecting "passthrough mode" configure that device to function with a router. Next, enter your router's MAC (Media Access Control) address and set the passthrough mode to "DHCPS-fixed."
The IP address that each device on your network is dynamically assigned is called DHCP, or Dynamic Host Configuration Protocol Server (I'll go into more depth on this briefly). Every router has a different MAC address, making them all unique. Once again, your gateway may follow another procedure, but the outcome will be the same. Additionally, it would be best to locate the option that turns off the WiFi access point on your gateway to avoid having a second, pointless WiFi network. After completing these adjustments, restart your gateway.
Step 3: Connect your gateway to your new router
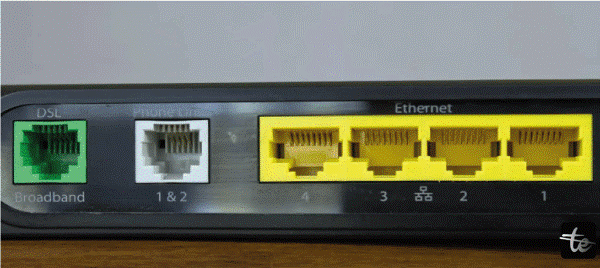
If your gateway lacks an on/off switch, turn it off by unplugging the power supply. Re-plug the Ethernet cable into the WAN port of your router if it was previously inserted into the LAN port of the gateway (remember, some routers have dedicated WAN and LAN ports, while others have auto-sensing ports). You should have received an Ethernet cable with your router if one isn't already inserted into the LAN port of the gateway. Connect the gateway to your router using it. After restarting your gateway, let it take a minute or two to fully power up. After that, switch on your router by plugging in its power source. Give it a further minute or two to boot.
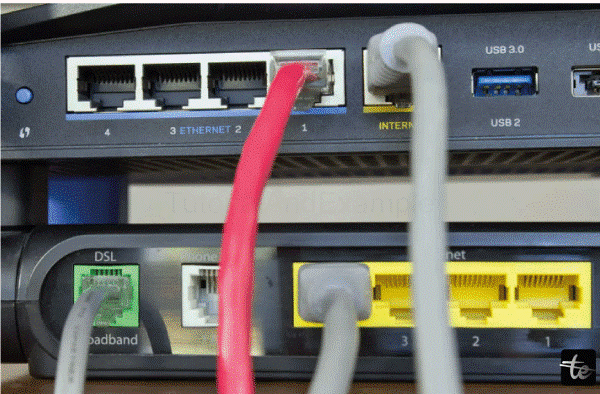
Use a CAT5e or CAT6 cable (the grey cable in this picture) to connect your gateway to the WAN port of your router. The thinner cable inserted into the green port on the gateway connects to a wall phone jack, while the red wire travels from the router to a PC.
Step 4: Modify the admin password on your wireless router.
Numerous router vendors provide smartphone applications for router configuration. If your new router has one, use it (it may be the only option to set up the router in some circumstances). Utilize an Ethernet connection to connect your PC to the router if there isn't an app or if you'd instead utilize the browser-based UI. In the address bar of your web browser, type the router's IP address and press Enter. The router's IP address may be found printed on the device itself; it will appear as 192.168.1.1 or a similar value.
You'll need to know the admin login and password to log into the router. The user manual may also provide this information in addition to being written on the router. After entering the necessary information, press Enter. It's not safe. Therefore, you should change the admin password right away. Make something original, then record it in writing or add it to a password organizer app like LastPass. Later on, you'll need it to make updates and modifications. Any modifications you've made might be lost if you have to do a hardware reset in the event that you forget the admin password.
Step 5: Upgrade the firmware on the router
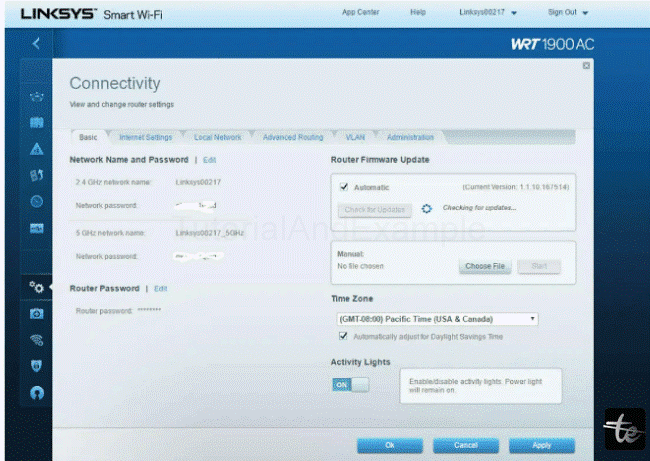
Router makers frequently release new firmware after the device has been sold. As well as security and efficiency enhancements, the latest firmware may include critical bug patches, so always make sure you have the most recent version. Though few routers do this automatically, most will check for updated firmware; usually, you must at least click a button on the router's setup software. For specifics, consult the documentation that came with your router. Following a firmware upgrade, the router must be rebooted.
Updating the firmware to the most recent version and changing the admin password are the first things you should do when setting up your router.
Step 6: Establish a password for your WiFi network
A pre-assigned WiFi password may even be included on certain routers' labels straight from the manufacturer. When you first set up the router, many others will at least ask you to create one. At the very least, ensure the router is set up to utilize WPA2 (WiFi Protected Access, second generation) encryption. Using the even less secure WEP (Wired Equivalent Password), which is considerably older, is not advisable. While most modern vintage routers still support it in case you have old devices that can only use WEP, none of the more current models will utilize it by default. Should you still use wireless gadgets that fit that description, you should retire them since they expose your whole network to even the most inexperienced hacker.
The method for configuring the WiFi password on your router varies depending on the model. For instance, the Connectivity and Wireless tabs on the Linksys WRT1900AC router I use have the settings (not the Security tab, as you might think). If your router is dual-band, you must set passwords for 2.4GHz and 5GHz networks. Although you won't be any more secure if you make them different, you'll be happy if you use the same password. The password should be rather complicated, using a combination of letters, numbers, and special characters. Again, unless you have a strong recall, you'll find a password manager incredibly helpful in this situation. Generating a password for any guest networks you manage would be best.
Step 7: Enjoy your WiFi Network
If everything goes as planned, you should be able to use the WiFi password you just established to access your new WiFi network. Please make the most of any guest network available on your router: These often let your visitors browse the internet but keep them cut off from the rest of your network, including the PCs and storage units linked to it.