Hover condition for a:before and a:after in CSS
In CSS, :after and :before are used to add content after and before the element.
The CSS pseudo-class is used to add some styling effect to the webpage. We can change or add a style when we hover over the button.
If we want to apply this styling effect, we must use the following syntax:
Syntax-
a:hover::before {
    // CSS Property
}
a:hover::after {
    // CSS Property
}
Example 1
<!DOCTYPE html>
<html>
<head>
<title>
 :hover condition for a:before
 and a:after
</title>
<!-- Style to add hover condition -->
<style>
 a:hover::before {
 content: "Before -";
 }
 a:hover::after {
 content: "-after";
 }
</style>
</head>
<body>
<a href="#"> javaTpoint </a>
</body>
</html>
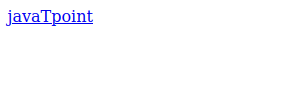
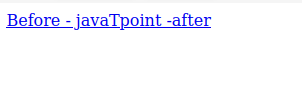
Output-
Before mouse pointer-
After mouse pointer-
Example 2
<!DOCTYPE html>
<html>
<head>
 <title>
 :hover condition for a:before
 and a:after
 </title>

 <style>
 a:hover::before {
 content: "Before -";
 background-color: red;
 }
 a:hover::after{
 content: "-after";
 background-color: red;
 }
 </style>
</head>
<body>
 <a href="#"> javaTpoint </a>
</body>
</html>
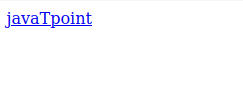
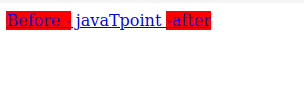
Output-
Before mouse pointer-
After mouse pointer-
Example 3
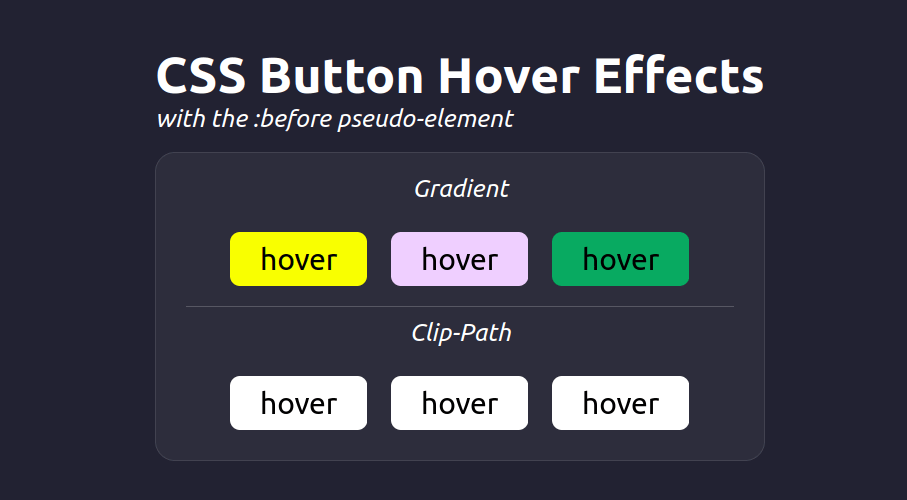
This effect is used before the hover effect.
HTML code-
<html>
<body>
 <div>
 <h1>CSS Button Hover Effects</h1>
 <p>with the :before pseudo-element</p>
 <div class="container">
 <p>Gradient</p>
 <button class="button-one gradient">Hover</button>
 <button class="button-two gradient">Hover</button>
 <button class="button-three gradient">Hover</button>
 <hr>
 <p>Clip-Path</p>
 <button class="button-four clip-path">Hover</button>
 <button class="button-five clip-path">Hover</button>
 <button class="button-six clip-path">Hover</button>
 </div>
 </div>
</body>
</html>
CSS code-
button {
font-size: 30px;
padding: 10px 30px;
margin: 10px;
border: 0;
cursor: pointer;
color: black;
text-transform: lowercase;
border-radius: 10px;
display: inline-block;
overflow: hidden;
transition: all 0.4s cubic-bezier(.86, .01, .15, .99);
}


button::before {
content: "";
position: absolute;
z-index: -1;
top: 0px;
left: 0px;
right: 0px;
bottom: 0;
}


button.gradient:hover {
color: white;
box-shadow: 0 5px 35px rgba(0, 0, 0, 0.6);
transform: translateY(-5px);
}


/************************************
GRADIENT BUTTONS


Button One


*/


.button-one {
background-color: #f9ff00;
transform: translateY(0);
}


.button-one::before {
background: linear-gradient(to right, #f9ff00, #00ff00);
-webkit-transform: scaleY(0);
transform: scaleX(0);
-webkit-transform-origin: 50% 100%;
transform-origin: 100% 0%;
transition: 0.4s cubic-bezier(.86, .01, .15, .99);
}


.button-one:hover::before {
transform: scaleX(1.1) scaleY(1.1);
}


.button-one:hover {
color: #333;
}


/* Button Two */


.button-two {
background: #efcfff;
transform: perspective(1px) translateZ(0);
transition: 0.4s cubic-bezier(.86, .01, .15, .99);
}


.button-two:before {
background: linear-gradient(to right, #efcfff, #af6fff, #efcfff);
transform: scaleX(0);
opacity: 0;
transform-origin: 50% 50%;
transition: 0.4s cubic-bezier(.86, .01, .15, .99);
}


.button-two:hover:before {
transform: scaleX(1) scaleY(1);
opacity: 1;
}


/*Button Three*/


.button-three {
-webkit-transform: perspective(1px) translateZ(0);
background: #08aa61;
transform: perspective(1px) translateZ(0);
position: relative;
transition-timing-function: cubic-bezier(.86, .01, .15, .99);
transition-duration: 0.4ss;
}


.button-three:before {
background: linear-gradient(to bottom, #88daa1, #08aa61);
transform: scaleY(0);
transform-origin: 0% 0%;
transition: 0.4s cubic-bezier(.86, .01, .15, .99);
}


.button-three:hover:before {
-webkit-transform: scaleY(1);
transform: scaleY(1);
}


/****************
CLIP-PATH EFFECTS


Button Four*/


.button-four {
background: #fff;
transform: perspective(1px) translateZ(0);
color: black;
transition: 0.4s;
}


.button-four::before {
background: rgb(255, 90, 20);
clip-path: inset(0 100% 0 0);
opacity: 1;
transition: 0.4s;
}


.button-four:hover::before {
clip-path: inset(0 0 0 0);
}


.button-four:hover {
color: white;
box-shadow: 0 0 0 10px rgba(250, 250, 250, 0.1)
}


/*Button Five*/


.button-five {
background: white;
color: black;
transform: perspective(1px) translateZ(0);
transition: 0.4s;
}


.button-five::before {
background: rgb(20, 120, 255);
clip-path: polygon(50% 0, 50% 0, 50% 50%, 50% 100%, 50% 100%, 50% 50%);
opacity: 1;
transition: 0.4s;
}


.button-five:hover::before {
clip-path: polygon(25% -70%, 75% -70%, 120% 50%, 75% 170%, 25% 170%, -20% 50%);
}


.button-five:hover {
color: white;
box-shadow: 0 0 0 10px rgba(250, 250, 250, 0.1)
}


/*Button Six*/


.button-six {
background: white;
color: black;
transition: 0.4s;
transform: perspective(1px) translateZ(0);
}


.button-six:hover {
color: white;
box-shadow: 0 0 0 10px rgba(250, 250, 250, 0.1)
}


.button-six::before {
clip-path: circle(0.5% at 50% 50%);
background: #9900cc;
transition: 0.4s;
opacity: 1;
}


.button-six:hover::before {
clip-path: circle(100% at 50% 50%);
}


/* just some extra styles */


* {
margin: 0;
color: white;
}


body {
background: #222232;
height: 100vh;
width: 100vw;
display: flex;
flex-direction: column;
justify-content: space-evenly;
align-items: center;
font-family: -apple-system, system-ui, sans-serif;
}


div.container {
padding: 20px;
border-radius: 20px;
background: rgba(255, 255, 255, 0.05);
border: 1px solid rgba(255, 255, 255, 0.1)
}


.container {
text-align: center;
}


h1 {
font-size: 50px;
}


p {
font-size: 25px;
font-style: italic;
border-radius: 20px;
margin-bottom: 20px;
}


hr {
border: 0;
background: rgba(255, 255, 255, 0.2);
margin: 10px;
height: 1px;
}
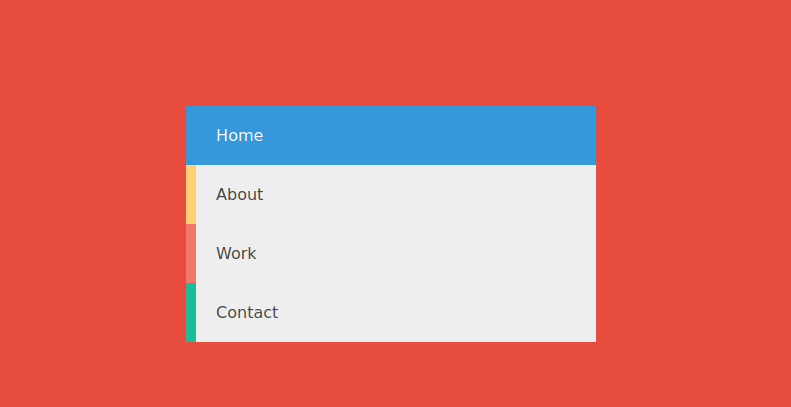
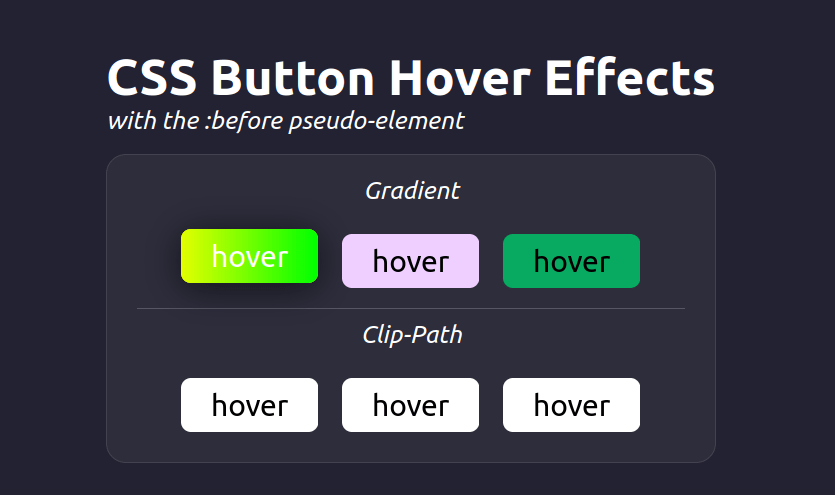
Output
Before mouse pointer-
After mouse pointer-
Example 4
HTML code-
<nav>
<ul>
<li><a href="">Home</a></li>
<li><a href="">About</a></li>
<li><a href="">Work</a></li>
<li><a href="">Contact</a></li>
</ul>
</nav>
CSS code-
body{
margin: 0px;
padding: 0px;
background: #e74c3c;
font-family: 'Lato', sans-serif;
}


nav{
float: none;
clear: both;
width: 30%;
margin: 10% auto;
background: #eee;
}


nav ul {
list-style: none;
margin: 0px;
padding: 0px;
}


nav li{
float: none;
width: 100%;
}


nav li a{
display: block;
width: 100%;
padding: 20px;
border-left: 5px solid;
position: relative;
z-index: 2;
text-decoration: none;
color: #444;
box-sizing: border-box;
-moz-box-sizing: border-box;
-webkit-box-sizing: border-box;
}


nav li a:hover{ border-bottom: 0px; color: #fff;}
nav li:first-child a{ border-left: 10px solid #3498db; }
nav li:nth-child(2) a{ border-left: 10px solid #ffd071; }
nav li:nth-child(3) a{ border-left: 10px solid #f0776c; }
nav li:last-child a{ border-left: 10px solid #1abc9c; }


nav li a:after {
content: "";
height: 100%;
left: 0;
top: 0;
width: 0px;
position: absolute;
transition: all 0.3s ease 0s;
-webkit-transition: all 0.3s ease 0s;
z-index: -1;
}


nav li a:hover:after{ width: 100%; }
nav li:first-child a:after{ background: #3498db; }
nav li:nth-child(2) a:after{ background: #ffd071; }
nav li:nth-child(3) a:after{ background: #f0776c; }
nav li:last-child a:after{ background: #1abc9c; }


@font-face {
font-family: 'Lato';
font-style: normal;
font-weight: 100;
src: local('Lato Hairline'), local('Lato-Hairline'), url(http://themes.googleusercontent.com/static/fonts/lato/v6/boeCNmOCCh-EWFLSfVffDg.woff) format('woff');
}
@font-face {
font-family: 'Lato';
font-style: normal;
font-weight: 300;
src: local('Lato Light'), local('Lato-Light'), url(http://themes.googleusercontent.com/static/fonts/lato/v6/KT3KS9Aol4WfR6Vas8kNcg.woff) format('woff');
}
@font-face {
font-family: 'Lato';
font-style: normal;
font-weight: 400;
src: local('Lato Regular'), local('Lato-Regular'), url(http://themes.googleusercontent.com/static/fonts/lato/v6/9k-RPmcnxYEPm8CNFsH2gg.woff) format('woff');
}
@font-face {
font-family: 'Lato';
font-style: normal;
font-weight: 700;
src: local('Lato Bold'), local('Lato-Bold'), url(http://themes.googleusercontent.com/static/fonts/lato/v6/wkfQbvfT_02e2IWO3yYueQ.woff) format('woff');
}
Output-
Before mouse pointer-
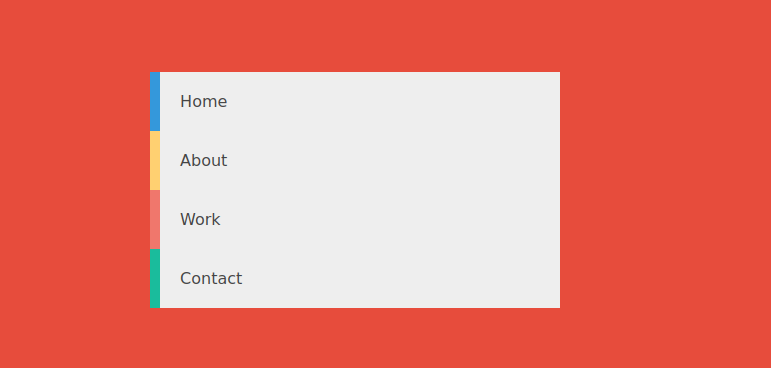
After mouse pointer-