Python MongoDB Tutorial
An Introduction to MongoDB
MongoDB is a document-oriented database application. It is an Open-source and platform-independent program. MongoDB is similar to few NoSQL databases that store the data in the documents with the help of JSON structure. This ability enhances the data flexibility and requires no schema.
Some significant features of MongoDB are shown below:
- MongoDB has extensive support from multiple standard types of query, such as comparison (<, >), matching (==) or even regular expression.
- MongoDB allows the users to store any type of data virtually. The data can be structured, partially structured or even polymorphic.
- MongoDB also allows the users to scale up and handling queries by adding more machines.
- MongoDB provides higher flexibility and agility that enables users to develop the applications rapidly.
- MongoDB is a document-based database that indicates that the users can store all the data related to the model in a single document.
MongoDB allows the users to change their database schema easily.
MongoDB also provides many relational database functionalities, such as indexing.
Apart from the above-stated features of MongoDB, there are some more tools and qualities relating to the operational side of MongoDB that we cannot find in any other database systems. These tools and qualities are shown below:
- Whether we need complete clusters of independent servers or a standalone server, MongoDB is as scalable as per our requirements.
- MongoDB also delivers the load balancing support by shifting the data automatically across many shards.
- MongoDB also provides automatic failover support. For example, if the primary server shuts down, a new primary server will start working automatically.
- The MongoDB Management Service, also known as MMS, is a pretty good web tool that offers the users the ability of machine tracking.
- MongoDB also offers the memory-mapped files that will save unnecessary usage of RAM, unlike Relational databases.
By taking advantage of the indexing features, we can store much of the data in memory for quick retrieval. Moreover, Mongo caches some bit of data even without indexing on particular document keys with the help of the Least Recently Used (LRU) method.
While at first, Mongo may look like a perfect solution to many database problems; however, there are some disadvantages. One of the common disadvantages of Mongo is that it lacks ACID transaction support, which implies that Mongo has limited support for ACID transactions, but not in all situations. ACID transactions are supported at the single-document level, which is mostly all transactions take place. But, because of distributed nature of Mongo, transactions related to multiple documents are not supported.
Mongo also lacks the native joins support, which we must do manually and thus, the whole process becomes slow. Documents are considered all-encompassing, which implies that they should not require to reference other documents. In reality, this does not often work as most of the data is relational by nature. Hence, it becomes a topic of argument that Mongo should be utilized as a Complementary database to a SQL DB; however, as we start using MongoDB, we will discover that it is not essentially accurate.
Understanding PyMongo
Since we have discussed a lot about MongoDB, now let’s understand how we can utilize the same with Python. In order to fire Python up with MongoDB, the developers of Mongo published the official driver called PyMongo.
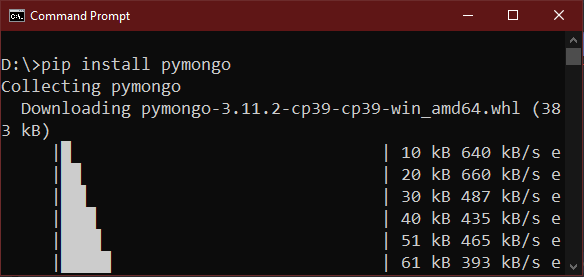
Let’s start the tutorial with the installation procedure of PyMongo in the virtual environment. We will be using the pip to make things a bit easier.
In order to install PyMongo, we have to type the following syntax on a terminal or command shell.
$ pip install pymongo
Once the installation is completed, we can try running the following command on a Python console.
import pymongo
If the above syntax works without raising an exception, then the installation has worked properly. However, we need to reinstall the package again carefully.
Now, we have to install the actual MongoDB database.
Installing MongoDB database
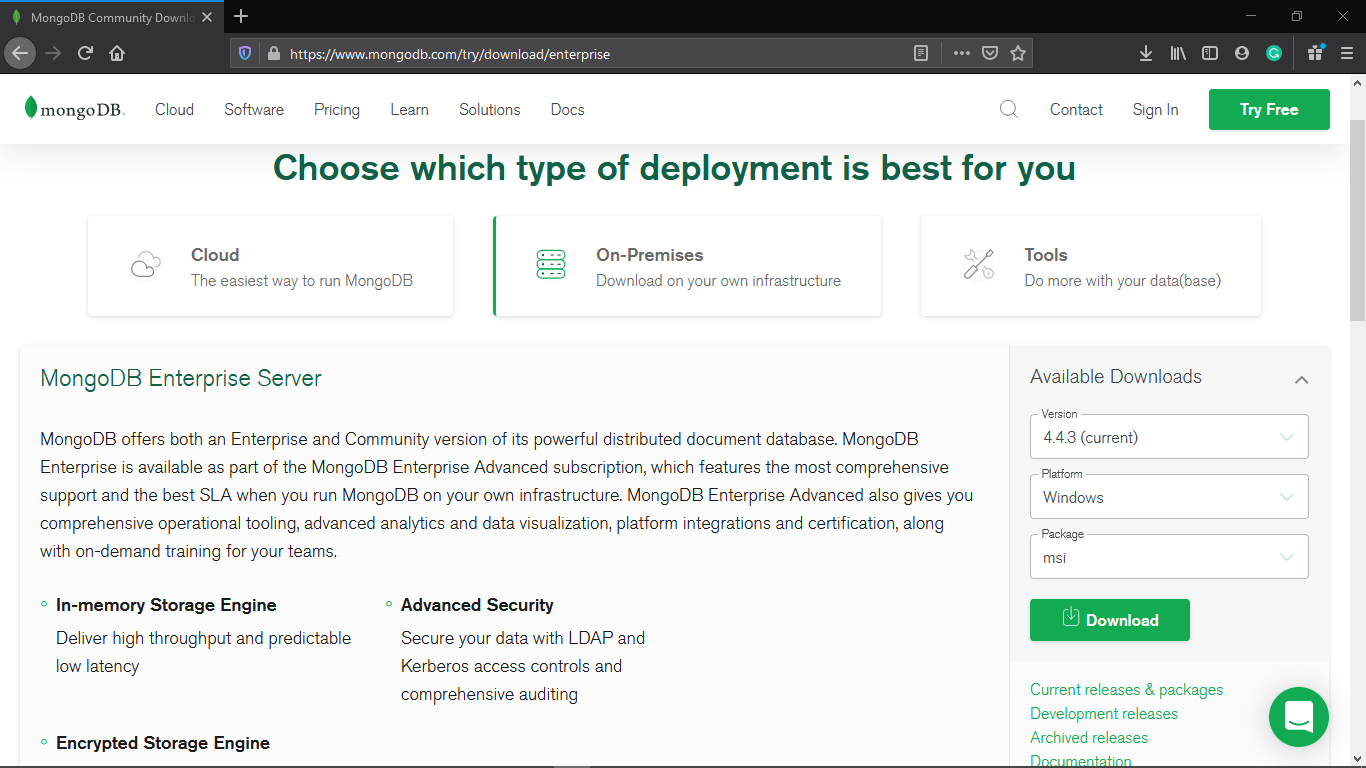
Note: The Installation procedure shown here is for Windows Operating System. In order to install the MongoDB database in Operating System other than Windows, one can check out the official site link: https://www.mongodb.com/try/download
Consider the following steps in order to install MongoDB in Windows Operating System:
STEP 1: Download the .msi setup file from the link provided above.
STEP 2: Once the downloading is completed, open the setup file to continue the installation.
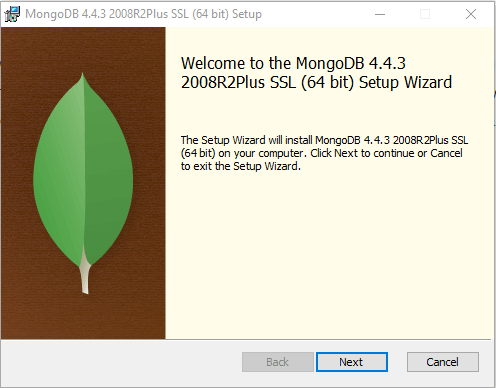
STEP 3: Click on Next to continue. Read and Accept the terms of the End-User License and click on Next to continue.

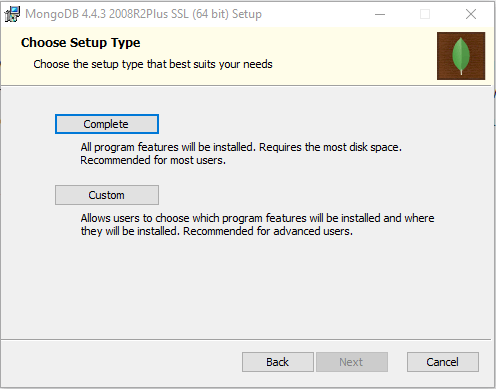
STEP 4: Now, we have to specify the setup type, which means that we can install a complete setup or a custom one. We will be installing the complete setup.
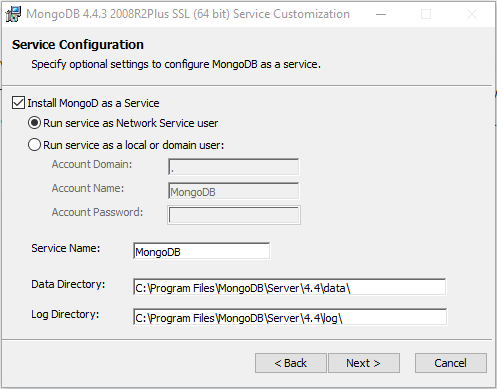
STEP 5: Now, configure the service, choose the path of installation and click on Next to continue.
STEP 6: This is an optional step to install MongoDB compass. One can tick the checkbox shown in the bottom left corner and click on Next to continue.

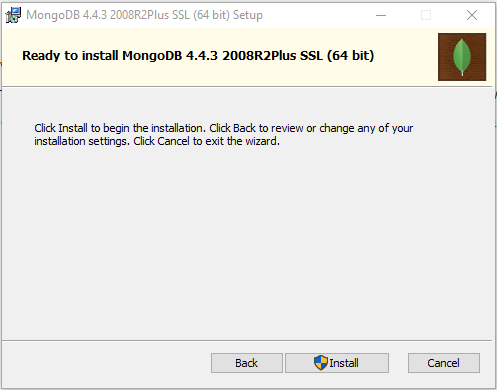
STEP 7: Once the configuration is done, click on Install to continue the installation.
STEP 8: Once the installation is completed, click on Finish to exit the Setup Wizard.
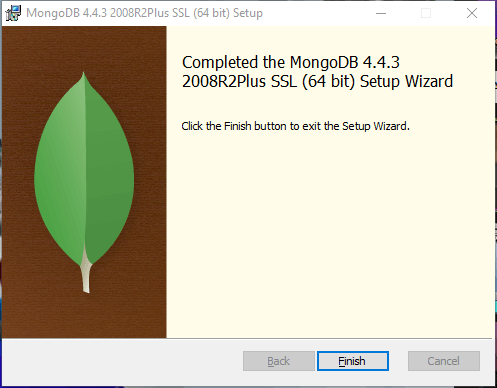
The MongoDB database has been installed successfully.
Now, we are ready to work with the MongoDB database. Let’s begin with the fundamentals of PyMongo.
Creating a database in Python
In order to establish a connection and create a database in Python, we will be using the MongoClient object. The MongoClient object is imported from the PyMongo package in order to connect to MongoDB, and we can have direct access to the database that we want to create in attribute passion.
Let us consider the following example to create a database in MongoDB.
Example:
 from pymongo import MongoClient
 # Creating a pymongo client
 my_Client = MongoClient('mongodb://localhost:27017/')
 # Getting the instance of database
 my_dBase = my_Client.database
 print("The Database has been created...")
 # Verification
 print("Databases list after creating a new one")
 print(my_Client.list_database_names())
Output:
 The Database has been created...
 Databases list after creating a new one
 ['admin', 'config', 'database', 'local']
In the above example, we have imported the MongoClient object from the PyMongo package. We have then created a client of PyMongo and established a connection. Later, we have instantiated a database for the client and print a message to the user. At last, we have listed out the database names available in the client.
Note: If the database is empty, it does not get listed in MongoDB. So, if we are creating a database for the first time, it is necessary to create a collection and insert some content before verifying the existence of the database.
Creating a collection in Python
In order to create a collection in Python using the PyMongo package, we have to use the instance of the database, specifying the name for the collection we wanted to create.
Let us consider the following example demonstrating the method to create a collection.
Example:
 from pymongo import MongoClient
 # Creating a pymongo client
 my_Client = MongoClient('mongodb://localhost:27017/')
 # Getting the instance of database
 my_dBase = my_Client.database
 # creating a collection
 my_Col = my_dBase["Employees"]
 print("The Database has been created...")
Output:
The Database has been created...
In the above example, we have followed the same procedure as in the previous one. However, we have created a collection Employee for the instance my_dBase. This method will create the collection in MongoDB if it does not exist.
Note: We cannot create an empty collection in MongoDB.
Once the program is executed, MongoDB waits until data is inserted before creating a collection.
Thus, let us understand how to insert or add data to the database.
Inserting Data into Collection
In order to add data or records, also known as a document in MongoDB, into a collection, we have to use the insert_one() method. The insert_one() method is a dictionary holding each entry's name and value as the first parameter in the document we would like to add.
Let us consider the following example to insert an entry or record in the "Employees" collection.
Example:
 from pymongo import MongoClient
 # Creating a pymongo client
 my_Client = MongoClient('mongodb://localhost:27017/')
 # Getting the instance of database
 my_dBase = my_Client.database
 # creating a collection
 my_Col = my_dBase["Employees"]
 # Defining a dictionary
 my_dict = {"First Name" : "Jake", "Last Name" : "Thompson"}
 # Inserting document into collection
 rec = my_Col.insert_one(my_dict)
 print("The Database has been created...")
Output:
The Database has been created…
In the above example, we have defined a dictionary and used the insert_one() method to insert the dictionary's key-value pairs into a collection.
As an Output, the document has been added to the collection. The insert_one() method returns an InsertOneResult object, containing the inserted_id property holding the identification number for the document added.
Let us look at the following example to understand the above statement.
Example:
 from pymongo import MongoClient
 # Creating a pymongo client
 my_Client = MongoClient('mongodb://localhost:27017/')
 # Getting the instance of database
 my_dBase = my_Client.database
 # creating a collection
 my_Col = my_dBase["Employees"]
 # Defining a dictionary
 my_dict = {"First Name" : "Jake", "Last Name" : "Thompson"}
 # Inserting document into collection
 rec = my_Col.insert_one(my_dict)
 print("The Database has been created...")
 # printing the id of the document
 print("The Document ID is", rec.inserted_id)
Output:
 The Database has been created...
 The Document ID is 60195edd97e82c70714ca6ac
In the above example, we have used the inserted_id property to return a unique id for the document.
Note: We can also specify an _id field in MongoDB for the document. If no ID has been specified in the _id field, then MongoDB will insert one for the user and assign a unique id to each document.
Moreover, we can insert multiple documents into a collection in MongoDB by using the insert_many() method. The insert_many() method takes a list of dictionaries with the data as the first parameter we wanted to add.
Let us see an example based on the working of the method.
Example:
 from pymongo import MongoClient
 # Creating a pymongo client
 my_Client = MongoClient('mongodb://localhost:27017/')
 # Getting the instance of database
 my_dBase = my_Client.database
 # creating a collection
 my_Col = my_dBase["Employees"]
 # Defining a list of dictionaries
 my_dict = [
     {"First Name" : "Jake", "Last Name" : "Thompson"},
     {"First Name" : "Olivia", "Last Name" : "Smith"},
     {"First Name" : "James", "Last Name" : "Wilson"},
     {"First Name" : "Ella", "Last Name" : "Taylor"},
     {"First Name" : "Harper", "Last Name" : "Davis"},
     {"First Name" : "Hannah", "Last Name" : "Brown"},
     {"First Name" : "Ross", "Last Name" : "Murphy"},
     {"First Name" : "Chandler", "Last Name" : "Bing"},
     {"First Name" : "Monica", "Last Name" : "Walsh"},
     {"First Name" : "Lisa", "Last Name" : "Jones"},
 ]
 # Inserting documents into collection
 rec = my_Col.insert_many(my_dict)
 print("The Database has been created...")
 # printing the ids of the document
 print(rec.inserted_ids)
Output:
The Database has been created...
[ObjectId('601a697e6b62feb4656f61e0'), ObjectId('601a697e6b62feb4656f61e1'), ObjectId('601a697e6b62feb4656f61e2'), ObjectId('601a697e6b62feb4656f61e3'), ObjectId('601a697e6b62feb4656f61e4'), ObjectId('601a697e6b62feb4656f61e5'), ObjectId('601a697e6b62feb4656f61e6'), ObjectId('601a697e6b62feb4656f61e7'), ObjectId('601a697e6b62feb4656f61e8'), ObjectId('601a697e6b62feb4656f61e9')]
In the above example, we have used the insert_many() method instead of using the insert_one() method. And as a result, the program has returned an InsertManyResult object with inserted_ids holding the IDs for the documents added.
We can also specify the IDs to the document. This can be understood in the following example.
Example:
 from pymongo import MongoClient
 # Creating a pymongo client
 my_Client = MongoClient('mongodb://localhost:27017/')
 # Getting the instance of database
 my_dBase = my_Client.database
 # creating a collection
 my_Col = my_dBase["Employees"]
 # Defining a list of dictionaries
 my_dict = [
     {"_id" : 1, "First Name" : "Jake", "Last Name" : "Thompson"},
     {"_id" : 2, "First Name" : "Olivia", "Last Name" : "Smith"},
     {"_id" : 3, "First Name" : "James", "Last Name" : "Wilson"},
     {"_id" : 4, "First Name" : "Ella", "Last Name" : "Taylor"},
     {"_id" : 5, "First Name" : "Harper", "Last Name" : "Davis"},
     {"_id" : 6, "First Name" : "Hannah", "Last Name" : "Brown"},
     {"_id" : 7, "First Name" : "Ross", "Last Name" : "Murphy"},
     {"_id" : 8, "First Name" : "Chandler", "Last Name" : "Bing"},
 ]
 # Inserting documents into collection
 rec = my_Col.insert_many(my_dict)
 print("The Database has been created...")
 # printing the ids of the document
 print(rec.inserted_ids)
Output:
 The Database has been created...
 [1, 2, 3, 4, 5, 6, 7, 8]
In the above example, as we can see, we have inserted another key-value pair to each dictionary in the list. This key-value pair contains the _id field and a unique assigned to each dictionary.
Note: The value of ID must be unique. Two documents in a database cannot have the same _id field while inserting them into a collection.
Retrieving Documents using Python
In order to retrieve documents in MongoDB, one has to use the find_one() method. The find_one() method helps in returning the first occurrence in the selection. Moreover, we can also use the find() method to select data from the collection. This method returns all occurrences in the selection.
The find() method takes a query object as the first parameter. If the query object is empty, it will select all documents in the collection.
Let us consider the following example demonstrating the same.
Example:
 from pymongo import MongoClient
 # Creating a pymongo client
 my_Client = MongoClient('mongodb://localhost:27017/')
 # Getting the instance of database
 my_dBase = my_Client.database
 # creating a collection
 my_Col = my_dBase["Employees"]
 print("The Database has been created...")
 # Retrieving document(s) using the find_one() method
 print("\nDetails of an Employee:")
 employee_one = my_Col.find_one()
 print(employee_one)
 # Retrieving document(s) using the find() method
 print("\nDetails of all Employees:")
 for emp in my_Col.find():
     print(emp)
Output:
 The Database has been created...
 Details of an Employee:
 {'_id': ObjectId('6019568b0970eea2d85aaad7'), 'First Name': 'Jake', 'Last Name': 'Thompson'}
 Details of all Employees:
 {'_id': ObjectId('6019568b0970eea2d85aaad7'), 'First Name': 'Jake', 'Last Name': 'Thompson'}
 {'_id': ObjectId('601a6949f9c30ddf51bece7c'), 'First Name': 'Olivia', 'Last Name': 'Smith'}
 {'_id': ObjectId('601a6949f9c30ddf51bece7d'), 'First Name': 'James', 'Last Name': 'Wilson'}
 {'_id': ObjectId('601a6949f9c30ddf51bece7e'), 'First Name': 'Ella', 'Last Name': 'Taylor'}
 {'_id': ObjectId('601a6949f9c30ddf51bece7f'), 'First Name': 'Harper', 'Last Name': 'Davis'}
 {'_id': ObjectId('601a6949f9c30ddf51bece80'), 'First Name': 'Hannah', 'Last Name': 'Brown'}
 {'_id': ObjectId('601a6949f9c30ddf51bece81'), 'First Name': 'Ross', 'Last Name': 'Murphy'}
 {'_id': ObjectId('601a6949f9c30ddf51bece82'), 'First Name': 'Chandler', 'Last Name': 'Bing'}
 {'_id': ObjectId('601a6949f9c30ddf51bece83'), 'First Name': 'Monica', 'Last Name': 'Walsh'}
 {'_id': ObjectId('601a6949f9c30ddf51bece84'), 'First Name': 'Lisa', 'Last Name': 'Jones'}
In the above example, we have used the find_one() and find() method to retrieve the document(s) from the collection.
Sorting the Output using Python
In order to sort the output in ascending order or descending order, we have to use the sort() method. The sort() method takes two parameters, one defines the fieldname, and the other defines the direction of order.
If the second parameter is not defined, the order is Ascending by default.
The syntax for the sort() method is shown below:
Ascending Order: sort(fieldname, 1)
Descending Order: sort(fieldname, -1)
Let us consider the following example demonstrating the sorting of the Output in Ascending and Descending order.
Example:
 from pymongo import MongoClient
 # Creating a pymongo client
 my_Client = MongoClient('mongodb://localhost:27017/')
 # Getting the instance of database
 my_dBase = my_Client.database
 # Creating a collection
 my_Col = my_dBase["Employees"]
 # Sorting the output in Ascending Order by First Name
 print("Ascending Order:")
 my_rec = my_Col.find().sort("First Name")
 for i in my_rec:
     print(i)
 # Sorting the output in Descending Order by First Name
 print("\nDescending Order:")
 my_rec = my_Col.find().sort("First Name", -1)
 for i in my_rec:
     print(i)
Output:
 Ascending Order:
 {'_id': 8, 'First Name': 'Chandler', 'Last Name': 'Bing'}
 {'_id': 4, 'First Name': 'Ella', 'Last Name': 'Taylor'}
 {'_id': 6, 'First Name': 'Hannah', 'Last Name': 'Brown'}
 {'_id': 5, 'First Name': 'Harper', 'Last Name': 'Davis'}
 {'_id': 1, 'First Name': 'Jake', 'Last Name': 'Thompson'}
 {'_id': 3, 'First Name': 'James', 'Last Name': 'Wilson'}
 {'_id': 2, 'First Name': 'Olivia', 'Last Name': 'Smith'}
 {'_id': 7, 'First Name': 'Ross', 'Last Name': 'Murphy'}
 Descending Order:
 {'_id': 7, 'First Name': 'Ross', 'Last Name': 'Murphy'}
 {'_id': 2, 'First Name': 'Olivia', 'Last Name': 'Smith'}
 {'_id': 3, 'First Name': 'James', 'Last Name': 'Wilson'}
 {'_id': 1, 'First Name': 'Jake', 'Last Name': 'Thompson'}
 {'_id': 5, 'First Name': 'Harper', 'Last Name': 'Davis'}
 {'_id': 6, 'First Name': 'Hannah', 'Last Name': 'Brown'}
 {'_id': 4, 'First Name': 'Ella', 'Last Name': 'Taylor'}
 {'_id': 8, 'First Name': 'Chandler', 'Last Name': 'Bing'}
In the above example, we have used the find() method to retrieve the documents from the collection and use the sort() method to arrange them in ascending and descending order. And as a result, we have sorted the data by the First name.
Deleting a Document using Python
To delete one document, we have to use the delete_one() method. The delete_one() method takes a query object as the first parameter that defines the document to be deleted.
Note: If in case the query finds multiple documents, only the first occurrence will be deleted.
Let us consider the following example to delete the document with the Last Name “Davis”.
Example:
 from pymongo import MongoClient
 # Creating a pymongo client
 my_Client = MongoClient('mongodb://localhost:27017/')
 # Getting the instance of database
 my_dBase = my_Client.database
 # Creating a collection
 my_Col = my_dBase["Employees"]
 # Deleting a document with the Last Name "Davis"
 my_query = {"Last Name" : "Davis"}
 my_Col.delete_one(my_query)
 for emp in my_Col.find():
     print(emp)
Output:
 {'_id': 1, 'First Name': 'Jake', 'Last Name': 'Thompson'}
 {'_id': 2, 'First Name': 'Olivia', 'Last Name': 'Smith'}
 {'_id': 3, 'First Name': 'James', 'Last Name': 'Wilson'}
 {'_id': 4, 'First Name': 'Ella', 'Last Name': 'Taylor'}
 {'_id': 6, 'First Name': 'Hannah', 'Last Name': 'Brown'}
 {'_id': 7, 'First Name': 'Ross', 'Last Name': 'Murphy'}
 {'_id': 8, 'First Name': 'Chandler', 'Last Name': 'Bing'}
In the above example, we have defined a query object as my_query, indicating the Last Name equals to Davis. Then, we have used the delete_one() method and place that query object in it. And as a result, the program searches the asked document's collection and deletes its first occurrence.
We can also delete multiple documents and all the documents using the delete_many() method. The delete_many() method also takes a query object as its first parameter that defines the documents to be deleted.
However, if we do not enter any method parameter, it will delete all the documents from the collection.
Let us consider one more example demonstrating the above statement.
Example:
 from pymongo import MongoClient
 # Creating a pymongo client
 my_Client = MongoClient('mongodb://localhost:27017/')
 # Getting the instance of database
 my_dBase = my_Client.database
 # Creating a collection
 my_Col = my_dBase["Employees"]
 # Deleting multiple documents with J as the first letter of their First Name
 my_query = {"First Name" : {"$regex" : "^J"}}
 emp = my_Col.delete_many(my_query)
 print(emp.deleted_count, "documents are deleted.")
Output:
2 documents are deleted.
In the above example, we have again defined another query object as my_query, indicating the First Name must start with J. We have then used the delete_many() method to remove all the asked query object's occurrence. And at the end, we have printed the total count of deleted documents.
Deleting a Collection using Python
In order to delete a table or collection as known in MongoDB, we have to use the drop() method.
Let us consider the following example demonstrating the same.
Example:
 from pymongo import MongoClient
 # Creating a pymongo client
 my_Client = MongoClient('mongodb://localhost:27017/')
 # Getting the instance of database
 my_dBase = my_Client.database
 # Creating a collection
 my_Col = my_dBase["Employees"]
 # Deleting a Collection
 my_Col.drop()
In the above example, we have used the drop() method to delete the collection my_Col. Thus, as a result, it will return true if the collection has been dropped successfully, else false if the collection does not exist.