How to build an Auto Clicker using Python?
What is an Auto Clicker?
An Auto Clicker is software that is used for automating the click of a mouse on any particular element on the computer screen and controlling the speed of the number of clicks. The auto clickers can be activated to repeat the input those were generated with the help of different current settings or were recorded earlier.
The auto clickers can be seen as a program that energizes the mouse clicking. These are also known as Automation Software Programs. A generic auto clicker has a wider scope as compared to a custom-made auto clicker. Its working depends on the type of software it is working with, i.e., sometimes due to limitations of the software, the number of clicks is not delivered according to the value entered.
Applications of an Auto Clicker
- Used in software testing: A task like software testing can be a boring and time taking task for a human being due to repeated testing of multiple UI elements. Here come the auto clickers and macros in action that easily test the elements of the software.
- Used in Data Entry Automation: In tasks like data entry, multiple operations have to be repeated, so to automate the process, copy the sequence of operations, save time and make minimum possible errors, an auto clicker is used. But auto clicker also has its limitations; it cannot be used in case of complex data entry operations.
- Used in gaming: Some of the gamers also use the auto clickers for conducting multiple gaming actions such as shooting, running, jumping, healing, etc. Some of the multiplayer games do not allow the use of auto clickers, as they may result in giving its user an unfair advantage over other competitors.
Hardware with auto click function
We all know auto clickers as software that is used to emulate the clicks of the mouse. But new devices having this function are in the market too. When you buy a mouse for gaming purposes, you may observe some additional buttons in it, those are placed to set to auto-click according to the user’s preference. And one more device comes with a similar function; we know it by the name-> “Joystick”. Some of them come with an auto-fire function and it can be adjusted according to the user’s need to increase the rate of fire and the clicking speed too.
Auto Clicker development tools available in different Operating Systems
Windows
- AutoIt
- iMacros
- Expect
- Macro Express
- thinBasic
macOS
- Automator
Linux
- AutoKey
Web-based
- Bookmarket
- iMacros
Advantages of using an Auto Clicker
- These reduce your large number of boring repetitive tasks that have to be taken care of every day. As a result, we can save a lot of time and can do something productive out of that time.
- Most of the time, we carry our devices with us to complete some tasks while travelling and many of us like working while travelling or while having a coffee. Here an auto clicker plays an important role by reducing repetitive tasks, thus giving you more time to do something more important and useful.
- One of the major advantages of using an auto clicker is that it saves you from multiple distractions, i.e., unwanted advertisements or links. You can simply design it in a manner to directly click at the required position. This not only saves you from distractions, but it also saves your precious time.
- One of the major advantages of using an auto clicker is that it helps you in achieving a more efficient and faster setup.
Approach to be followed to build an auto clicker
To build a simple and efficient auto clicker, we will use the pynput module which is a cross-platform module. It will help in monitoring both the screen and keyboard at the same time. This module also helps us in checking for mouse events.
To install this module, we have to run the following command in the command prompt:
pip install pynput
To verify the successful installation of the pynput module, you just need to open IDLE on your system, you can use both -> “Command Prompt” or “Python Shell”. After this run the “import pynput” command and if you get zero errors after executing this command that implies that it has been installed successfully in your system.
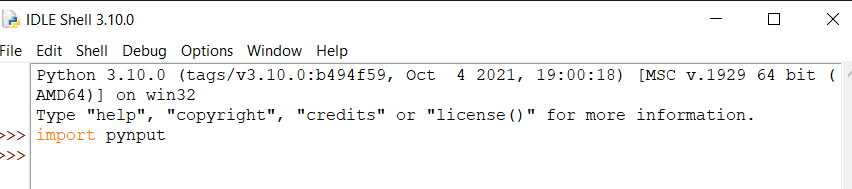
Verifying installation of the pynput module
Implementation of code
We will be using the following steps to build an auto clicker using Python:
Step 1: We will start with importing threading and time, we will import KeyCode and Listener from the pynput.keyboard module, and Controller and Button from the pynput.mouse module.
# Importing threading and time
import threadingas thr
import timeas tm
# The pynput.keyboard module is used to observe events of
# a keyboard to control initialization and stopping of the auto clicker
frompynput.keyboard importListener, KeyCode

frompynput.mouse importController, Button
Step 2: Now we will create the following four variables:
- Delay: This will specify the time taken (in seconds) between each click.
- Btn: This variable is used to control the direction of our click. Button.right | Button.left | Button.middle.
- stt_stp_key: This variable is used to start and stop of the click when we will be running the program to execute the auto clicker. This variable has to be either from a key set or class using KeyCode.
- ext_key: This variable is used to stop the program and terminate the execution of the auto clicker. This variable has to be either from a key set or class using KeyCode.
# Creating the variables
# to control the working of the auto clicker
Delay =0.001
Btn =Button.right
stt_stp_key =KeyCode(char='a')
ext_key =KeyCode(char='b')
Step 3: Now we will create a class that will extend threading.Thread. Then we will pass Btn and Delay to the class having two flags that will verify the successful execution of the program.
# To control clicks we create a class “Click Mouse” and use
# threading.Thread
classClkMse(threading.Thread):

  # We pass Btn and Delay in the class to check for
  # the execution of auto clicker
    def__init__(self, Delay, Btn):
        super(ClkMse, self).__init__()
        self.Delay =Delay
        self.Btn =Btn
        self.running =False
        self.program_running =True
Step 4: After creating the class, we will add methods that will be used to control threads independently.
defstt_clkng(self):
        self.running =True

defstp_clkg(self):
        self.running =False

defexit(self):
        self.stp_clkng()
        self.program_running =False
Step 5: When the thread starts, we will create a method; the program_running repeats itself continuously until the value is true, and along with that it also generates another loop within itself, this new loop checks whether running is set to true or not. While we are inside both the loops, the clicker will click on the set button and then it will sleep for the set delay time.
# The method to check the value and repeat itself
# till it finds the value as true and another loop will verify
# whether it is set to true or not,
# And for the mouse click it is set to Delay and Btn
defrun(self):
    whileself.program_running:
        whileself.running:
            mouse.click(self.Btn)
            time.sleep(self.Delay)
        time.sleep(0.1)
Step 6: Then, we will create an instance to create the mouse controller, then we will create ClickMouse thread. Then we will start the instance to go to the loop inside the run method.
# Creating an instance of a mouse controller
mse =Controller()
click_thread =ClickMouse(Delay, Btn)
click_thread.start()
Step 7: Next, the on_press method has to be created, which will take the key as an argument and it will set up a keyboard listener. After execution, the stt_stp_key match with a start key (a). After that, when flag is set to True in the thread,the click has to be concluded.When the exit key (b) is implemented in the method, exit method is called and it stops the listener.
# The on_press method is created to
# take a key as an argument
defon_press(key):

  # The stt_stp_key is used to stop clicking
  # when the running flag is set to true
    ifkey ==stt_stp_key:
        ifclick_thread.running:
            click_thread.stp_clkng()
        else:
            click_thread.stt_clkng()

    # Here we call the exit method to terminate
    # the auto clicker when the key is pressed
    elifkey ==stp_key:
        clk_thread.exit()
        listener.stop()
with Listener(on_press=on_press) as listener:
    listener.join()
After the execution of the code, we get the output as shown below. The output is used to display the number of clicks the auto clicker made after the code was implemented. All Mac, Windows, and Linux users can use this software as it is adaptable in all three. As now we are aware how it works, its importance is understood as it helps in saving a huge amount of time by helping us in repeating and boring tasks.
Complete code:
# Importing threading and time
import threading as thr
import time as tm
# The pynput.keyboard module is used to observe events of
# a keyboard to control initialization and stopping of the auto clicker
frompynput.keyboard importListener, KeyCode

frompynput.mouse importController, Button


# Creating the variables
# to control the working of the auto clicker
Delay =0.001
Btn =Button.right
stt_stp_key =KeyCode(char='a')
stp_key =KeyCode(char='b')


# To control clicks we create a class “Click Mouse” and use
# threading.Thread
classClkMse(thr.Thread):

  # We pass Btn and Delay in the class to check for
  # the execution of auto clicker
    def__init__(self, Delay, Btn):
        super(ClkMse, self).__init__()
        self.Delay =Delay
        self.Btn =Btn
        self.running =False
        self.program_running =True


defstt_clkng(self):
        self.running =True

defstp_clkng(self):
        self.running =False

defexit(self):
        self.stp_clkng()
        self.program_running =False


# The method to check the value and repeat itself
# till it finds the value as true and another loop will verify
# whether it is set to true or not,
# And for the mouse click it is set to Delay and Btn
defrun(self):
    whileself.program_running:
        whileself.running:
            mse.click(self.Btn)
            tm.sleep(self.Delay)
        tm.sleep(0.1)


# Creating an instance of a mouse controller
mse =Controller()
click_thread =ClkMse(Delay, Btn)
click_thread.start()


# The on_press method is created to
# take a key as an argument


defon_press(key):

  # The stt_stp_key is used to stop clicking
  # when the running flag is set to true
    ifkey ==stt_stp_key:
        ifclick_thread.running:
            click_thread.stp_clkng()
        else:
            click_thread.stt_clkng()

    # Here we call the exit method to terminate
    # the auto clicker when the key is pressed
    elifkey ==stp_key:
        click_thread.exit()
        listener.stop()
with Listener(on_press=on_press) as listener:
    listener.join()