Python Setup guide and installation
Python Installation guide Step by Step
Python is widely used high-level programming language. The first version of Python was launched in 1991. Since then, Python has been gaining popularity. It is considered as one of the most user-friendly and flexible server-side programming languages.
To start working with Python, you need to install the Python interpreter. Unlike most Linux distribution, Windows does not come with the Python programming language by default. However, there are few easy steps to install Python on Window server or the local machine. There are several common ways to achieve this:
- Python can be downloaded from the Python Software Foundation website at www.python.org. Generally, it includes downloading a suitable installer for your operating system and running it on your machine.
- The best way to install Python in macOS is by installing a package manager called Homebrew.
- In Linux, it provides a package manager, which can be run to install Python.
- For a mobile operating system like Android and IOS, you can download apps that offer a Python programming environment.
- There are several websites which provide a Python programming environment. You can practice coding on these websites without installing Python.
Python Installation on Windows
First, you need to choose a Python version. If you want to learn the latest version of Python, you will need to install Python 3.7. You can install it alongside 2.7, but this version is no longer use in industry.
There are few steps to install Python on Window. These steps are given below:
Step-1 Set Up for Download
- Open a browser and visit the official site of Python www.python.org. It will get you on the home page of the website.
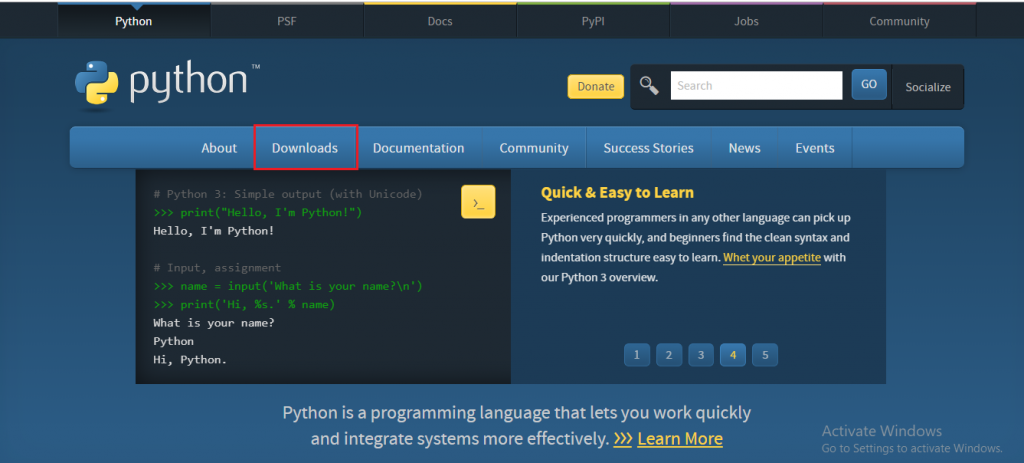
- Navigate to the Downloads section and then click on Windows option. Search for the desired version of Python. The latest version of Python 3 is version 3.7.4, while the latest Python 2 release is version 2.7.16. Consider the below image:
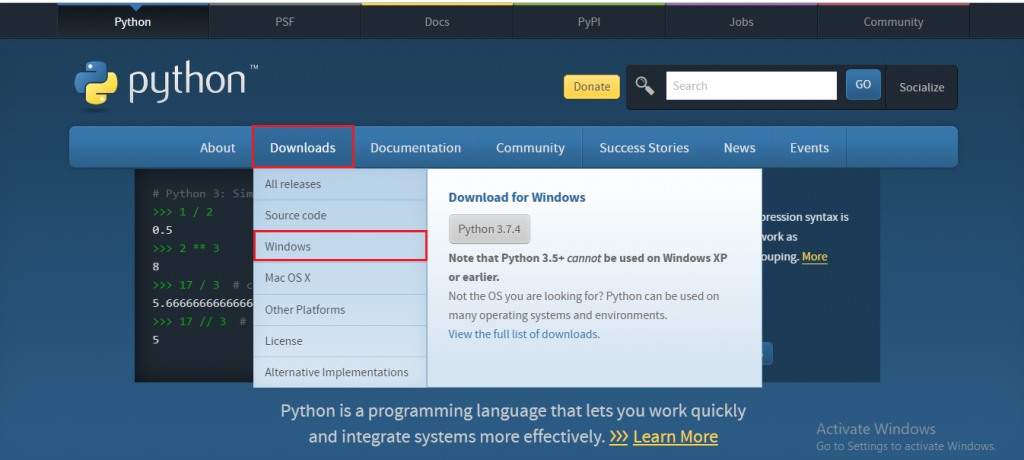
Step-2 Select Installer:
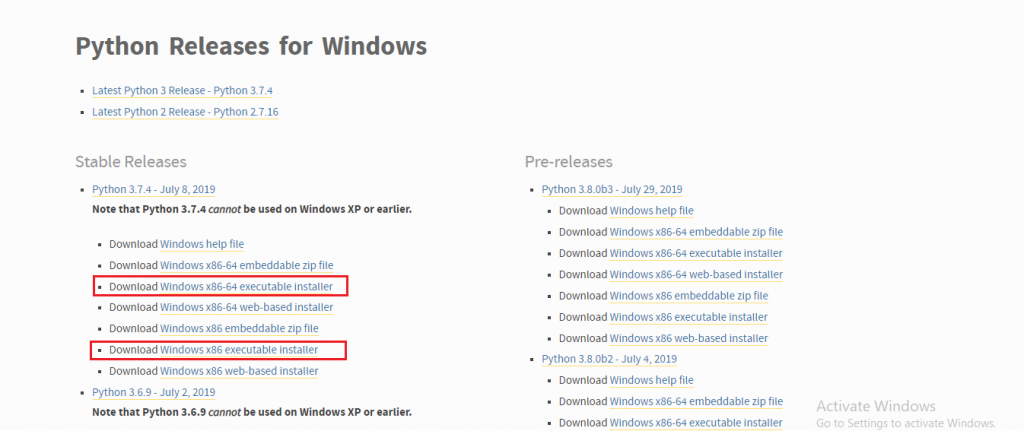
Select a link either window x86-64executable installer to download Python for 64-bit OS or window x86 executable installer for 32-bit OS.
Note: For Windows, you can choose either the 32-bit or 64-bit installer. On a 64-bit system, either installer will work for most purposes. The 32-bit version will generally use less memory, but the 64-bit version performs better for applications with intensive computation according to the operating system.
If you are not sure which version to pick, go with a 64-bit version. But if you get the "wrong" choice and would like to switch another version of Python, you can easily uninstall Python and reinstall another installer.
Step-3 Run the installer
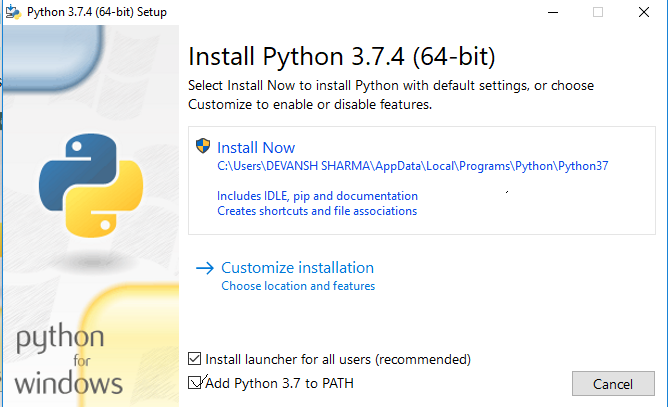
Once you download the installer, run that installer.
- Select the install launcher for all user and Add Python 3.7 to Path checkbox. Older versions of Python do not support the Add Python to Path checkbox.
- Click on install now option, which is the recommended installation options.
Note: Older versions of Python might not contain such additional features. But in all recent versions of Python, recommended installation options include Pip and IDLE (Integrated Development and Learning Environment).
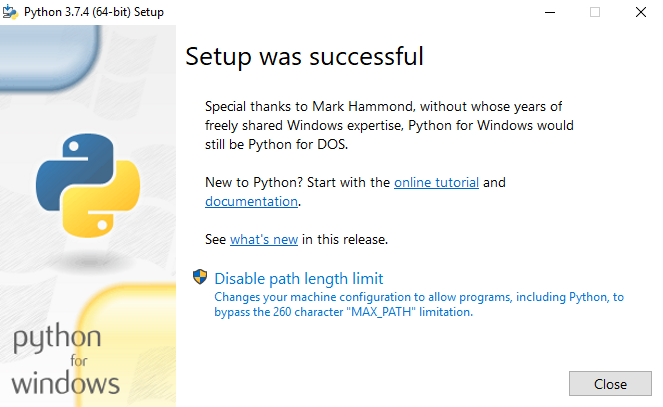
- The next dialog box prompt, "Setup was successful." You can select "Disable path length limit”, by choosing this option, it will enable Python to use long path names.
Step-4 Verify whether Python is installed or not
- Navigate to the directory in which Python was installed on the system. In our system it is C:\Users\Username\AppData\Local\Programs\Python\Python37, Since we have installed the latest version of Python
- Double-click on "python.exe" which is called python executable file
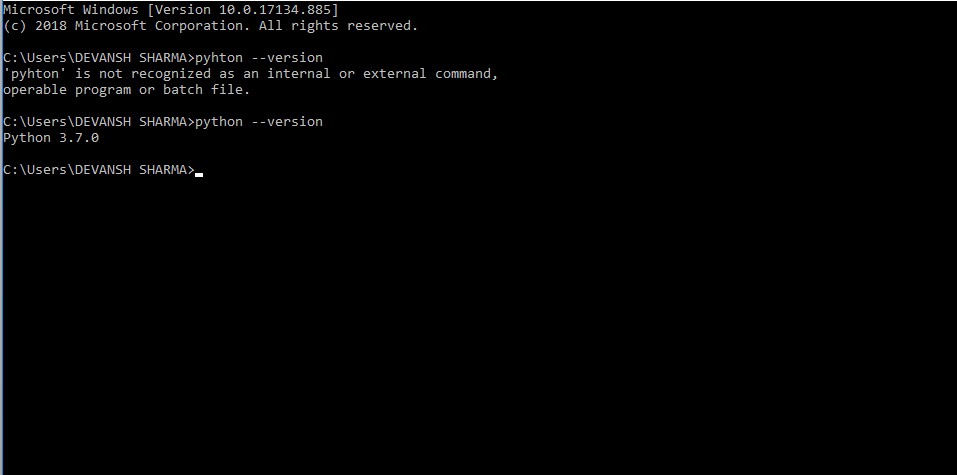
- You can also check it by typing "python –-version" on command prompt. It will display the version of Python. If Python is successfully installed, then it will produce the following output.
Step-5 Verify whether Pip is installed or not
Pip is a powerful package management system for Python software packages. If you install an older version of Python, it is possible that Pip would not be pre-installed.
a) It is recommended to use Pip for most Python Packages, mainly when working in virtual environments.
b) To check whether Pip has been installed
i) Open the Start menu and type cmd
ii) Open the Command Prompt application.
iii) Enter pip –-version in the console. If Pip is installed successfully. It will display the following output

But if pip would not be installed yet, you get the following output:
"pip is not recognized as an internal or external command, operable batch file."
Step-6 Setting to Environment variable (Optional)
If you have not selected Add Python to PATH checkbox or if your version of the Python installer does not include then you go through the below steps:
Open the Start menu and click on ÿ+R.
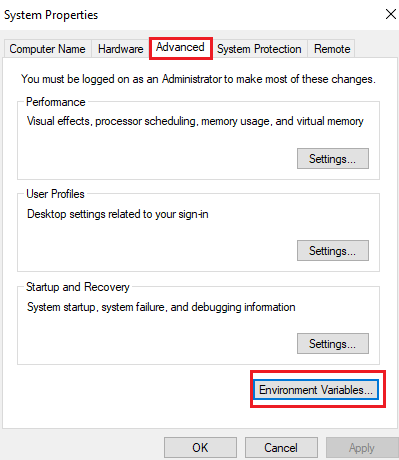
- Type sysdm.cpl and click ok. This will open the System Properties window.
- Navigate to the Advanced tab and select Environment Variable.
- Under System Variables, find and select the Path variable and click Edit.
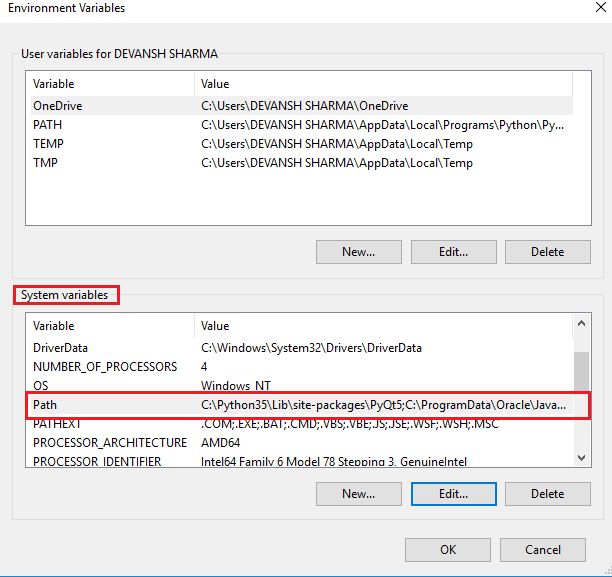
- Select the Variable value field. Add the path to the python.exe file preceded with a semicolon(;).
Step-7 Virtual environment (virtualenv) installation (optional)
Virtual environment (virtualnv) creates isolated environments for your Python application and allows you to install Python libraries in that isolated environment instead of installing them globally.
Why use virtualenv?
Suppose, you develop an application, and you do not want to make any change to the libraries it is using. At the same time, you start developing another application which requires the updated versions of those libraries, so at that time virtualenv comes into play.
To install virtualnv: Open Command prompt application and type the following command
C:\User\Username> pip install virtualenv
Upon completion, virtualenv will be installed on your system.