How to import pandas in python
How to Install Pandas in Python
Python is a vast ocean of libraries, modules, and different functions. It has a solution for almost everything. Using Python, we can simplify even a complex problem with the help of Python libraries and modules; one of such libraries is Pandas in Python.
The main goal of this library is data analysis. It is an open-source platform for data science and machine learning applications. Wes McKinney developed it in the year 2008. He needed an efficient tool for quantitative analysis of big data.
It is built on another package called numpy. By using pandas, many time-consuming tasks can be made quickly like visualization, statistics, merging and joining the data, etc. It is the best data analysis tool that help any programmer or a data scientist.
To use it, we need to install this library. In this article, we will see the installation process.
Requirement: Python and PIP versions must be already installed in the system.
Steps to import Pandas
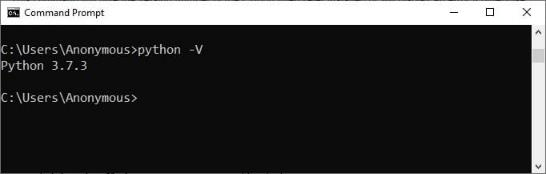
- Check if Python and pip are already installed by opening the cmd via search and typing the command: Python --version
If Python is already installed in the system, it will show the version number; if not, it shows an error:
If it is not installed:

Then, you need to install Python first.
The other requirement is PIP – It is a package management system that manages the packages and modules installed in Python. We checked if Python is installed or not; now we need to check PIP. Check by using the below command:
pip –version
If it is not installed, install it
If both Python and PIP are present in your system, it is now time to install the library; follow the below steps:
- Open cmd from the start menu
- Type the command
pip install pandas
All the library packages, data, and sub-packages will be installed one after the other.
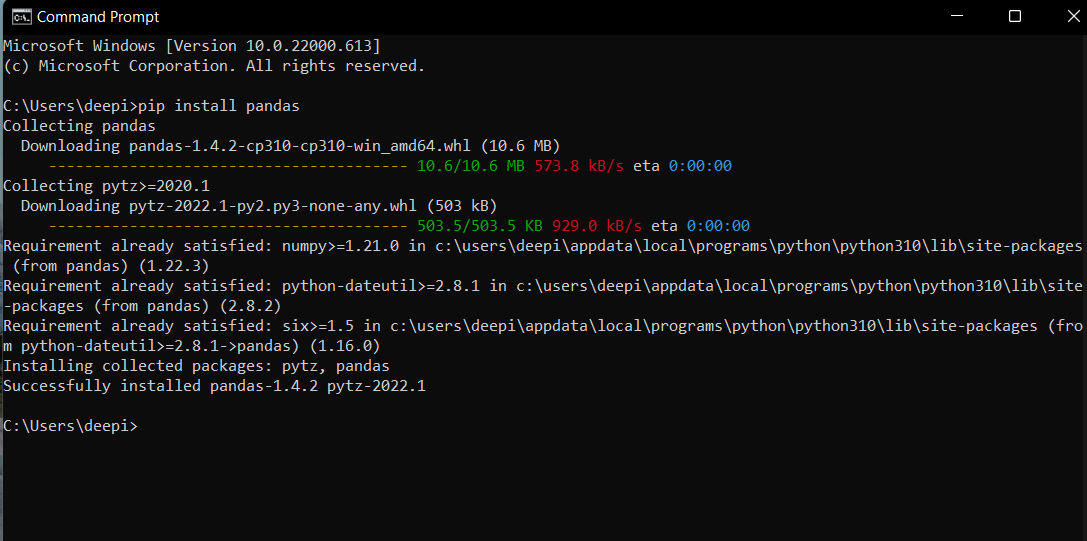
Please wait for the successful message, and that is it.
To confirm if the installation process is successful, follow the below steps:
- Open cmd
- Type Python
- Now, you enter the interactive mode
- Now, type the commands:
import pandas
pandas.__version
If the process is successful, it will display the version number.
To install Pandas in Anaconda
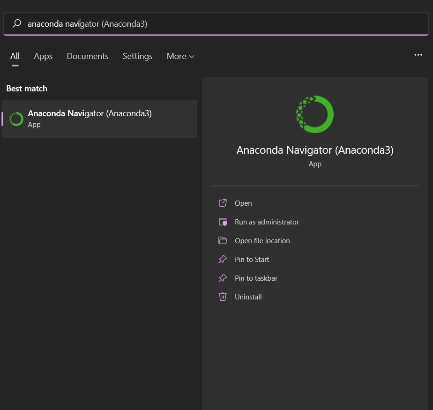
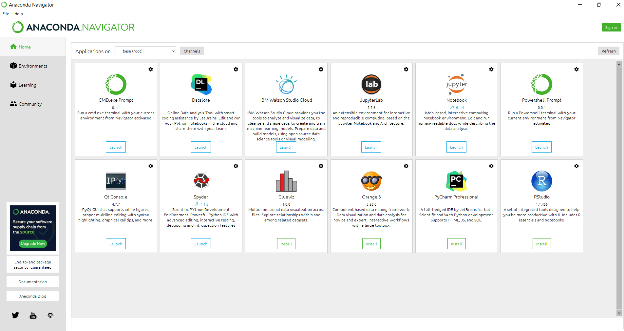
1. Open the anaconda navigator from the search menu.
2. Click on the option “Environment” on the left side list.
3. Now, click the Create button at the left- bottom.
4. This step is to create a new pandas environment. Please give it a name, something like pandas. It might take the version number by default, or you have to give the Python version:
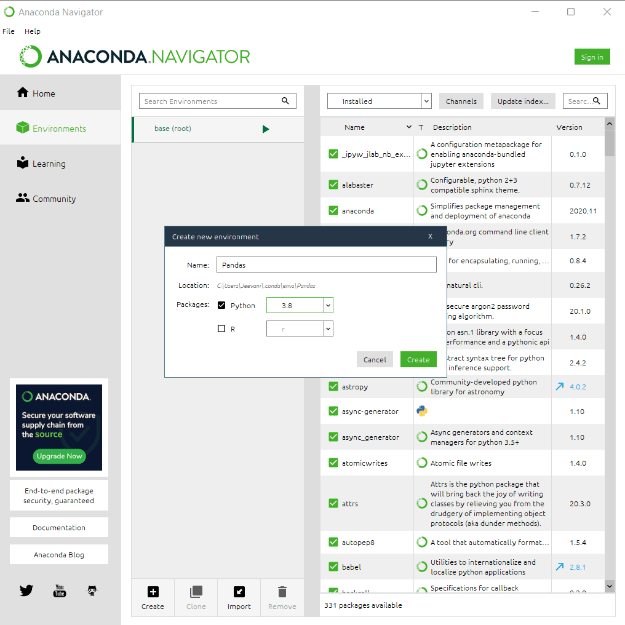
5. The pandas environment gets created; click on it to activate it.
6. In the list of packages given, click on all in the sorting drop-down menu:
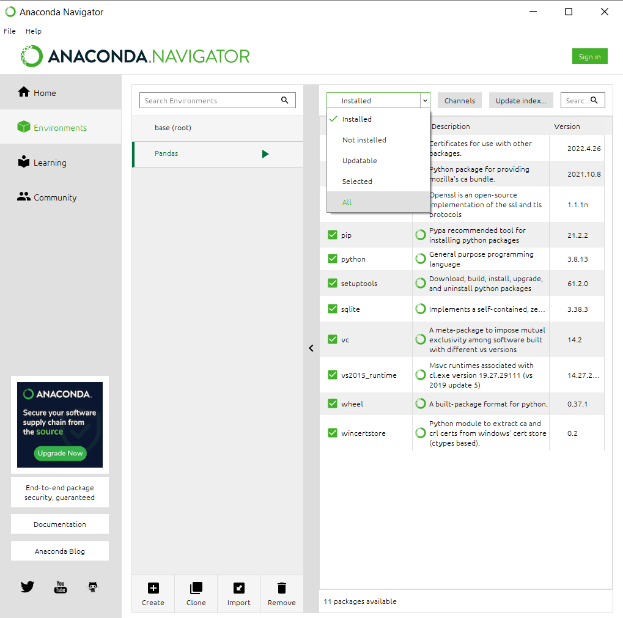
7. Search for pandas in the top search bar on the right side.
8. Mark the checkbox before the pandas package, right-click on it, and then go to "mark for specific version installation" and select the version you want.
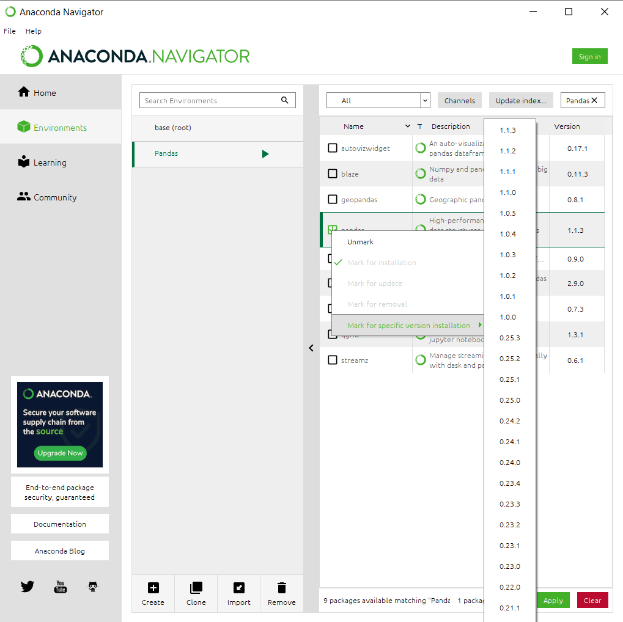
9. Click on “Apply” at the right bottom.
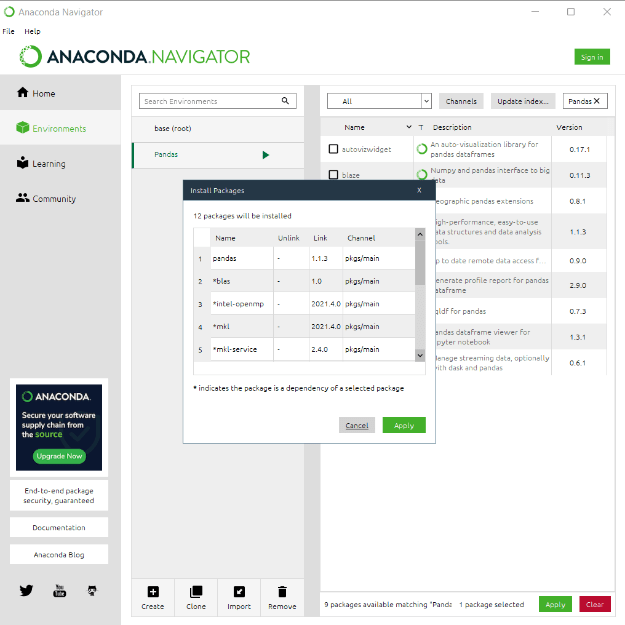
10. All the packages that are need to be installed will appear in a dialogue box. Click on the Apply button.
11. The installation process takes a while.
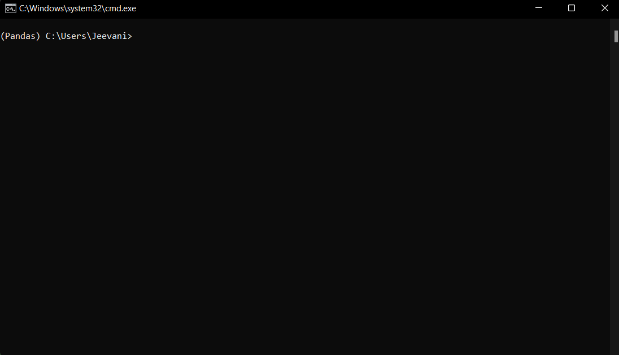
12. Click on the green arrow on the right of the pandas environment you created in the list on the left side:

13. Select the option you want. The terminal leads you to a Pandas terminal, as shown below:
To confirm if the installation process is successful, follow the below steps:
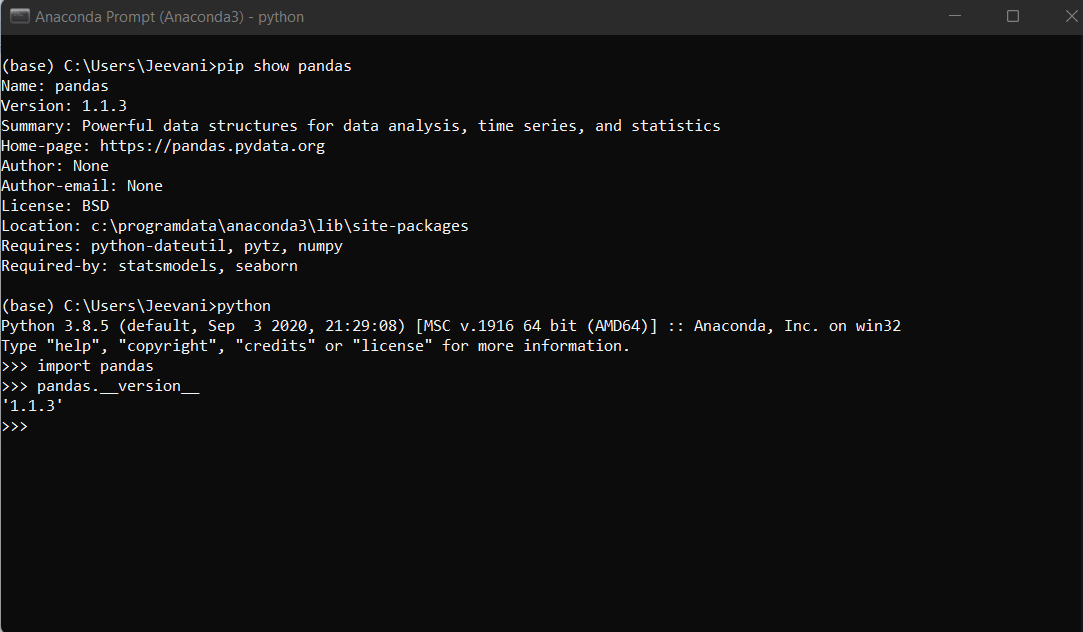
- Open the anaconda prompt from the search menu
- Type Python
- Now, you enter the interactive mode
- Now, type the commands:
import pandas
pandas.__version
If the process is successful, it will display the version number.
OR
You can type the command
pip show pandas