Python Scikit-image | Image Processing Using Scikit-Image
What is Image Processing?
The world is defined with images and, every image has its different specialties. An image can contain much-needed information that can be helpful in various ways.
The process by which we can obtain the information of an image is known as Image Processing.
In today's scenario, Image processing has a broad range of applications in various fields. Image processing enables us to manipulate and transform lots of images at a single time to obtain useful information from them.
For image processing, One of the popularly utilized programming languages is Python. Python includes very effective libraries and tools which help in obtaining the information of images in image processing.
The most popular image processing libraries used are:
OpenCV, Python Imaging Library (PIL)/Pillow, Scikit-image, Numpy, Mahotas.
Python Scikit-image
scikit-image is a Python package that is assigned for image processing in Python and it uses NumPy arrays. For image processing, it is a set of algorithms.
scikit-image is used for various image processing tasks and it also works with Numpy and SciPy in Python image processing.
Here, we will discuss various useful techniques for image processing using scikit-image.
Features of scikit-image
- It is a very simple and light image processing tool.
- it is built above NumPy, matplotlib and, SciPy.
- Everyone can access and reuse it.
- It is open-source and industrially usable - BSD license.
Installing scikit-image
We have to install Numpy and SciPy before installing scikit-image. it can be easily installed using pip.
Syntax:
pip install –U scikit-image
Reading Images
Importing images in Python using skimage is the very first step in image processing using scikit-image.
The image is stored in form of numbers when it is read using scikit-image. The numbers are defined as pixels and also intensity of the image is defined by using these numbers.
Example:
fromskimage import data
 camera = data.camera()

  # An image with 512 rows
  # and 512 columns
 type(camera)

 print(camera.shape)
Output:
 numpy.ndarray
 (512, 512)
Importing images
The data module consists of various sample images in the scikit-image package. here, we can import an image to work with some image operations. for an instance, we always don't need to import images externally we can load images from which provided by the package.
Example:
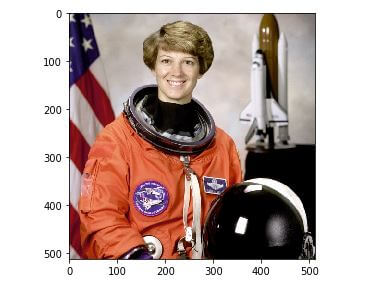
# Python3 program to process
 # images using skikit-image
 importos

 # importing io from skimage
 importskimage
 fromskimage import io

 # way to load image from file
 file = os.path.join(skimage.data_dir, 'astro.jpg')


 cars = io.imread(file)

 # way to show the input image
 io.imshow(astro)
 io.show()
Output:
Read Images from the System
We can read images from the system with the imread function.
Example:
importmatplotlib.pyplot as plt
 %matplotlib inline

 image = imread('car.jpg')
 imshow()
Output:

Explanation –
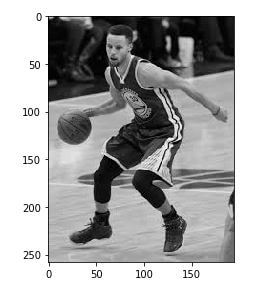
With the imread function, we can use the as_gray parameter to reading images in grayscale mode. we just need to set the as_gray parameter to true.
Example:
 from skimage.io import imread, imshow

 importmatplotlib.pyplot as plt
 %matplotlib inline

 image_gray = imread('images.jpeg', as_gray=True)
 imshow(image_gray)
Output:
Note: The image can be viewed with imshow function but the image is stored in the form of numbers matrix.
Example:
 image_gray = imread('images.jpeg', as_gray=True)

 print(image_gray.shape)

 print(image_gray)
Output:
 (258, 195)
 [[0.73586314 0.77115725 0.7907651 ... 0.11822745 0.11822745 0.11430588]
  [0.65743176 0.70056902 0.72017686 ... 0.11822745 0.11430588 0.11430588]
  [0.41401176 0.45714902 0.48067843 ... 0.11430588 0.11430588 0.11038431]
  ...
  [0.73491725 0.73491725 0.73491725 ... 0.42055725 0.42055725 0.42055725]
  [0.72594314 0.72986471 0.72986471 ... 0.41750667 0.41750667 0.41750667]
  [0.72594314 0.72986471 0.72986471 ... 0.41750667 0.41750667 0.41750667]]
Changing the format of the image
We can convert the format of an image into any other format. like, if we want to convert the image format from RGB to HSV we have to use rgb2hsv.
Example: 2
 fromskimage.color import rgb2hsv
 img = imread('images.jpeg')
 img_new = rgb2hsv(img)

 plt.subplot(121), imshow(img)
 plt.title('RGB Format')

 plt.subplot(122), imshow(img_new)
 plt.title('HSV Format')

 plt.show()
Output:

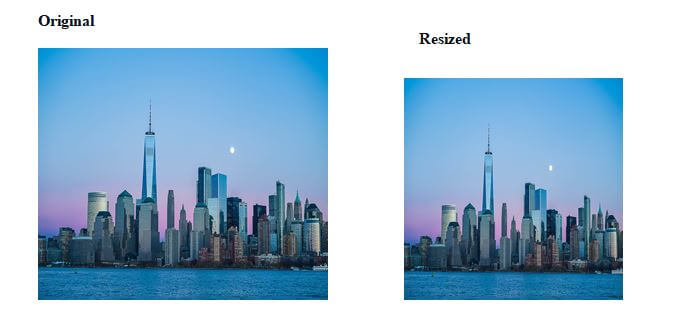
Resizing images
We can also resize the images using resize function in scikit-image by giving the required dimensions of the new image to the input image.
Example:
 fromskimage.transform import resize
 img = imread('city.jpeg')
 #resize image
 img_resized = resize(img, (300, 300))

 #plot images
 plt.subplot(121), imshow(img)
 plt.title('Original Image')
 plt.subplot(122), imshow(img_resized)
 plt.title('Resized Image')
 plt.show()
Output:
Rotating an image
The rotate() function is used to resizing the images by defining the required angle to the image.
Example:
 fromskimage.transform import rotate
 image = imread('car.png')

 image_rotated = rotate(image, angle=45)
 imshow(image_rotated)
Output:

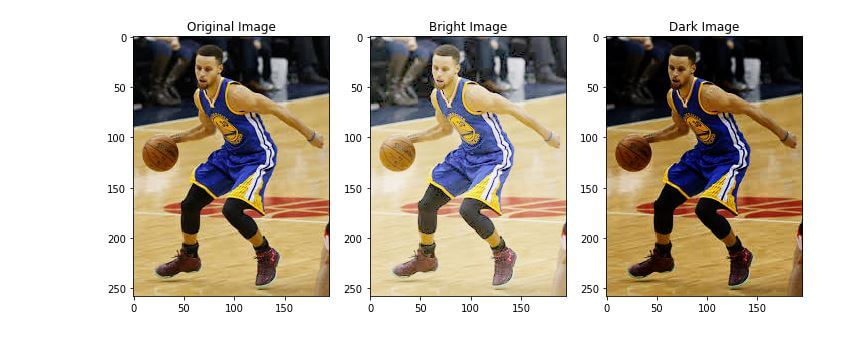
Changing the Image Brightness
The adjust_gamma()function is used to alter the brightness of the image and the method used by this function is called gamma correlation.
Here, for darker images, gamma should greater than 1, and for brighter images, gamma should less than 1.
Example:
 fromskimage import exposure

 #adjusting brightness
 image = imread('basket.jpeg')
 image_bright = exposure.adjust_gamma(image, gamma=0.5,gain=1)
 image_dark = exposure.adjust_gamma(image, gamma=1.5,gain=1)

 # plotting images
 plt.subplot(131), imshow(image)
 plt.title('Original Image')

 plt.subplot(132),imshow(image_bright)
 plt.title('Bright Image')

 plt.subplot(133),imshow(image_dark)
 plt.title('Dark Image')

 plt.show()
Output:
Conclusion
In this article, you have seen the different image processing methods in Python scikit-image library. Now, you can easily perform the image processing techniques with scikit-image.