Python Tkinter Tutorial
What is Tkinter?
Tkinter is GUI library of Python. When we integrated Tinkter with Python, it provides an easy and quick way to develop GUI applications. It provides the Tk GUI toolkit with a powerful object-oriented GUI.
The Python's interface to the Tk GUI toolkit is the Tkinter package ("Tk interface"). Tk and Tinkter are available for both Unix and Windows platform. Tk is not a part of Python but ActiveState maintained it.

Tk / Tcl was an integral part of Python for quite some time. The tkinter.tix is the package of Tkinter and the Tkinter is its extension. These modules provide a platform-independent and robust window toolkit.
The Tkinter package is a thin layer on top of Tcl / Tk, oriented to objects. You need not write the Tcl code for using the Tkinter, but you might have to check the Tk documentation or sometimes for reference the Tcl documentation. It is a series of wrappers that are used to implement the Tk widgets in this programming language as Python classes.
However, the internal Tkinter module provides a thread-safe mechanism that allows interaction between Python and Tcl.
The quality of Tkinter is that it is easy and integrated with Python. Although its standard documentation is weak, there is an excellent material that includes: references, tutorials, a book, etc. It is also known for its outdated look and feel, which was improved in Tk 8.5.
Python offers several options to the develop Graphical User Interfaces (GUIs). Some of them are listed below:
Tkinter: It is an interface for the Tk Graphical User Interface (GUI) that Python ships. It usually includes the following:
- WxPython: It is an open-source framework of Python that is used for the windows platform.
- JPython: JPython is a Java Python port that provides seamless access to Java class libraries for Python scripts on the local computer. Many other interfaces are available on the net.
In command line for running “Python-m tkinter” from the Windows operating system must open a dialog box or window that will display a simple Tk interface which will help you in knowing that it is correctly installed on your system. So that you can read the related Tk / Tcl documentation for the installed version.
tkinter documePython Tkinterntation
Tk / Tcl was an essential part of Python for quite some time. It provides Python programmers with the tkinter package and its extension, the tkinter.tix and the tkinter.ttk modules, with a robust and platform-independent window toolkit.
The Tkinter package is a thin layer on top of Tcl / Tk, oriented to objects. Additionally, the internal tkinter module provides a thread-safe framework that enables interaction between Python and Tcl.
The qualities of Tkinter are that it is easy and usually comes bundled with Python. Although its essential documentation is poor, there is an excellent material that includes: guides, videos, a book, and others. Tkinter is also renowned for its outdated look and feel, which was significantly enhanced in Tk 8.5.
A Look At Tcl/ Tk –
- These classes are provided to organize some functions within a single namespace.
- The Tk class should be instantiated in an application only once. The programmers do not need to install it directly in the system. The host system creates one automatically every time any of the classes are installed.
- The class Tk is not for installation. Instead, it is intended only for a subclassification to give the widgets a "real" feel (it is known by the name ' abstract class ' in C++).
Mapping Tk Basic to Tkinter
- In Tk, class commands respond to Tkinter class constructors.
- An object's master is implied in the development time given to it by the new name. Masters are expressly stated, or in other words, they are specified explicitly in Tkinter.
- To map Tk basic to Tkinter, goto Setting option and do the following:
The configuration options given in Tk is provided in a list of tags and values. The instance constructor option is specified as keyword arguments. It configures calls or instance-indices for existing instances. It is found in dictionary format.
- In Tk, using the widget name as a command to act on a widget, and following it with an action name, possibly with parameters. In Tkinter, you can call in class instance methods to invoke widget behavior. Tkinter/ init .py lists the actions (methods) that a given widget can perform.
- You call pack with optional reasons to give the Packer a widget (geometry manager). The Pack class in Tkinter retains all of this functionality, and the different forms of the pack command are implemented as methods. All the packing methods are inherited form the Packer that is subclassified in the tkinter widgets. For additional information on the Form, the Geometry manager sees the documentation of the tkinter.tix module.
The relation between Tk and Tkinter -
From the top:
Your App Here (Python).
A tkinter call is made in a Python application.
tkinter (Package of Python)
It is implemented in the package of tkinter, (say, creating a button widget, for example). It interprets the arguments and commands. Further, it changes them into a format that looks like if they have been passed from a Tk script instead of Python script in the GUI application calls.
_tkinter (C)
The commands and their arguments are passed through a function in C _tkinter.
Widget Tk (C and Tcl)
The C feature is capable of making calls to other C modules, which include the Tk library's C function. In C and some Tcl, Tk is introduced. Widgets that are used to join certain predefined behaviors to widgets the Tcl part is used for the same. Once the Python tkinter package is imported in the code, the package gets executed. (The consumer never sees that at this point).
Tk (C)
It does the final mapping of the Tk component.
Xlib (C)
Xlib library is used for drawing graphics on your computer.
Installing Tk/ Tkinter
You can install Tk on your computer by using the following steps:
Although almost all macOS and Linux devices already come with Tk, it is often an older version (usually 8.4.x or early 8.5).
You want to make sure that you have at least version 8.5 (or probably 8.6) to use the new widget package, so you need to update the newer version if it's not already available.
Although there are many ways to install Tk, one of the versions offered by ActiveState (www.activestate.com) is the most comfortable version to download and install.
Note
ActiveState is a company that sells complex language tools for professional developers. Remember that this tutorial assumes that you are using Python 3 rather than Python 2. There are some differences between both of them, which includes the naming of the module, which is the very first thing that you will be doing when you are going to try Tkinter by yourself.
Linux Operating System
Installation of Python
First, ensure that Python is installed in your system. After that, open the Linux command line terminal (Applications->Accessories->Terminal) and type Python
Python 2.6.4 (r264:75706, Jan
26 2020, 18:45:15)
 >>>
It indicates that Python 2 is installed in your system. If the number of the version begins at 3, you have Python 3.
Execute Python on Ubuntu
sudo apt-get install python python-tk
And, in Python version 3
sudo apt-get install python python3-tk
Or install "python" and "python-tk."
You can also read reference for instructions on https://python.org for other distributions and queries related to its installation.
Note: If you have Python version 2.4 or earlier, you must update to the latest version to use Tkinter.
Install Tkinter
Type python into the Linux command line to see if you have Tkinter. Then type Python.
>>> import Tkinter
 Or in python 3
 >>> import tkinter
It will not give an error message if you have Tkinter, and you can move to the next part.
If not, you'll see the error message like this:
ImportError: No module named Tkinter
In that case, your Tkinter needs to be assembled. You can run the following command in Ubuntu.
Sudo apt-get install python-tk
 Or for python 3
 Sudo apt-get install python python3-tk
Or you can also build python-tk with the help of Synaptic Package Manager.
Install Python on Windows
To run Python from the Command Prompt, the folder that includes Python must be added to the Windows command search list of files. The default folder name is C:\Python2.6, or C:\Python2.7.
Select Control panel-> system-> advanced-> Environmental Variables-> system variables-> Path to add this folder to the search path. Add C:\Python26 or C:\Python27 to end of list (with a separator semi-colon).
After restarting the window, we are able to launch the Python.
Install the Tkinter
To ensure that Tkinter is install or not in the system, type the following command in the Python prompt.
>>> import Tkinter
Or in Python 3
>>> import tkinter
If the Tkinter is installed in the system, it does not show any error message and allows you to move to the next segment.
If the Tkinter is not installed in the system, it shows an error message as shown below.
importError: No module named Tkinter
Tkinter needs to be mounted in that case. ActiveState will access the ActiveTcl Community Edition, which should include Tkinter.
The Programming of Tkinter
Tkinter is Python's Simple GUI library. When tkinter is combined with Python, it provides smooth and quick ways to create the Graphical User Interface app. Tkinter provides the Tk GUI toolkit with a powerful object-oriented interface.
The most straightforward task is to create a Graphical User Interface application using Tkinter. All you need to do is take the next steps:
- Import module Tkinter.
- For the Graphical User Interface application, create the main window.
- Add one or more of the widgets listed above to GUI.
- Join the user-triggered primary event loop to take action against each case.
FOR EXAMPLE
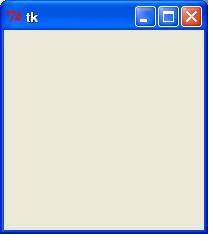
#!/usr/bin/python
 Import Tkinter
 up = Tkinter.Tk ()
 # The Code to add widgets is here
 top.mainloop
When we execute the above code, it shows the output as shown below.
Widgets of Tkinter-
Various controls are offered by Tkinter, such as labels, buttons, and text boxes that are used in the Graphical User Interface. These controls are often referred to as widgets.
Tkinter offers nineteen forms of widgets. The brief description of widgets is given below:
1: Button :
It is used to display Buttons in your GUI application.
2: Canvas:
It is used to draw shapes such as rectangle, oval, line, etc. in your GUI application.
3: Checkbutton:
It is used to show a number of the checkbox for the options given. The user is allowed to opt for multiple options at once.
4- Frame:
To organize other widgets, the Frame widget is used as a container widget.
5- Entry:
It is used to accept the single line values for the user. It provides a single line Text box to accept the values.
6- Label:
It is used to give a single-line caption to the other present widgets. If interested, it can include the picture also.
7- ListBox:
The widget Listbox is used to provide a user with a list of options.
8- Menu:
The Menu widget is used to provide a user with different commands. Inside - Menubutton, these commands are contained.
9- Menubutton:
The widget Menubutton is used for menu display in your application.
10- Message:
The Message widget is used to view multiline text fields for user approval of values.
11- Radio Button:
It is used as the radio buttons to display multiple options. The user is allowed to choose only one option at a time.
12- Scale:
The Scale widget includes a slider feature.
13- Scrollbar:
It is used for providing scrolling capabilities to UP-DOWN or RIGHT-LEFT to different widgets present. For instance - list boxes.
14- Toplevel:
The Toplevel is a plugin that is used to provide a distinct container.
15- Text:
The Text widget is used to show several lines of text.
16- Spinebox:
To select from a set of values, a variant of spinebox, i.e., standard Entry Widget, is used.
17- Labelframe:
A label frame is a simple widget for the containers. For the layout of complex windows, it is used to act as a spacer or container.
18- PanedWindow:
This widget is used to hold the horizontally or vertically arranged panes. It is a container widget.
19- tkMessageBox:
Boxes of a message are displayed by the help of this widget in your Graphical User interface application.
Managing the geometry of Tkinter
The specific methods have access to Tkinter widgets for managing geometry, which is used to maintain widgets across the parent widget area.
The following classes of geometry managers are exposed by Tkinter: pack, grid, and place.
The grid() Method - The geometry manager of the Grid positions the widgets in a 2-dimensional row. A number of rows and columns are splitted of the master widget, and each cell in the resulting table can hold a widget.
Use of the Tkinter Grid Manager
The grid manager in Tkinter is the most versatile of the geometry managers If you are not interested in learning how and when to use these three administrators, you should at least make sure that you know this one.
The grid manager is particularly handy to use when designing dialog boxes. The grid manager is much simpler to use instead of Packer in today's time. We can simply put all the widgets into a container and use the grid manager to move them where ever we want. Instead of using so much extra frame to get packing() to work.
SYNTAX
widget.grid( grid_options )
There are following options that we can use in the above syntax.
ipadx, ipady - How many pixels the widget has to cover, horizontally and vertically, within the boundaries of the screen.
padx, pady - It is used to determine the number of pixels the widget has to pad w in any direction, i.e., horizontally and vertically, outside the boundaries w.
column - It is used to bring the column in default 0 (leftmost column).
Columnspan - How many widgets occupy of columns; default to 1.
Row - It is used to bring the row to defaults row, i.e., to the 1st row, which is still empty.
Rowspan -It is used to determine how many row w will occupy, by default, it is 1.
Sticky -If the w is larger than the cell, then what to do? By contrast, the widget is based in its cell with sticky= '. The compass directions showing the sides and corners of the cell to which widget sticks are the string concatenation of zero or more of W, NE, NW, SE, SW, N, E, and S.
The pack() Method - Before placing the block in the parent widget, the geometry manager manages it.
The Pack geometry manager packs widgets into columns or axes. This geometry manager can be managed using options like fill, extend, and hand.
The manager controls all bundled widgets within the same Master widget. It is a little difficult to describe in words, but the packing algorithm is simple. For example, think of a sheet that is made up of an elastic material, which is having a rectangular hole in the middle.
The geometry manager makes the hole wide enough to carry the widget for each widget, in the order in which they are packed, and then position it against a given inner edge (default is the top edge). It then repeats all widgets in the process. The manager is authorized to calculate the bounding box for all the widgets that have been packed into the hole. And he makes the master widget big enough to hold all the widgets at once and move them all to the master.
Use of the Pack Manager
The pack manager is very much easier to use, but it is a minimal approach. It is excellent to use in the place of grid manager but in some limited situation.
· Place a widget in a container and fill the whole frame or container.
· Place several widgets, one on top of the other.
· Set aside a range of widgets.
Note:
In the same window as the leader, do not mix the grid and box. Delete the software, and instead of waiting, look at your code again. Using the wrong parent on some of the widgets is a common error.
SYNTAX
Widget.pack( pack_options )
We can use the following options in the above syntax.
fill: It is used to check whether the widget takes any extra space that is reserved by the Packer, or maintains its own limited space.
NONE (default), Y (fill only vertically), X (fill only horizontally), or BOTH (fill both horizontally and vertically).
Side: Sets through parent widget side packs against TOP (default), BOTTOM, LEFT, or RIGHT.
Expand: The widget w is used to expands to the extra space when it is set to true else it is used in the parent's w’s.
The place() Method: It is the easiest of all the three present General Tkinter Geometry Managers. It allows the place manager to set the size and position of a window, either relative to another window or in absolute terms. The place manager can be accessed with the use of a method, namely place() method, which is available for all widgets of that standard.
Use of the Place Manager
Using space for ordinary windows and dialog layouts is not a good idea; it is not as simple as the things must be. Nevertheless, in more limited situations, the position does have its benefits. Most importantly, various custom geometry managers can be implemented through compound widget containers. Further, it is also used to position control buttons in dialog boxes in your GUI application.
SYNTAX
widget.place( place_options )
We can use the following options in the above syntax.
Bordemode: INSIDE (the default) to indicate that other options refer to the inside of the parent (ignoring the parent's border); otherwise, OUTSIDE.
Anchor: Default is NW (the widget's upper left corner). An exact place to w with other option can be other than default place is W, NE, NW, N, E, S, SE, or SW, are the compass direction indication the corners and sides.
height, width - Pixels in height and width.
relheight, relwidth – These perimeters ofHeight and width ranges between 0.0 and 1.0.
relx, rely -The horizontal and vertical offset as they float from 0.0 to 1.0. A division of the width and height of the parent widget.
x, y - Offset in pixels, horizontal and vertical.
Tkinter Conclusion –
Tkinter can be best used for a very lightweight, fast Graphical User Interface applications. It is running on more than one platform than any other Python Graphical User Interface toolkit present till now. It is a perfect choice where portability is the top priority or is treated as the prime concern.
We have not been able to give Tkinter the depth of discussion it deserves, but it is fair to say that with Python and Tkinter, almost anything that can be accomplished using the C language can be achieved.
One of the best examples is Python megawidgets package (PMW). It is a pure Python package that helps in creating an excellent widget collection by building on the core Tkinter for developing an excellent widget on Tkinter, this pure python package is the best option.