How do double space or change line spacing in Microsoft Word?
Microsoft Word provides various options for changing the line spacing of your document. The line spacing refers to the distance between two consecutive lines of text. The line spacing can be changed depending on the style of the document. For example, you may need double spacing for academic papers, while single spacing may be more suitable for business letters.

To change the line spacing, you can either use keyboard shortcuts or follow a series of steps in the software. The keyboard shortcuts to change line spacing are Ctrl+1 for single spacing, Ctrl+2 for double spacing, and Ctrl+5 for 1.5 line spacing. This can be applied to any line, paragraph, or all highlighted text.
However, if you prefer to use the software, the steps to enable double spacing to differ slightly between versions. In the newer versions of Microsoft Word, you can go to the Home tab, select the Paragraph group, and then click the Line Spacing option. You can choose either Single, 1.5 lines, Double, or At Least from the dropdown menu.
In older versions of Microsoft Word, you can go to the Format menu, select Paragraph, and then click the Indents and Spacing tab. In the Line Spacing section, you can select Double and then click OK.
Note: Pressing the Enter key creates a new paragraph with added space between the previous and the new one. If you want to move to the next line without creating a new paragraph, use the Ctrl + Enter combination instead.
Enable Double Spacing for the Word
Here some ways to double-space in words are:
1. From the Design Dropdown
To double-space a Microsoft Word document using the Design Dropdown, follow these steps:
- Open the Word document you want to double-space.
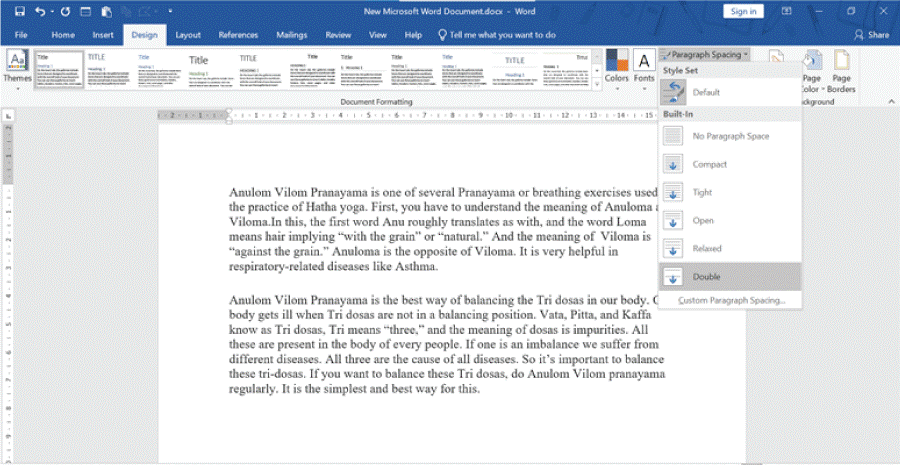
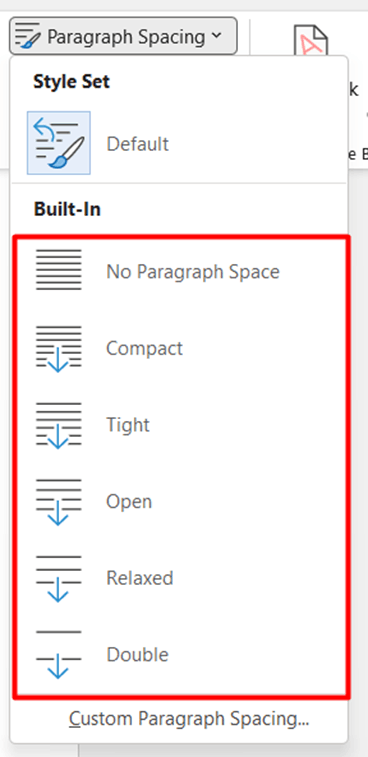
- Go to the "Design" tab in the main menu.
- In the "Document Formatting" section, click on the dropdown in "Paragraph Spacing".
- From the drop-down menu, select "Double".
This will double-space the entire document, with two spaces between each line and paragraph.
Before:
After:
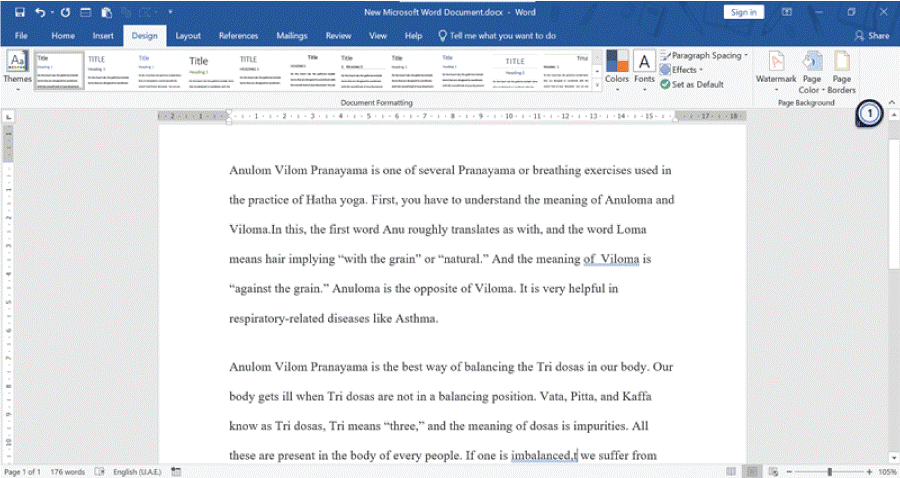
Keep in mind that this method only allows you to double-space the entire document and not specific text or paragraphs. The purpose of double spacing is to improve the readability of the content.
If you want to choose other spacing options or customize the spacing, you can also select "Custom Paragraph Spacing" from the Paragraph Spacing dropdown.
This allows you to change the font, size, colour, alignment, and spacing manually by providing a set value.
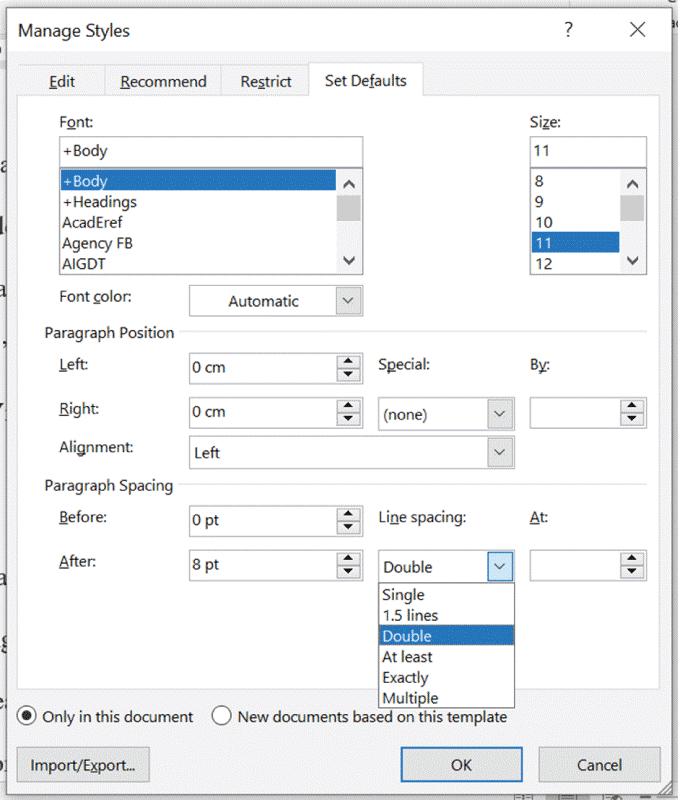
In addition, if you want to apply the same double spacing to future documents, you can check "New documents based on this template". This way, you don't have to set the spacing for every single document.
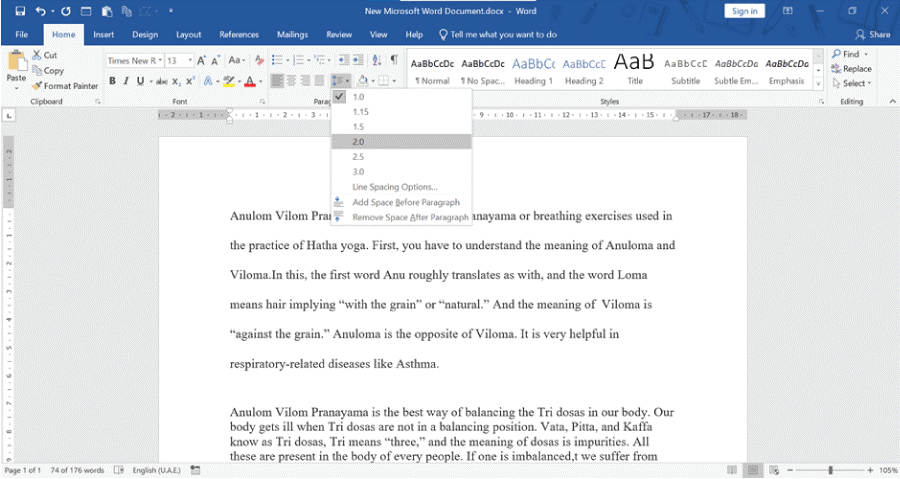
2. From Line and Paragraph Spacing
Here are the steps to double-space selected text using the Line and Paragraph Spacing option in Microsoft Word:
- Select the text you want to double-space.
- Go to the "Home" tab in the main menu.
- Under "Paragraph", click on the "Line and Paragraph Spacing" icon.
- From the drop-down menu, select "2.0".
- This will double-space the selected text, adding two spaces between each line.
- If you want to customize the spacing further, you can select "Line Spacing Options" from the Line and Paragraph Spacing dropdown.
This will open a dialog box where you can adjust the line spacing, indentations, and page breaks. You can preview the changes in the Preview pane and set them as the default for other Word documents by clicking on "Set As Default".
3. From Modify Option
- Navigate to Home Tab: Open the word document and go to the Home tab in the main menu.
- Right-click on Style: In the Styles section, right-click on any of the styles. Usually, the Normal style is the default, but you can choose any style based on your document.
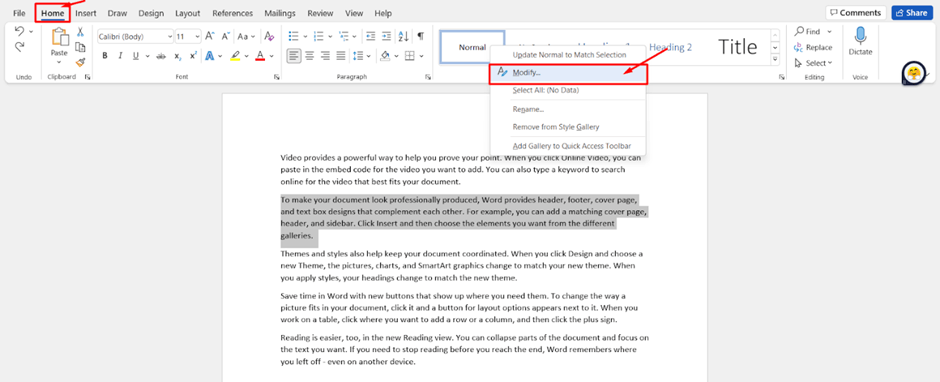
- Modify Style: Select Modify from the right-click menu. This will open the Modify Styles dialog box.
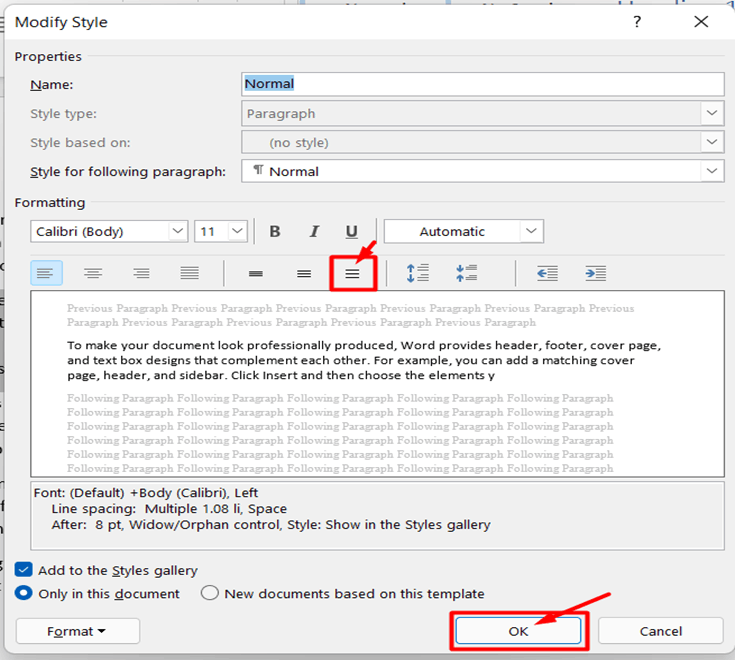
- Customize Spacing: You can also customize the before and after paragraph spacings, indentations, and alignments. Additionally, you can make changes to the text or set the changes as a default for other documents.
- Apply to Selected Text: To double-space only a selected part of the text, select the text first and then follow the above steps.
This method of using the Modify option in Styles allows you to set a default spacing for the entire document and customize spacing for specific parts of the text as needed.
4. Using Shortcut Keys
To add double-spacing using shortcut keys, follow these steps:
- Select the text you want to add double spaces too.
- Press Ctrl + 2 on your keyboard.
- The selected text will now be double-spaced.
Note: If you use the shortcut keys without selecting any text, the double spacing will be applied to the paragraph with the cursor. Using the same shortcut keys, you can also add single spacing (Ctrl + 1) or 1.5 spacing (Ctrl + 5).
Modify Line Spacing For All Or Part Of An Existing Document
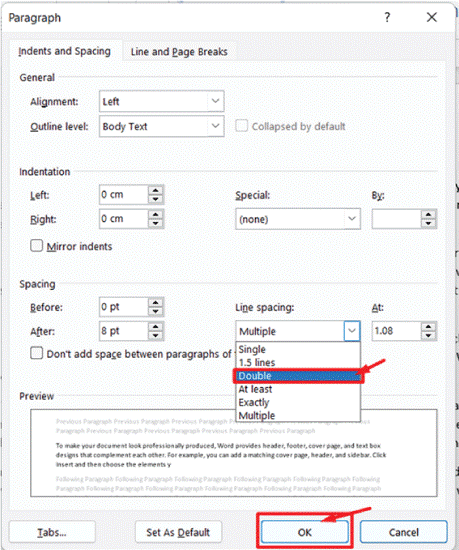
Microsoft Word 2007 And Later
- Open Microsoft Word and the document you want to modify
- Highlight the text where you want to change the line spacing or select all the text
- Right-click the highlighted text, and select Format, and then Paragraph (or just Paragraph, depending on your version of Word)
- In the Paragraph window, go to the Indents and Spacing tab
- Click the down arrow in the Line spacing drop-down box
- Select Double
- Click the OK button.
This process will double-space the text you highlighted. If you selected all text, the entire document would be double-spaced. The Line spacing drop-down box will allow you to choose different line spacing options, including Single, 1.5 lines, or At Least, which sets the minimum line spacing but allows it to increase if necessary to accommodate larger text sizes or images.