How to Enter and Exit the BIOS or CMOS Setup?
To access and configure the basic settings of your computer and its hardware components, you need to enter the BIOS or CMOS setup. The following is a list of common methods for accessing and exiting the BIOS or CMOS setup, as well as some recommendations for troubleshooting.
Important: Please ensure a working keyboard before entering or exiting the BIOS or CMOS setup.
Note: The process of accessing the BIOS or CMOS setup may vary depending on your computer model or motherboard. If you need more clarification, it is advisable to consult the owner's manual for your computer or the manual for the custom-built motherboard.
Note: If you cannot enter the BIOS or CMOS setup because it's password-protected, this guide will not provide a solution. To clear a BIOS or CMOS password, you will need to follow a different process.
Access BIOS or CMOS On Newer Computers
To enter the BIOS or CMOS setup on newer computers, you need to press one of the five keys listed below during the boot process.
These keys include F1, F2, F10, Delete or Del, and Esc.
F1, F2, and F10 are function keys on the top of the keyboard. If pressing F2 opens a diagnostics tool, the setup key is likely to be F10. On the other hand, if pressing F10 opens a boot menu, the setup key is likely to be F2.
The setup keys should be pressed as the computer is booting up. You will likely see a message similar to "Press F2 to enter BIOS setup" or a flashing block of text indicating when to press F1 or F2. If you're unsure of the correct key to press, you can try pressing and holding one or more keys on the keyboard to cause a stuck key error. This will cause an option to continue or enter setup to appear.
In case you're unable to enter the BIOS or CMOS setup using the methods listed above, you can check the motherboard's manual or the manufacturer's website for the appropriate key to enter BIOS.
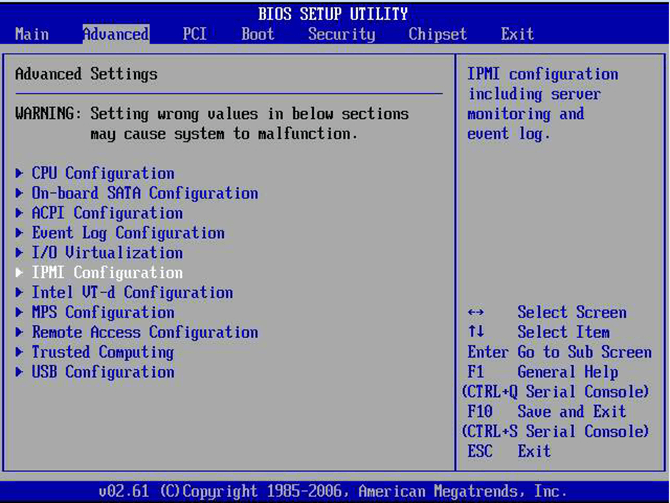
Once you have successfully entered the CMOS setup, you will be presented with a screen that may look different depending on the manufacturer but will still have a lot of the same options and information.
How Do I Change and Save Changes in CMOS Setup?
When you're in the CMOS setup on your computer, the process for changing the settings can vary based on the manufacturer of your BIOS. You can typically use the arrow keys to navigate through the different menus and categories, and the Enter key to select a specific setting. In some cases, you may also need to use the Page up and Page down keys to change the values of certain settings.
To save any changes you make in the CMOS setup, look for an option such as "Save and Exit" or "Save Changes." Select this option using the arrow keys, then press Enter. You may be prompted to confirm the changes, or the system may automatically save the changes and exit the CMOS setup.
Note: that the exact process for changing and saving changes in the CMOS setup can vary depending on the manufacturer, so be sure to check the bottom or right side of the setup screen for specific instructions on how to navigate and save changes.
I cannot change the values for a setting I want to use
If you're unable to change certain settings in your computer, it may indicate that the setting is not supported by your motherboard or the current version of your BIOS (Basic Input/Output System). The BIOS is a firmware that controls the basic functions of your computer and allows you to change certain settings.
If you believe that the setting you're trying to change should be supported, you may need to update your BIOS. BIOS updates can add support for new hardware and improve compatibility with new operating systems. It's important to be cautious when updating the BIOS, as a failed update can result in a non-functional computer. It's recommended to follow the instructions from your motherboard or computer manufacturer and to back up your important data before proceeding with a BIOS update.
How do I Save the Changes?
To save changes in the BIOS, you typically need to press a specific key, such as the "F10" key, to bring up the save and exit options. The key used to save the changes varies depending on the motherboard or computer manufacturer, so it's best to look for the prompt or a message on the screen that indicates which key to press.
Once you've found the correct key, you should be able to save your changes and exit the BIOS. It's important to save your changes and restart your computer so the new settings take effect. If you don't save your changes and exit the BIOS, your computer will continue to use the old settings, and any changes you made will be lost.
Access BIOS Or CMOS On Older Computers
Here is a list of some of the common key sequences used to access the BIOS setup on older computers:
- Ctrl+Alt+Esc
- Ctrl+Alt+Insert
- Ctrl+Alt+Enter
- Ctrl+Alt+S
- Page Up
- Page Down
Note: that these key sequences may not work on all older computers, as the method to enter the BIOS setup varies between different computer manufacturers and models. It's always best to check the documentation or website of the manufacturer to determine the correct key sequence to enter the BIOS setup on your specific computer.
Acer BIOS
To restore the BIOS on an Acer computer to its original settings, start by turning on the computer and pressing and holding the "F10" key. As you hold down this key, you should hear two beeps, which indicate that the settings are being reset. This process can be useful if your Acer computer is unable to boot or if you want to restore the BIOS to its original configuration.
AMI BIOS
To restore an older AMI BIOS to its original bootable settings, press and hold the "Insert" key while the computer is starting up. The two beeps will indicate that the BIOS has been successfully restored to its original settings.
BIOS or CMOS diskettes
On early 486, 386, and 286 computers, it was necessary to use a floppy disk to access the BIOS setup. These diskettes are typically referred to as ICU, BBU, or SCU disks and are specific to your computer's manufacturer. If you need one of these diskettes, you can contact your computer manufacturer, and they will provide you with one.
Access BIOS on early IBM computers
On some early IBM computers, to enter the BIOS setup, you need to press and hold both buttons on the mouse as the computer is booting. This is a specific method that only applies to IBM computers, and it is important to refer to the computer manufacturer's instructions or contact information for more information.
Additional suggestions for accessing BIOS or CMOS
If you have tried all the previous suggestions to access the BIOS or CMOS setup and they have not worked, another approach you can try is creating a "stuck key" error. To do this, simply press and hold down any key on your keyboard and don't let go. You may hear several beeps while doing this, but keep pressing the key until the computer stops booting. If all goes well, you should now have the option to enter the setup. If this method still doesn't work, make sure that your keyboard is functioning properly.
How to exit the BIOS or CMOS
Exiting the BIOS or CMOS setup allows you to save any changes you made to the computer's basic input/output system (BIOS) and then restart the computer. The steps to exit the BIOS setup vary depending on the type of computer you have, but some common methods include:
- Esc Key: You can exit the BIOS setup without saving any changes by simply pressing the Esc key.
- F10 or F12 Key: Pressing the F10 or F12 key is another way to save changes and exit the BIOS setup.
- Exit or Save & Exit Tab: In the BIOS setup, you can access the Exit or Save & Exit ab and select the Exit or Save and Exit option to exit the setup and save any changes made.
If you have trouble exiting the BIOS setup, there are a few methods you can try to fix the problem.
- F9 Key: Pressing the F9 key can help you load default settings and then save changes and exit the BIOS setup by pressing the F10 key.
- Load Optimized Defaults: You can access the Exit or Save & Exit tab in the BIOS setup, select the Load Optimized Defaults option, select Yes, and then press Enter. This will revert any changes made to the BIOS or CMOS and set it back to its default settings.
- Turn off the computer: As a last resort, you can turn off the computer, but be cautious when doing so.