What is ScanDisk?
ScanDisk is a DOS utility software that is used for the purpose of examining and repairing errors on both hard and floppy disks. The computer came with Windows 95, 98, and ME already installed and was first provided with DOS 6.2.
The tool scans disk surfaces for imperfections and identifies these places to prevent data loss and the need for rewriting. ScanDisk saves recovered lost clusters as .chk files.
Scandisk is also called chkdsk, so we can execute this command in the command prompt by running the command prompt as administrator. We will discuss how to run Scandisk in Windows in the below section.
A command-line program called chkdsk may be used to test the integrity of the file system on a hard drive or other storage device. There is another phrase for it: check disk. This command tests the drive's performance and stability for faults such as missing clusters, wrong sectors, directory errors, and other difficulties. It may also be utilized in case the file system needs maintenance. Both the command line and programmed automation applications may employ the command.
If Chkdsk is run without any parameters, it will show the disc's state along with a menu. It may also be used to show the following information: the amount of available disk space, the amount of disc space consumed, and the current file system status. If appropriate options are specified, Chkdsk may recover lost data, correct mistakes, and analyze the disk for defects.
History
Microsoft purchased ScanDisk from Symantec, formerly known as Norton. ScanDisk was included as a bundled software package for use with Microsoft's Windows and DOS operating systems. Due to its inability to analyze new technology file system (NTFS) disk drives, which are increasingly prevalent in computer systems running post-ME versions of Windows, ScanDisk has been excluded from post-ME versions of Windows. CHKDSK, a closely related counterpart to ScanDisk, remains in active use and is pre-installed on all Windows versions released so far, including Windows 8. It performs similar operations and can scan NTFS volumes.
ScanDisk is automatically initiated when a computer is restarted without appropriate shutdown or if the Power On Self Test (POST) detects initial disk problems.
A program called ScanDisk, which was initially included in early Microsoft WindowsTM versions, allows users to examine their PCs for damaged data or hard disk issues and attempt to repair them. However, as the program only works with previous versions of Windows that make use of File Allocation Table (FAT) file systems, it is no longer included in current versions of WindowsTM. New Technology File Systems (NTFS) have succeeded FAT systems in newer incarnations of WindowsTM. Consequently, ScanDisk has been succeeded by a new version of the application called CHKDSK. Because ScanDisk is so commonly used, many computer users will still refer to it while conducting CHKDSK. ScanDisk may still be run on WindowsTM versions older than Windows XPTM.
A computer's data may quickly get destroyed owing to frequent use, virus attacks, and quality deterioration via compression or copying. A utility dubbed CHKDSK was included in numerous MS-DOS versions, allowing users to inspect individual files for flaws and correct them. When early WindowsTM versions were introduced, MicrosoftTM offered a utility called ScanDisk with an integrated graphical user interface (GUI) that could more readily execute analogous operations.
Even though ScanDisk provided computer users with a lot of capabilities, it was only meant to perform successfully with the FAT file systems that were in use at the time. The older utility was not compatible with the new file system, NTFS, which debuted with Windows XPTM. Although it wasn't similar to the prior MS-DOS utility, MicrosoftTM built a new program dubbed CHKDSK that could execute analogous functions on more current incarnations of WindowsTM. Many WindowsTM users who work with later versions of the operating system originally learned how to employ older versions that contained ScanDisk to fix difficulties with PCs. Due to familiarity with the previous program and habit, many technical professionals and ordinary users started referring to the newer CHKDSK system as ScanDisk.
ScanDisk may aid in maintaining the Windows filesystem and boost hard drive performance. Check out the ScanDisk instructions for your Windows version below.
To ensure that there is as minimal disk activity as possible during the disk scan, shut down any active apps, web browsers, etc., before beginning the disk scan.
If you are running Windows 95, 98, or Me, you should boot your computer into Safe Mode before opening ScanDisk.
First introduced in MS-DOS 6.2, the utility superseded the more easy CHKDSK. Compared to CHKDSK, it featured an easier-to-use interface, more configuration possibilities, and the potential to discover and, if practicable, correct physical disk errors. This extended and superseded the constrained capabilities given by the MS-DOS recovery utility. ScanDisk would also repair crosslinked files, unlike CHKDSK.
ScanDisk also featured a graphical user interface (GUI) beginning with Windows 95, while it was still possible to employ the text-based GUI in single-tasking (or "DOS") mode.
ScanDisk is unable to scan NTFS disk drives, so PCs running NT-based Windows versions (Windows 2000, Windows XP, etc.) cannot use it; a more modern version of CHKDSK is supplied in its alternative.
How to Run Scandisk in Windows
Windows 11:
Method -1: Utilize the error-checking software:
To do a disk scan using Windows File Explorer, follow the following guidelines.
- Step - 1: Launch the File Explorer window using the keyboard shortcut Windows key+E.
- Step 2: Select the option "This PC" located in the left navigation pane of the File Explorer window.
- Step 3: To initiate a scan on the desired disk, right-click on the drive located in the Devices and Drives section on the right side of the window, and then choose the Properties option. Click Show More Options to view an enlarged menu, then pick Properties from there If the Properties option is not shown in the context menu when right-clicking.
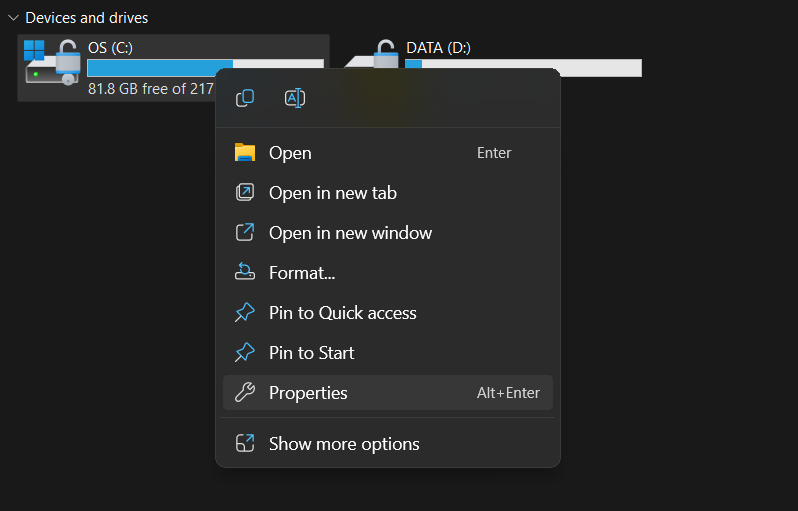
- Step 4: Access the Tools tab located inside the Properties window.

- Step 5: Press the Check button located in the Error Checking section.
- Step - 6: Click Scan Drive in the Error-checking window.
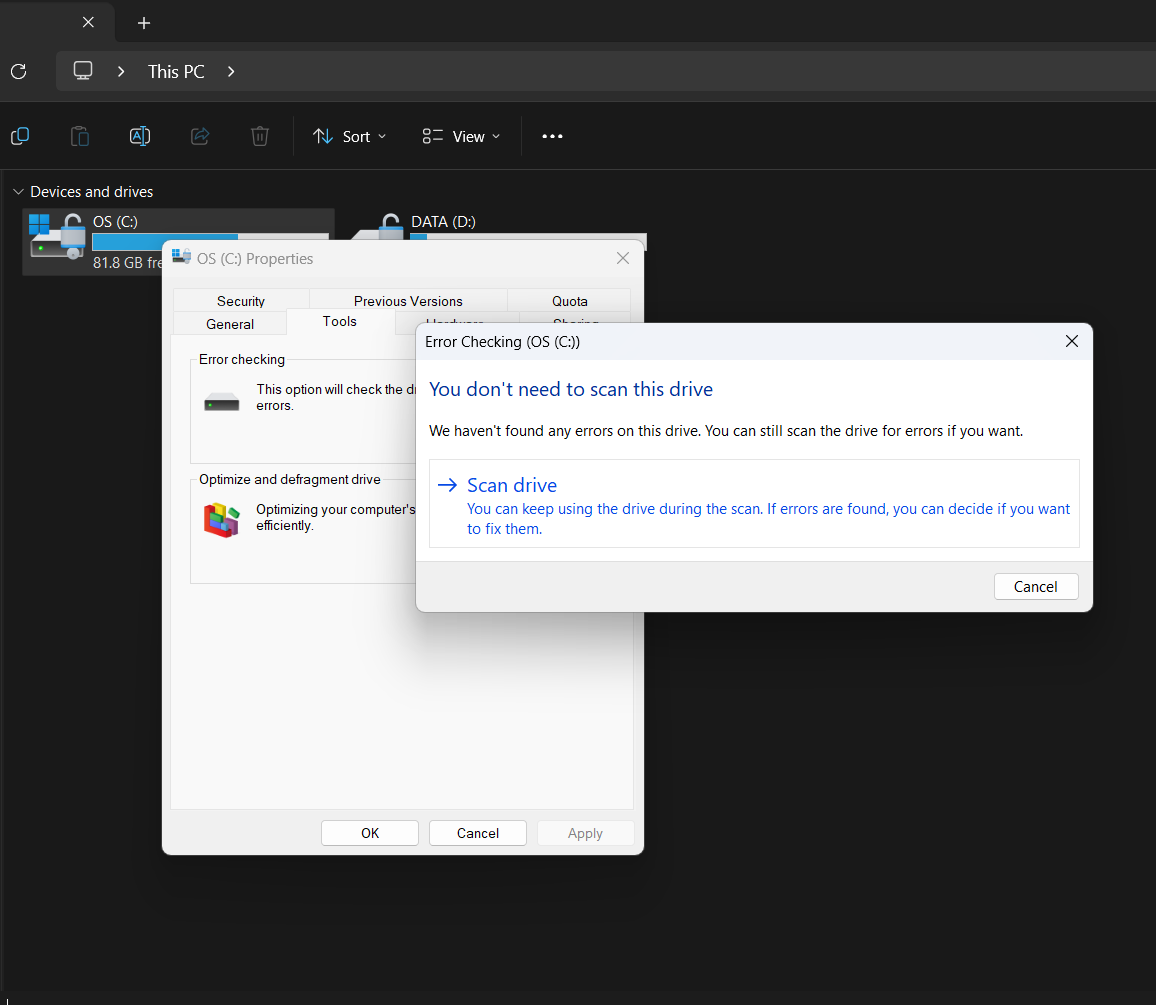
- Step – 7: Select the "Scan Disk" option in the Error-checking box of Windows 11.
The duration of the scan might vary significantly, ranging from many hours to as little as fifteen minutes, contingent upon the specifications of your system.
Method 2: SFC/SCANNOW Utilization
A command-line application named SFC (system file checker) scans your computer for corrupted resources and files. To use SFC to scan your drive, follow these steps.
- Step 1: To enter the Power User Tasks Menu, hit the Windows key + X.
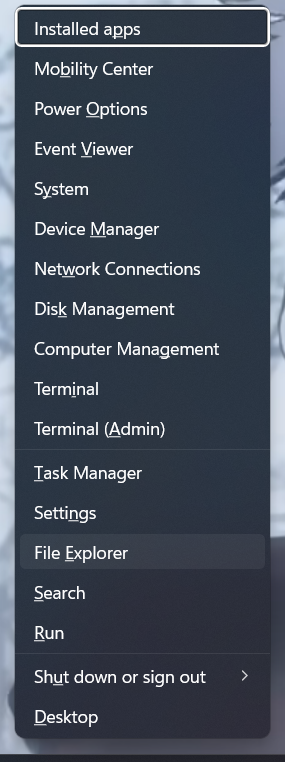
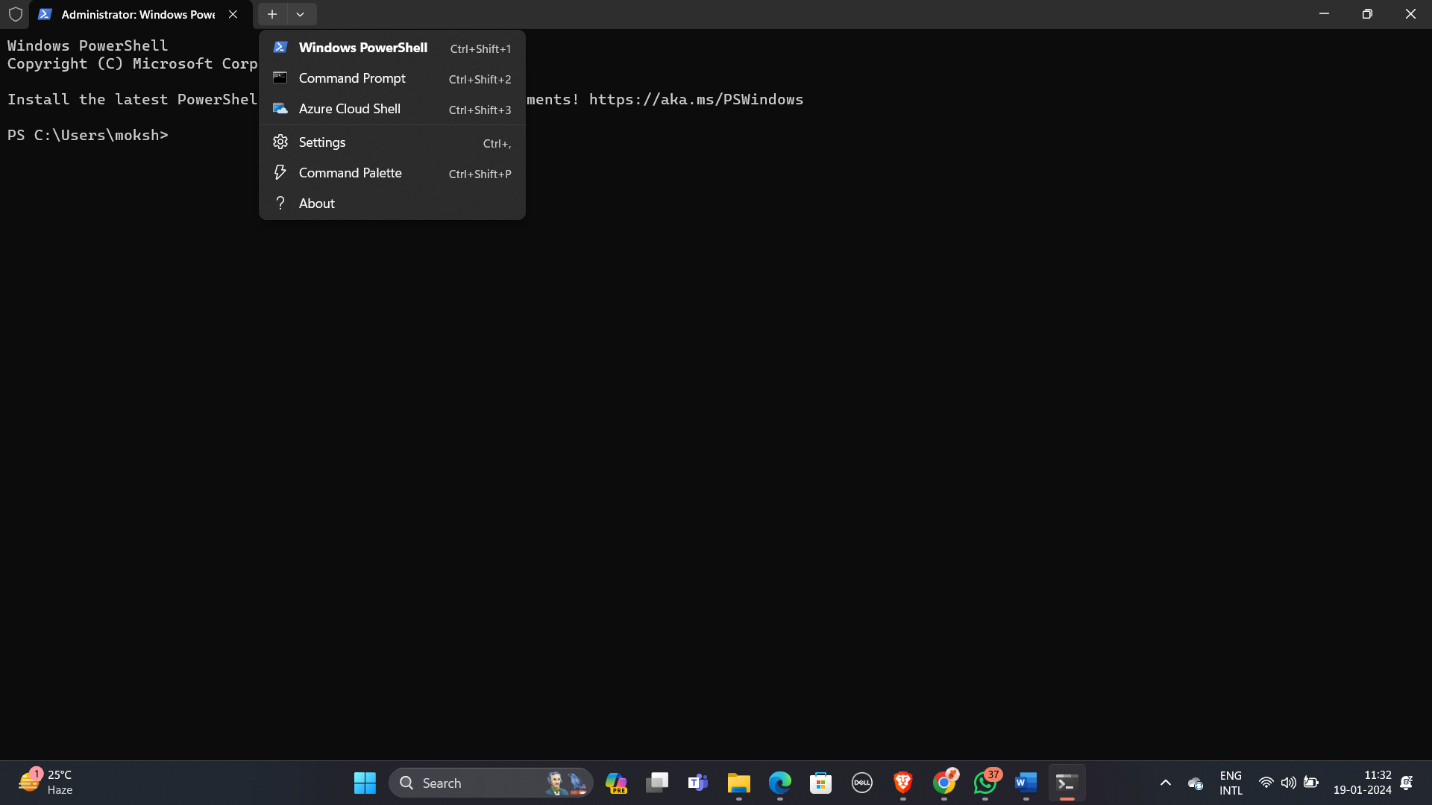
- Step 5: To transform the Windows Terminal from PowerShell to a command prompt, click Command Prompt from the drop-down menu.
- Step 6: Convert the PowerShell Windows 11 Windows Terminal to a Command Prompt
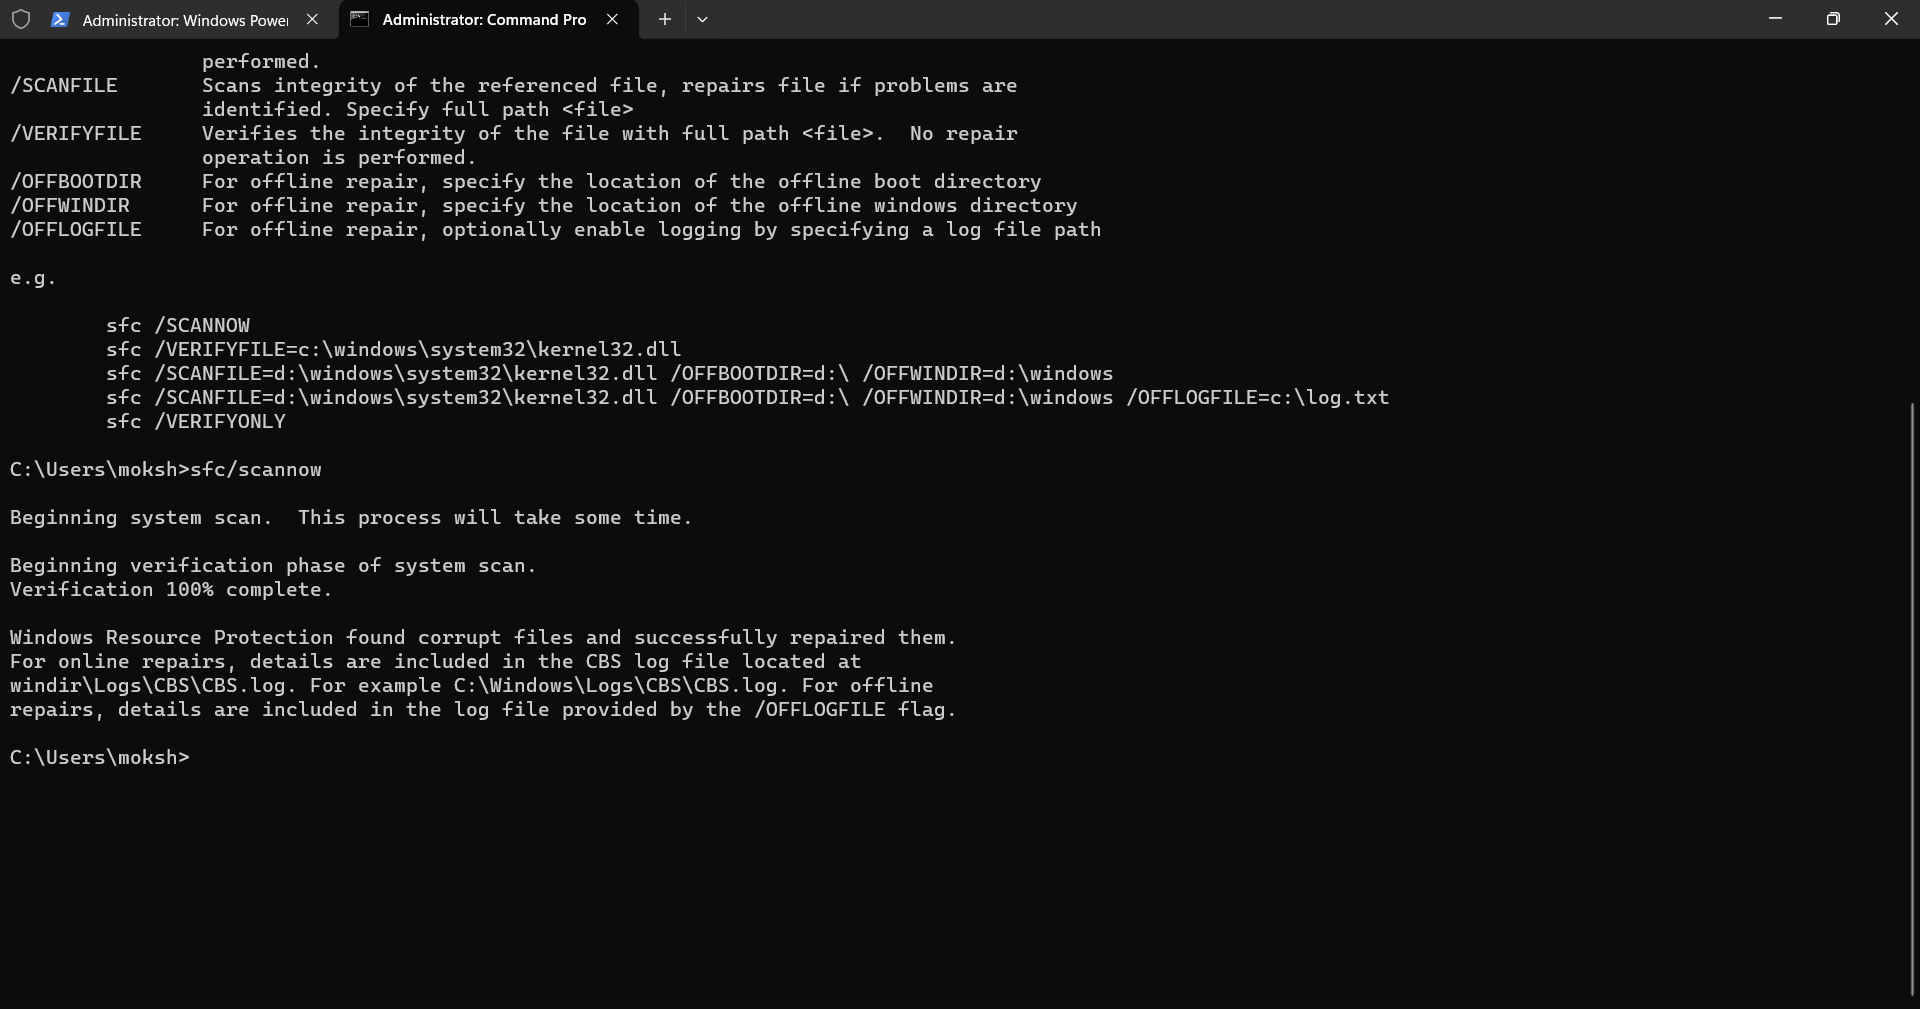
- Step 7: Enter "sfc /scannow" at the Command Prompt and click Enter.

Please wait until the scan says that it is done before closing the command prompt window. The scan may take several hours or as little as fifteen minutes, depending on your system.
Tip:
In the case that you receive the warning "Windows Resource Protection could not perform the requested operation," restart your computer in Safe Mode and continue the previously specified methods.
Method - 3: Using Command prompt (Administrator)
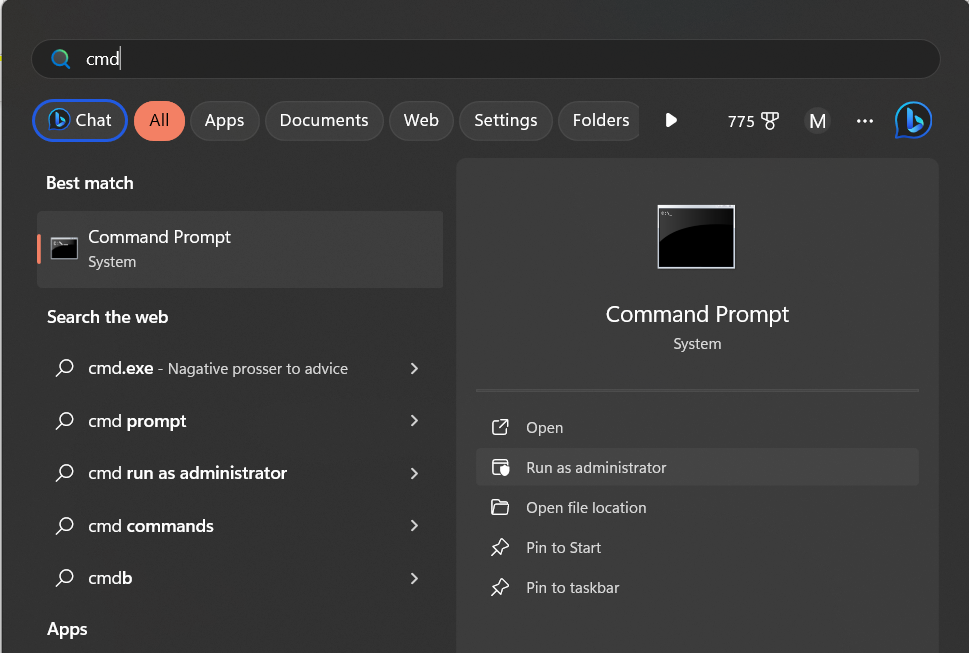
- Step 1: Search cmd in the Windows search bar located on your taskbar by clicking the Windows icon from your keyboard.
- Step 2: Click Run as administrator and confirm the popup box by clicking Yes.
- Step 3: Enter chkdsk in the cmd and click enter; if any drive defects are found, CHKDSK will notify you and try to fix them; otherwise, it won't try to fix them on its own.
Windows 10
Method -1: Utilize the error-checking software:
To do a disk scan using Windows File Explorer, follow the following guidelines.
- Step 1: Launch the File Explorer window using the keyboard shortcut Windows key+E.
- Step 2: Select the option "This PC" located in the left navigation pane of the File Explorer window.
- Step 3: To initiate a scan on the desired disk, right-click on the drive located in the Devices and Drives section on the right side of the window, and then choose the Properties option. Click Show More Options to view an enlarged menu, then pick Properties from there If the Properties option is not shown in the context menu when right-clicking.
- Step 4: Access the Tools tab located inside the Properties box.
- Step 5: Press the Check button located in the Error Checking section.
- Step 6: Click Scan Drive in the Error-checking window.
- Step 7: Select the "Scan Disk" option in the Error checking box of Windows 10.
Method 2: SFC/SCANNOW Utilization
A command-line application named SFC (System File Checker) scans your computer for corrupted resources and files. To use SFC to scan your drive, follow these steps.
- Step 1: To enter the Power User Tasks Menu, hit the Windows key + X.
- Step 2: Choose the Administrator Command Prompt.
- Step 3: Using the Power User Tasks menu in Windows 10, launch Command Prompt (Admin).
- Step 4: Click Yes when the User Account Control box displays.
- Step 5: Enter "sfc /scannow" at the Command Prompt and click Enter.
Please wait until the scan says that it is done before closing the command prompt window. The scan may take several hours or as little as fifteen minutes, depending on your system.
In the case that you receive the warning "Windows Resource Protection could not perform the requested operation," restart your computer in Safe Mode and continue the previously specified methods.
Windows 8
We recommend that you do the following steps to diagnose any issues with your hard disk.
- To launch a File Explorer window, use the keyboard shortcut Windows key+E.
- Select the option "This PC" located in the left navigation pane of the File Explorer window.
- To initiate a scan, right-click on the desired device located within the Devices and Drives part of the window and then choose the Properties option.
- Access the Tools tab inside the Properties box.
- Within the Error Checking area, proceed to hit the Check button.
- Choose the option "Scan Drive." Windows will alert you if the computer has to be rebooted in order to finish the scan.
Windows 2000, XP, Vista, and 7
Follow these steps to start the ScanDisk program.
- Click My Computer twice.
- Click once to highlight a local hard drive.
- Choose Properties with a right-click on the local drive that is highlighted.
- To inspect the drive for issues, pick the Tools tab and then click Inspect Now.
- To guarantee the ongoing execution of ScanDisk, the computer must restart.
Windows 98 and 95
Follow these instructions to run ScanDisk from Windows 95 and 98.
- Press the Start button.
- Select Run from the menu, type scandisk into the Run box, then click type.
- Choose the drive that you want to have inspected in the ScanDisk window.
- Select either the comprehensive or ordinary option. It would be best if you started with a Standard scan. Use the Thorough scan if the Standard scan fails to address any issues with ScanDisk.
- To get ScanDisk started, click start.
Should the machine be incorrectly shut down, ScanDisk is immediately launched by Windows 95 OSR2 and Windows 98. They do this action to see whether there were any problems with the hard disk after an incorrect computer shutdown.
Windows NT
ScanDisk is not included with Windows NT. Nonetheless, a number of independent businesses provide programs to check the integrity of your disk.
Windows 3.x and MS-DOS
Versions 6.2 and beyond have access to MS-DOS ScanDisk. The instructions below are used to run ScanDisk if you are using MS-DOS 6.2 or 6.22.
To get the MS-DOS prompt in Windows 3.x, click File and then Exit.
Run this at an MS-DOS prompt:
- CD \DOS
In the CD \DOS prompt, run:
- SCANDISK
Some computers may have changed the installation of Scandisk. If the Scandisk is not available in the DOS directory, then try the following:
- CD \WINDOWS
In the CD \WINDOWS prompt run:
- SCANDISK